Waves Multirack: Bass Guitar

Welcome back the inaugural Waves series here at Studio.Stage.Live.com. Hopefully last week you picked up a few tips and tricks to help your vocals if you have the ability to use waves. If you don’t have a waves rig to play around with hopefully you are getting an idea of what is possible with just a little outboard processing. Each plugin I use has a distinct purpose and many of those purposes all work together and make an incredibly positive change when combined. Like last week where we started this series talking about my philosophy of waves and my vocal chain, I want to remind you again that these settings at best make a decent starting point for you and your room. So many factors weigh in to good mixing like room tuning, gain staging, style choices, etc that there is no preset for everyone. The best thing you can do is load these plugins and play around. Learn how this stuff works and then adjust them to fit your situation and style. This week we will be discussing the bass guitar and how I process this to achieve a balanced and dynamic sound that helps to form the basis of my mix with the kick and snare (which we will talk about next week). You’ll remember that I also run a bass drive channel that I briefly talked about in part 3 of my From the Booth: Episode 3 short series.

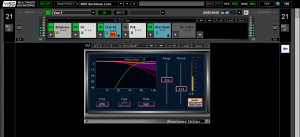
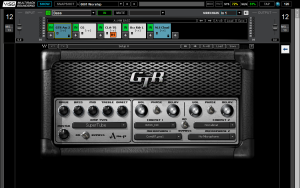
My bass guitar plugin chain is relatively short. Because of the bass drive channel that provides a lot of the brightness and presence of the bass guitar that gives me a bunch of character I can focus my main bass channel on being big and round. It becomes very easy to lay a firm foundation for my “pyramid of sound” if I’m not trying to accomplish two things with one channel. My chain starts with an amp modeler. On stage, the bass guitar is usually wired through a tuner (like this one) so the player can tune and mute their guitar as necessary then straight into our Neve DI. We have used other DIs in the past but have landed on this one as it seems to convey the clearest bass sound without distortion or weird filtering. Also, not having a bass amp on stage allows us to have incredible control over the low end of the mix but we still want to have the “good” harmonics as a part of the change so we pull up the GTR Amp 3 plugin set. Most weeks we will just have one amp in there but on the big weekends or for concerts I’ll pull up the second channel in there and simulate having to bass amps. Believe it or not, even on a mono channel you can really hear a difference (we do like to save some stuff for the big weekends as the difference is still not huge). This plugin is also where I will correct any weird pickup issues or balance issues that I hear as the bass enters the system. Those first five knobs (drive, bass, mid, treble, direct) can really shape your sound and turn an average guitar into a great bass guitar. The settings in my preset are those I chose for our bass player who plays the most so it’s a great place to start and help steer a good average for this instrument which brings great consistency to our mixes.
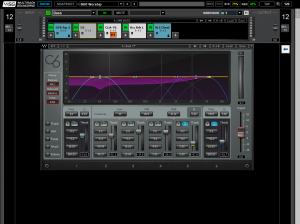
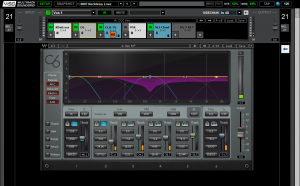
Next is the C6. I have it setup like a general compressor with the crossovers set to differentiate where the sounds are going. The orange band covers what goes to our sub send, the green band is the meat of the bass guitar, the purple band covers the upper harmonics and presence of the guitar and the yellow band is bypassed as it is unneeded for this application. We also don’t use the blue sweep usually but sometimes bring it down to manage something inside the purple band. The best part of this setup is the light blue sweeping compressor. I use it to directly compress the resonant frequency or a frequency that is just jumping up out of the bass guitar. By doing this you can really win over some folks because you will end up with a much more uniform signal across the spectrum. Setting this plugin than becomes as easy as grabbing the global threshold and dialing that in, than moving the sweep around and finding the frequency that pops out when notes like open E are played that really dig into a room.

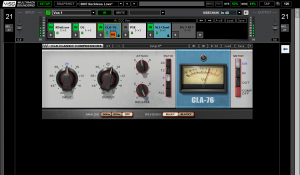
One of my favorite compressors to use in general within waves is next, the CLA-76. I like how the blacky reacts and sounds a little better than the blue side and start with the preset for the bluey, “Start me up.” If I have trouble I’ll just dial up the Bass preset and go from there. Input and output levels are based on how you manage it in the console but I’ll use the attack about halfway and the release pretty quick. I want to squash it a bit but make sure the attack isn’t attenuated that much. Faster release times also allow for a more dynamic sound which is why I love this compressor so much. It always sounds transparent because it reacts and releases fast enough that it’s difficult to hear the compressor working if you have it setup correctly. My ratio usually ends up and an 8 or 12 but can waffle around depending on the player.
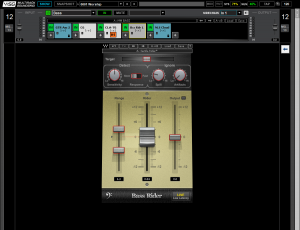
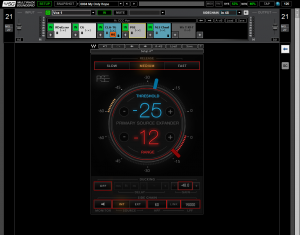
This next plugin is likely my ace in the hole so to speak. It’s the Bass Rider Live plugin. While it’s easy to use this like a compressor the key is to remember to give it a range to work with and make sure some of it is above zero. I know this is a fear for a lot of folks that a computer could be turning something up but I think I’ve found a compromise. In the early days of using this plugin I would run this thing at +3 to -3. The fader returned to unity when nothing was happening and this was pretty great. But when I realized I’d like to have this plugin help highlight the mid and upper range and attenuate the bottom (creating a more even sound why still being dynamic) I switched to my current settings which are +1.5 to -4.5 with the fader still resting at 0 db by default (just grab the tiny black arrow and move it where you want the plugin to start when the signal is strong enough). I start with the gentle rider preset which keeps this pretty slow reacting so it moves like a human would react instead of snap reactions. This causes the plugin to react once a note or so making a small adjustment for each note played. Waves as well claims that the algorithms used in the plugin were specifically designed to be different than a compressor so it moves more like a person moving a fader. Before I had this plugin I would find myself riding the bass more and more instead of being able to ride more melodic sources like the guitars or keys so it has really allowed me to have greater control and dynamics within my mix that I hadn’t had previously.
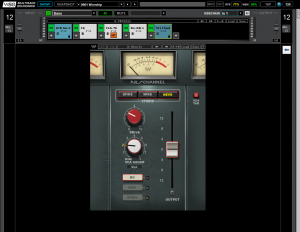
Lastly, as always, is the NLS plugin. It is set to it’s standard settings with the default model being the Nevo setting. However, much like you’d select a mic capsule for vocals, I use this plugin in a way to select the right model for instruments. If I’m having trouble with an instrument like the bass guitar, I’ll pull up this plugin and make sure the model I’m on suits the scenario the best. All 3 are good choices for everything so it’s really up to you as the audio guy, to pick the right one for your mix, whether it’s live or in the studio, that is a great universal principle to abide by while you mix, especially when using plugins as extensively as we are discussing.

That’s it for this week. Next week I will be going through my signal chains for the kick and snare to continue to build the mix. As always if you have any questions please feel free to email me at daniel@studiostagelive.com or comment below and I’ll get back to you as soon as possible. If you like what you are reading and want to make sure to get notified when new content is published, please subscribe at this link, and you will receive an email on mondays or whenever new content is published. See you all on the flipside!
Waves Multirack: Philosophy and Vocals

Well, it’s finally that time. I have alluded to this series over and over again and finally found the extra time needed to dig into my waves setup. Each week we will dig into the my default plugin chain for a given set of inputs. Please don’t hesitate to leave a comment or email me if you have any questions.

I think it’s important to start this series off with a bit of a disclaimer. Mixing audio is incredibly subjective. Everything I do is what works best for my room. At best the presets I use would be a good place to start anywhere else. Just like EQ or compression, FX processing is different for every room. What I do won’t necessarily work anywhere else. The keys I look for when reading articles like this is looking for new uses for the tools I already have or things that the author is doing that I need to try. Perhaps someone was working to solve a similar problem and is using a plugin or an EQ to approach the issue from a different angle. I hope that you can read through what I do, see how I solve different problems, and walk away with a new idea how to solve similar problems in your space. As always, I’m happy to answer any questions you have in the comments below or at my email, daniel@studiostagelive.com.

Just to give an overview of how audio is processed on a macro scale at CCC where I work, we mix on an SSL L500.  There are several optical and coaxial madi I/O ports that we use to get in and out of our waves soundgrid with. Right now, we have 64 96k channels inserted across the entire band input list. Every channel, ableton input, group bus, etc is inserted to a channel in waves. This includes our master groups. We do not currently use waves for our main verbs for two reasons: verbs are dsp hogs but more importantly, the verbs built into the L500 are amazing as all SSL verbs always seem to be. This leaves waves to be basically a dynamic processor which works great. All 64 channels, whether they are stereo or mono, have the NLS plugin inserted which does some pretty amazing stuff (I’ll get into this more when I discuss this particular plugin later). Lastly, waves is inserted, in most cases, directly before the fader.

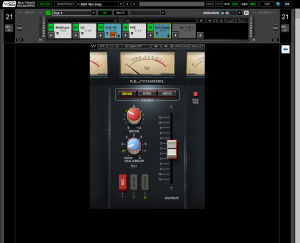
Well this week is all about the vocals so let’s great right down to it. At CCC the vocal inputs are the most important part of our mix, they are always as intelligible as possible. After around 3 years I’ve finally landed on a vocal chain that I really love for the live environment that I haven’t really messed with a lot (I’ve played around in studio with this and short of needing to add an EQ it works pretty well there as well). Because waves presets can move between work environments, when I sit down at our audio workstation, I’ll often start with this chain and see what happens. I’ve included pictures of my presets for our worship leader and while these get dialed in each week for each vocalist, this is just where I usually start the process. The very first plugin I use is a de-esser, Renaissance DeEsser. This is a very easy plugin to use and one of the most transparent de-essers I’ve used. You have the option for a band pass de-esser or a low-pass de-esser. As with all de-essers, you need to be careful not to turn this down to low because you will sacrifice presence and in some cases intelligibility. A good test is to watch your compressors for this channel and make sure they aren’t working in tandem, if they are this might mean you need to turn the frequency of the de-esser up a bit so it only triggers when needed and not during regular speech. My worship leader can have a harsh ess so sometimes I lower the frequency down a bit but it’s usually never below 5k and usually lands between 6-7k (this is where Smaart comes in handy because I can bypass this plugin, see the ess on the meters and really be able to dial this in a lot faster). I then just adjust the threshold to taste being careful not to overdo it and create a lisp. That reason is also why I often stick with the de-esser working low-pass mode rather than band pass. It just sounds better in our environment.

Next I have the perennial Waves C6. I have traded the F6 in here a few times but have always come back to the C6. Others have said this and I agree, the C6 seems to respond a bit faster for whatever reason. I also like the UI when it comes to vocals as well. I use EQ with vocals to fix global issues and use the C6 to correct dynamic issues that occur when a vocalist really sings out.  Then, when he really sings out, I use the C6 to really shape his amplified voice to make the sure clarity and crispness remains. I try to keep his EQ light and only end up pulling some low mids. I’ve found that with the seV7 capsule I need very little EQ and this allows his voice to sound incredibly natural despite how much processing is actually happening. In the past I had some more dramatic cuts at the EQ level brightening it up and such but had a few issues when he is talking so I swapped to using the C6 instead which allowed for a more normal EQ curve and dynamic compressor that simply doesn’t trigger when he is just talking. I don’t use the orange band because I low pass all my vocals up to about 200 anyway so there isn’t any point in processing that range and I just didn’t need the other sweeping band. Generally I’m setting thresholds so the compressor is doing something measurable when singing out and not doing a whole lot when he is just singing normally. I love setting this with the adjustment to the far left where I can grab all the thresholds together so I can keep the curve that I set with the individual thresholds. A lot of times with female vocalists I’ll bypass that high yellow band to keep the presence in their voice that they naturally have when singing.

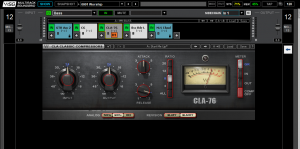
Third in the chain I insert a CLA-76 compressor. This really helps me lock in the whole voice together. Notice how I went from the C6 to the CLA-76. I don’t want to compress the voice as a whole before I dynamically compress different parts of it. The CLA-76 itself is based on a modified 1176 and is one of the fastest compressors out there. It also is a little different to setup as the threshold is not adjustable, you are setting input and output gains and setting the ratio and attack/release times. I turn the input gain up until I see the desired amount of compression happening, set attack/release based on role (for the worship leader I slow the down the attack and set the shortest release time, for BGV I speed up the attack and slow the release down a bit) so that even in my compression settings, the worship leader will have priority. I often have it on a ratio of 8 or 12 depending on circumstances and turn up the output gain to at least match input levels if not a bit higher. That output nob is basically post-compression gain. Also, it’s important to note that with the attack and release knobs, faster is to the right, slower is to the left. I’ve used the vocal rider here in the past but when I tried out the CLA-76, I’ve basically never gone back. If I need it I’ll put a vocal rider after this plugin but that is a pretty rare circumstance anymore. The biggest thing to remember when layering compressors is that ratios are additive. If you have 3 or 4 compressors on a voice you might end up with 15+:1 compression happening could all but eliminate dynamic range. Just something to keep in mind as you choose your plugin chains.

Before the NLS plugin sits the Primary Source Expander. This isn’t just an expanding gate, it works better than many other gates with expanders work and I really believe Waves when they say they developed this plugin as “the” gate to use with melodic sources such as vocals. They claim to have developed with voices in mind and it seems to have really paid off. I think the ballistics in the meters don’t truly show what’s happening, you really need to set this with your ears live. Occasionally you’ll have to make a change mid-show as well. Because this is post compression the threshold can be set pretty high with an aggressive range. I’ll set the threshold during soundcheck and often never have to touch it and will experiment with different speed settings but usually land on medium 95% of the time as well. If I change it I’ll slow it down for BGVs or have to speed it up for a song for the lead voice. When I first started using it I was only at a -6 range or so with my lead vocal and a few less for BGVs but as I’ve learned to use it and start automating Waves so I can turn this plugin off when not singing, I’ve gotten real comfortable down around -12. Because the plugin is so smooth you get all the benefits of a strong gate to lessen drum bleed but have it open up every single time. PSE at this point is basically on by default for all of our events for vocals in general. Having it in line has really tightened up the band sounds and been one of the factors in allowing me to actually get to have cymbal mics up in the mix a bit to hear them better. In addition, having it after compression easy takes care of the higher noise floor from any compressors you’ve added up to this point. 

Then comes the NLS plugin. As I said earlier, this stands for non-linear summer. This plugin simulates the harmonics added by the electronics of the faders on every channel of three famous consoles. The first, Spike (as it’s called in the plugin), is modelled from the SSL console used for bands like Muse and Maroon 5. The second, Mike (a console owned by Mike Hedges), was used for some big name singles like Pink Floyd’s “The Dark Side of the Moon.” The third, Nevo (a modified british vintage console owned by Yoad Nevo) which was used for Sugababe, Air, and many more. They all have their own unique characteristics. We start them all on the Nevo setting with each on their own channel model because this seems like the brightest model of the three which is the best starting point for us of the three available. I have set a global drive level to the same numeric value so the plugins are all having about the same impact and sometimes turn it up on a few inputs to really push the harmonics. Because I have my bus groups in waves I can use the dca settings as well so those are setup as well. This adds the modeled harmonics of the DCA pots on the consoles as well which is a really unique feature. While the differences in the models are minor, if you take the time to try all three A/B/C style, one will pop out as sounding the best. So most weeks, I’ll go through the guitars and vocals and make sure that Nevo model sounds the best still and make changes as necessary. Having this plugin in the chain has really given me the ability to mix at the same warmth of sound our PA provides between 95-100 dBa down at levels in the low 90s where we usually try and mix.

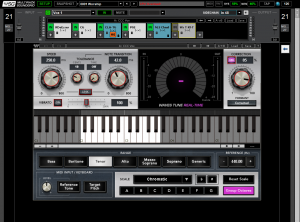
Last in the chain is the Waves Tune Real-Time. This is an auto-tune plugin I use to really lock in good vocals to each other.  I don’t use this all the time because it can make vocals who struggle with pitch worse but if you have a group of really good singers, you can enable this and really lock them in pitch-wise. We use it very gently in a live setting. For example, one of our vocalists hits the note but sometimes has trouble holding that pitch which I can fix with this plugin. We also have it react relatively slowly with a correction of only 85% so this plugin is not going nuts. Sometimes I’ll set a key if the chromatic setting isn’t finding itself but most of the time it works great. I’m not using this as an effect so the key here is keeping it incredibly transparent and slow moving.

***UPDATE*** After some experimenting with having this at the end, I now have this at the beginning of the chain.

Well that is week one. I hope you got some new ideas or confirmed what you are already doing. Next week we will going through the default chains for guitars. While they default chains are a bit different for each they are also quite similar. As always if you have any questions, feel free to leave a comment below or email me at daniel@studiostagelive.com and I’ll respond as quick as I can. See you next week!

Tips and Tricks: Utilizing Cloud Services

So far in this Tips and Tricks series we have discussed getting the perfect keyboard sounds, using drum triggers to get the perfect gate settings, properly setting up wireless guitars or extending drum cables, and last week we talked about getting the most out of your tracks channels. This week we are going to discuss using online services to expand and enhance your support and documentation. We all have heard of these website and services but throughout my career and conversations it seems like so few of us utilize them very well. I’m sure there are many more options but these are the ones that I use at this moment.

The first online resource that many of us use but more should probably be using is Planning Center Online. PCO is also the only one of these services that is a paid service. I will be the first to say that it is worth whatever you pay for it let me be clear. Every church in America, including my own, could probably improve how we schedule volunteers. PCO is the best tool for this. Volunteers can put in blockout dates (this is key on my team) so that when I go and schedule I can know right then and there if they are available. You can also have them fill in contact information with at least an email so they can schedule through email and not even have to log into the app or the website. At a glance I can look at the schedules for the next 90 days (yes that’s how far out I schedule my sound team) and start the game of musical chairs so that by the time we get down to 30 days out, I’ve got a team locked and loaded and tuned for the obstacles that are coming down the pipe. This also allows me to schedule with the lighting and video teams because many of our volunteers serve on more than one team so I can be sure not to always be using everyone only on audio, we can plan the big weekends so that every team is staffed to meet the challenge. If you’ve never used PCO you can reach out and get a demo which I would highly encourage you to do. You’ll be hooked, I promise!

The next resource is free, it’s soundcloud.com. For a long time we were looking for ways we could improve the potential for our worship teams to practice between our rehearsals and the weekend. The biggest hurdle was just that we don’t have recordings of how we sing each song each weekend. There are some up there that can be used but even then, sometimes we sing songs differently or change the number of a given element so it’s difficult to practice too. Since we were already multi-tracking our rehearsals for playback/prep and archiving, we decided to set it up to record our broadcast mix (could just use your Main Mix as well) and then upload that to soundcloud. The free service has only one limit and that is just the number of minutes of audio you have up at one time there is plenty of room for the entire run-though to be recorded and uploaded. Than when rehearsal is over, we normalize and upload to same soundcloud account every week named for our church. Beyond that, then we go into PCO and email the entire team with a hyperlink to the page where the recording can be heard and practiced with. Than, our worship bands have recording, with transitions, with exactly how we are going to sing and play the songs each week. It’s also good for guitars and vocals to hear themselves and be able to make changes before the weekend comes.

The last resource that I don’t see enough people use is google drive (as a part of gmail). Not only are gmail accounts free but they also come with 15 gb of storage. If you need more it’s incredibly reasonably priced. But for us, 15 gb is more than enough.  We have a few gmail accounts setup for the different tech areas that are in place. With Google Drive sync setup we can automatically backup critical templates and show files with ease so that no matter what happens to our production computers, everything is backed up. The other great thing about google drive is the live documents. We use this to keep a log of passwords for our various services and software downloads, patch lists for our larger venues, and even IP address tables for our tech subnets so we can keep track of what is where on our network. Because they are live at all times, the instant I make a change, it’s instantly propagated to all other windows. Because documents can be easily shared amongst gmail accounts, we shared all of those documents to the entire team so that we can all have access to all the documentation that our team needs on a day to day basis. Personally I use google sheets to generate organized quotes with purchase links for each project I manage and than archive them when completed so when a similar project comes along (perhaps the same thing but for a different regional campus) I already have the majority of the work completed. I just have to bring it up, be sure prices and links are up to date and I’m done. I find this incredibly helpful when I’m building our production PCs so I can be sure they all have compatible parts (if you want to read more about what I do with my production PCs check out this link!).

Well that about wraps it up for this post and series. I hope you have learned something. There are always things that as technicians we can do better so even if you haven’t been able to identify with these, find the area in your work that you can improve upon, figure out what you can do, and just do it. Commit to improving yourself professionally so that as you work, artists want to have you around. If you do have any questions about what we did talk about please don’t hesitate to use the contact form below or email us at engineers@studiostagelive.com.