How To: Making a Broadcast Mix – Part 6

Hey there! We are on week 6 of our series talking about making a broadcast mix. Over the last 5 weeks I’ve been covering my process to develop consistent mixes including recording, file ingest, and many more (here are the links to the previous weeks: Week 1 – Recording, Week 2 – Ingest, Week 3 – Processing, Week 4 – Mixing, Week 5 – Mastering). This week is about my review process. In my opinion, this is likely one of the most important steps you can do to make sure that your mix is received well. Any audio engineer, at any level, still must make their customer happy. For my job, the customer is the worship pastor, technical director, and teaching pastor. For a studio engineer, that customer is going to be the recording artist. If anyone knows this already it’s the monitor engineers among us. They are continually having to make adjustments to suit the musicians need despite what they think might be better. 

So here’s how I do it. As soon as I have some semblance of a mix that I’ve been able to spend time on I try to export it as it stands knowing there is probably more to do. This not only keeps the musicians involved (in the studio they would often be right with you as you mix so this emulates that experience) but allows for feedback regarding tonal blend and general feedback. Maybe they like a thicker kick, or a snappier snare, or maybe just less sibilant vocals. Doing this step early allows me to make any major course corrections early so that I don’t spend a lot of time mixing and tweaking and then end up redoing a lot of work. If I have enough time I might even send daily updates that show what I’ve been doing that day. The only thing I’ve found in this time is that if you decide to do daily or more than one export in order to facilitate conversation, make sure you share your delivery deadlines for the mix so the artists are motivated to provide feedback in a timely manner. Secondly, limit who you ask for feedback to only the people whose opinion you need to pay attention to. Everyone has an opinion but unfortunately in this business, personal preference are a huge pat of things. So try to only ask for feedback from people who you’ll actually need to listen to so you don’t end up making changes that don’t really matter.

One of the hardest things about asking for feedback is a good delivery method that makes it easy for people to listen in. There are several options out there but I prefer to just use Soundcloud. There is a free tier that only limits you to 90 minutes of playtime but allows for as many tracks as can fit in that time frame. The great thing is that people can leave comments in time within the browser version but also it shows waveform so it’s easy to track where the songs are. It’s really easy to upload, send the link, and just sit back and wait. This also works well for trying the mix in your car or with a Bluetooth speaker because you can pull your mix up on your phone.

Last thing I wanted to talk about this week is something that is a bit harder to do. Don’t take feedback on your mix personally. It’s really easy to get bummed out and feel like you are just awful but just realize that it’s impossible for you to hear your mix on every type of playback device. I can’t tell you how many times I’ve thought things sounded great on my studio speakers and on my crappy computer speakers but it just doesn’t seem to work well from my phone or TV. That’s OK. It’s really hard to do really well for any medium. But what asking for feedback for is good at is employing a small group of people to listen to the mix in what is likely a variety of different speakers and whatnot. I weigh each suggestion I get against what I hear from my speakers and make sure that it’s an improvement because if it is, you are effectively improving both listening scenarios. With my coworkers help, I can effectively raise up the lowest common denominator which will help my stream sound better in general. It’s a win-win!

This was a quick week but hopefully there were a few nuggets that you can take and translate to your process. That is it process wise for the series but I have at least one week, maybe two, of tips and tricks that I’ve learned along the way that I will start next week as an abbreviated tips and tricks series. If you want to be emailed when that post goes live next week, subscribe at this link, and you won’t miss a beat! If you have any questions or concerns please don’t hesitate to reach out here or on Facebook in the respective comments sections. Lastly, I’m aware of some issues within the site that I have been working to mitigate (I was recently hacked). There is a redirect code I’ve been trying to track down. Don’t worry, just going to the link won’t cause issues but any clicks on their page might be problematic. Just reload the page and you should get to the right place. My hope is to be able to take care of this without too much damage but if I’m unable to I will be taking the site down at the conclusion of the tips and tricks series starting next week and rebuilding, which would mean a short shut down of service for a week or two. I’ll keep you all up to date as much as possible. Thanks again for stopping by!

How To: Making a Broadcast Mix – Part 5

It’s week 5 here at Studio.Stage.Live and we are in the middle of our series on making broadcast mixes. These posts are far from perfect and not super detailed for a reason. As I’ve hopefully made clear by now, this series aims to help you lay the framework for your broadcast mixing and give you some concrete steps to work through with the hopes of helping you develop a consistent process that you can follow each time you mix and really fall into a groove of quality products. So far we’ve talked about my processes for recording, ingest, dynamics processing and mixing (Week 1 – Recording, Week 2 – Ingest, Week 3 – Processing, Week 4 – Mixing). This week it’s all about my major busses and master buss. Let’s get right to it!

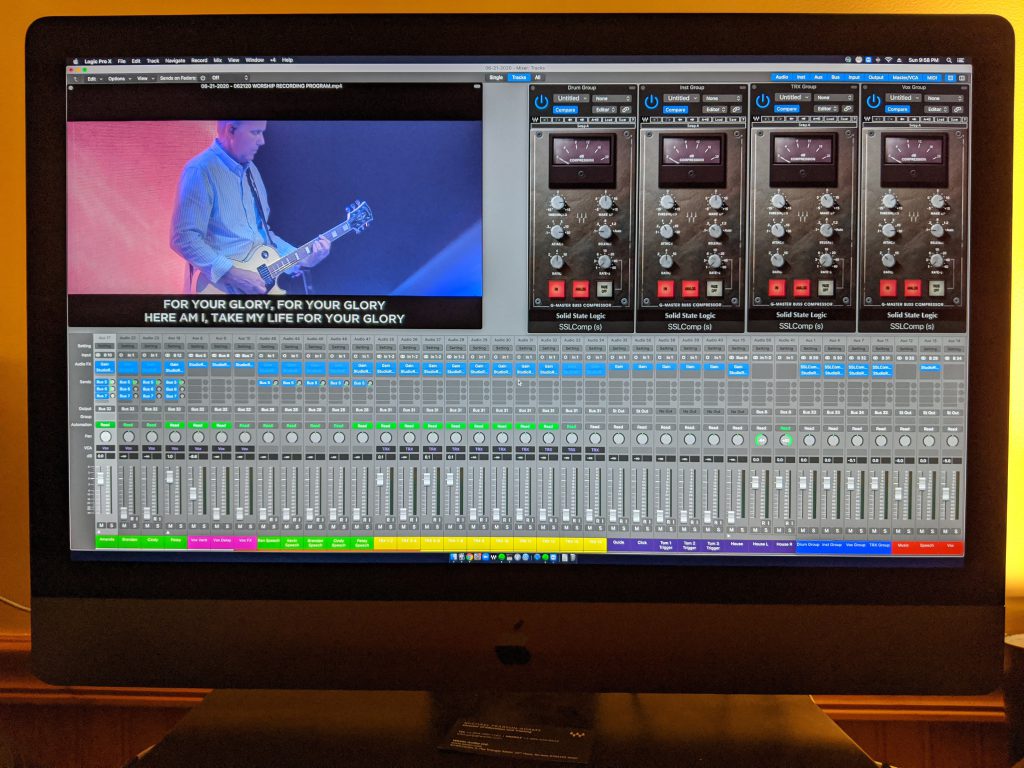
After I’ve developed and spent some time refining it, I’ll literally get comfortable and sit back and just listen to things as they stand. I also listen to speaking parts that are mixed in as I can to make sure things feel right level wise. However, the biggest thing I do is bring in the broadcast rough edit (just the video feed from the screens before our video director has gone through and fine tuned). I do this so that I can be sure that everything I see I can hear. More than a few times I’ve been watching/listening through and caught something that I need to fix. This also provides an important chance for me to listen the entire way through a song, which if things go well, may not have happened until now for every song (I’ll usually set dynamics with the loudest and softest songs only for speed knowing fine tuning will happen later). Also, taking a break, if there is time, can be helpful here as well. Remember ear fatigue is a thing so if you’re in a time crunch, just try and take 15 minutes an hour and rest your ears. While your watching, try to have your buss compressors pulled up as well (the SSL buss compressor doing light work is really all I run on group busses). You should be able to hear plugins over-working but sometimes they get missed and as your ears get tired you may not be able to pick that out so I’ll pull up at least my 4 major buss compressors up and make sure they are behaving during the play-through. I’ll show you a picture of my screen layout for my mastering passes so you can get an idea of what I’m talking about. 

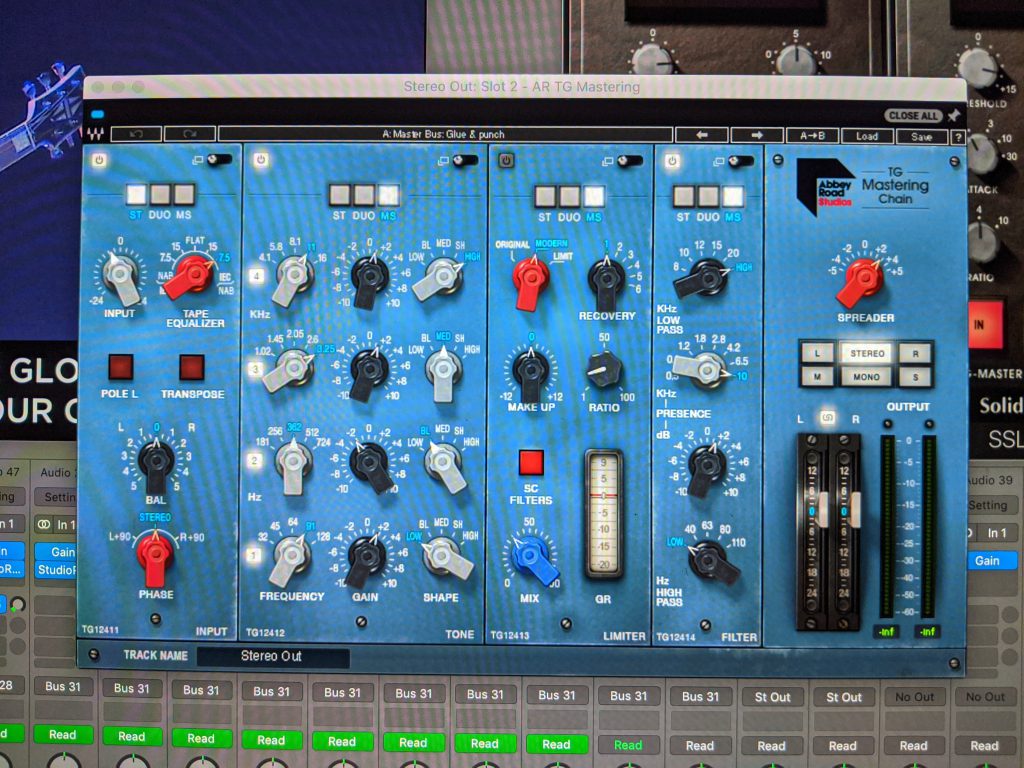
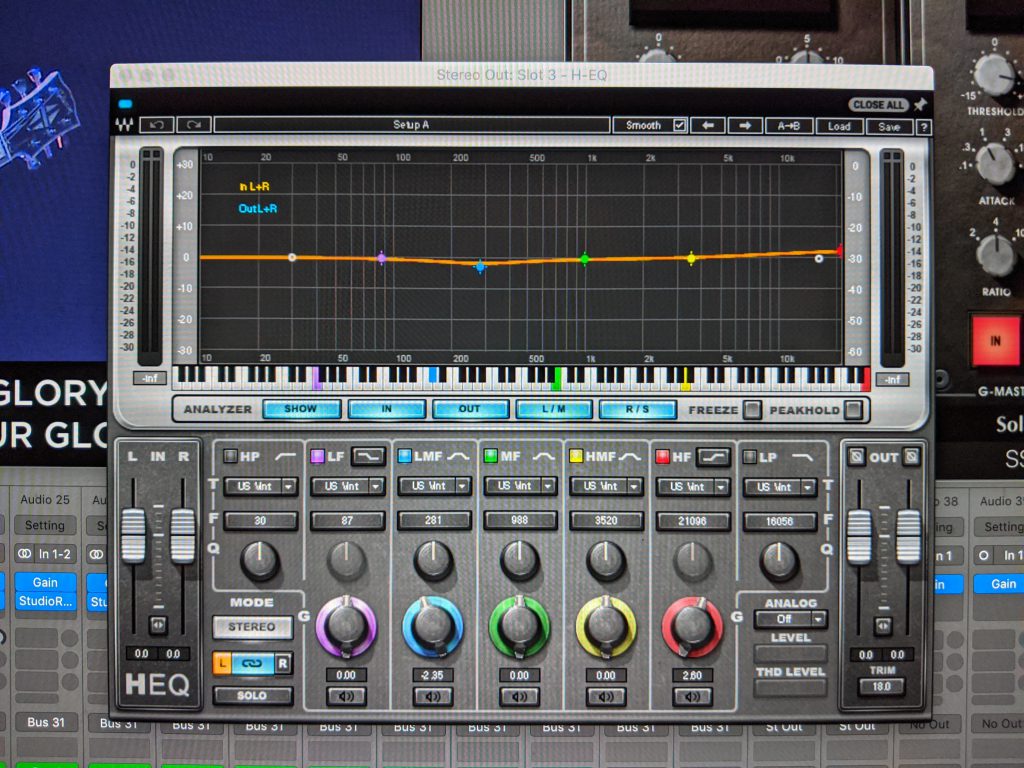
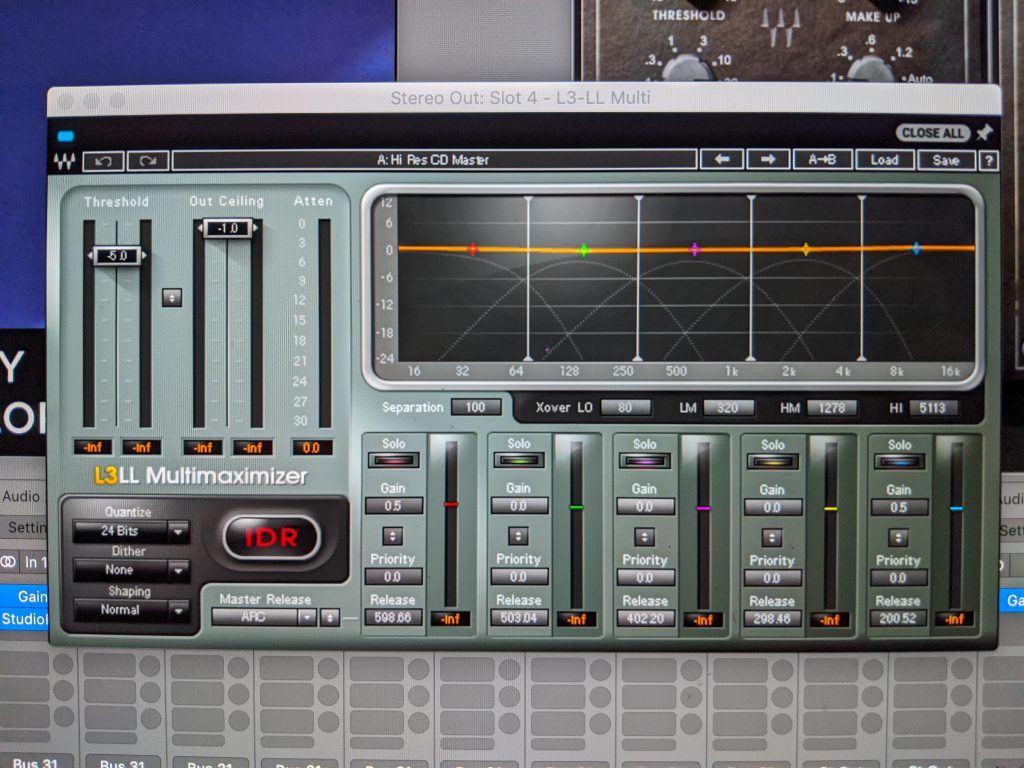
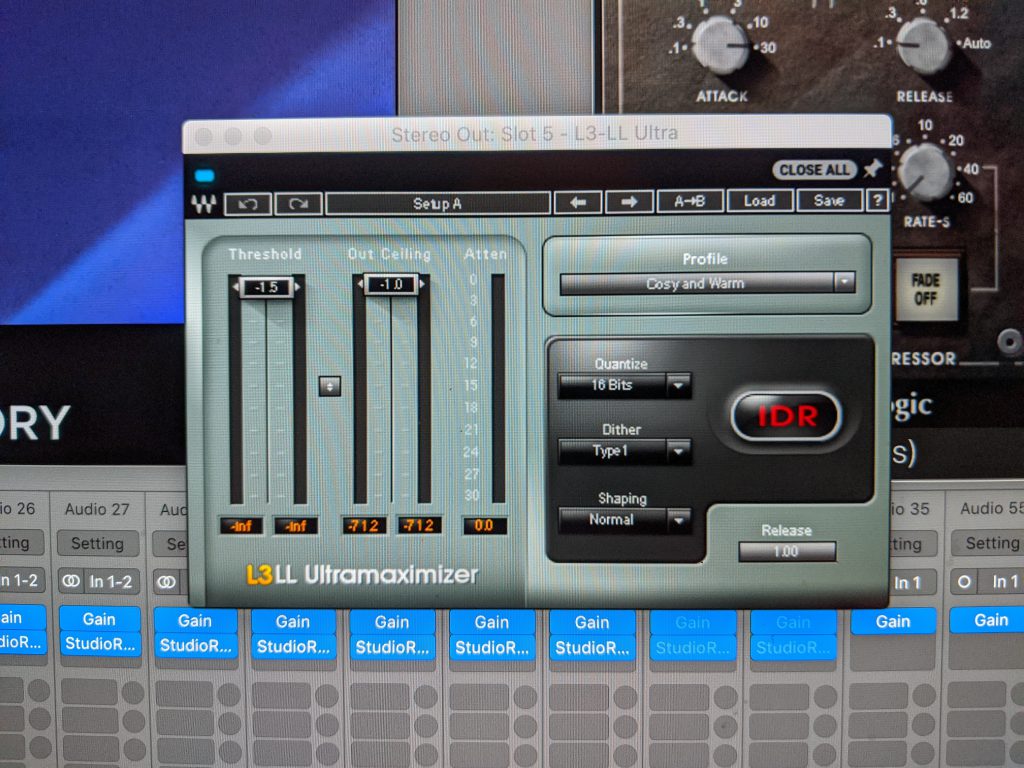
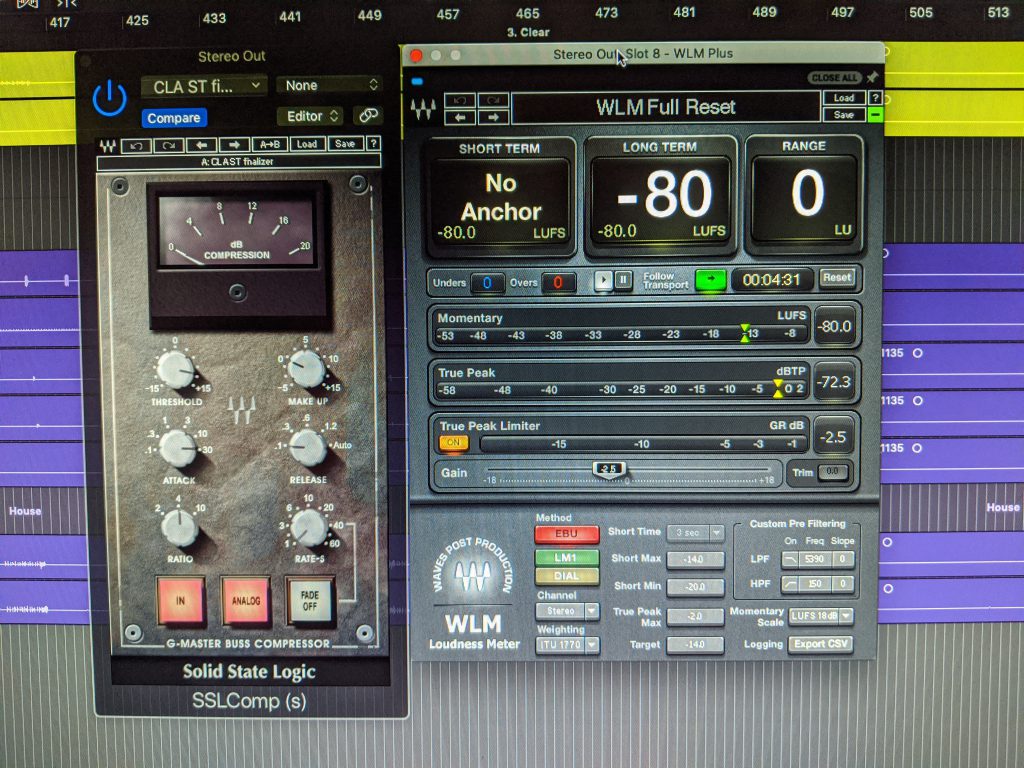
This has been the most frequently asked question I get asked…what’s on your master buss? Well, I have news for you, it’s not as cool as you might think. I try to really do my best to keep things stupidly simple and have as few duplicate tasks as possible. Right now the chain looks like this: SSL Buss Compressor, Abbey Road Mastering Chain, H-EQ, L3 Multimaximizer, and the L3 Ultramaximizer. Each has a specific purpose and when I first started things were quite different but the longer I’ve been at this, the more I’ve learned to really hone in on what these plugins do the best and really refine those. We use the SSL Buss compressor to help glue everything together (it’s really not working too hard here, no more than 3db at any given time with a slow release, pictured with the WLM Meter below). The Abbey Road plugin is doing some tape saturation, mid-side EQ, filtering, and of course the spreader is on! Note, we aren’t doing any compression with this plugin, in my experience it got a bit heavy handed which is why we brought in the SSL compressor. The H-EQ is cutting some mids out and adding some air to the mix post compression which has had a significant impact (if you don’t have something like this on your chain, just try it, you’ll thank me later). I know you’ll see the curve I use in mine but keep in mind, my setup should be a template for you, always take the time to dial it in on your own with your own content. Also, less can be more when it comes to the master buss. My curve is the result of previous EQ/dynamics choices so yours should look different. Lastly I have the successive L3s. In the past I’ve always loved putting a multiband compressor in front of a single band compressor to really refine things. I tried that here and that has really helped. The multiband allows me to do my limiting with some dynamic shape and the final L3 does the heavier limiting and also does my quantizing down to 16 bit (audio standard our video team is using, if I have to break it down to 16 bit, I’d rather do it with my specialized plugin then allow premiere to bork it all up!). 

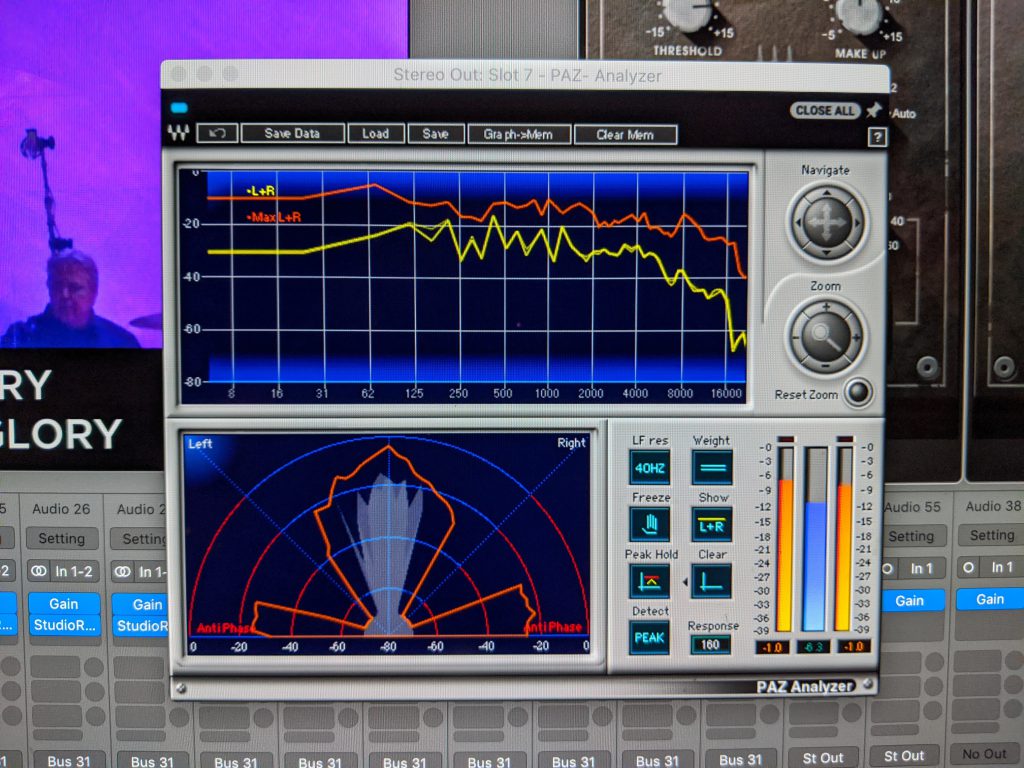
The last two things I’m really looking into at this stage are my PAZ-Analyzer (graphically shows stereo width and phase) and WLM (both of which sit after all of the plugins listed above). While we aren’t pushing for super wide super produced music (going for more of a live broadcast feel) these two tools allow me to keep an eye on things globally. In the studio, my ears are incredibly important but since things are so much more critically heard I’ve found it’s really important to make every tool available for use in order to monitor and mix your project. With WLM, all you need to know is the LUFS that your broadcasting medium asks for. In our case we are streaming straight to YouTube. Their limiter kicks in at -13db LUFS so I set my goal to be -14 (which is something I see a lot of creators doing as well) and the peak limiter to -1 (makes sure to really get those rogue hits). The biggest thing you can do is research and research and research. Each streaming service is different so make sure you know what your service is asking for and be sure to send that because if you don’t, you can bet they will be adjusting your mix on the fly and not as cleanly as you’d hope. The best thing you can do is listen to your mix through your provider and make sure it sounds the same because if it doesn’t, it’s likely you need to adjust on your master buss.

Well that’s it for this week. Hopefully I’ve given you some creative ideas to try in your setup. If I created more questions than I answered please don’t hesitate to reach out to me below or on Facebook. I love touching base with you guys! If you’ve liked the series so far, be sure to subscribe to my blog so you can be notified when new posts go live (usually every monday). Well next week I’ll be going over what I think may be the most important step in this whole process which is “farming it out.” The peer review process, at least for me, has really helped me step up my game and make sure I’m putting out good stuff each time I bounce a mix. Until next week, happy mixing!

How To: Making a Broadcast Mix – Part 4

Welcome to week 4 of our “Making a Broadcast Mix” series. If you’ve missed the first 3 weeks you can find them at these links (Week 1 – Recording, Week 2 – Ingest, Week 3 – Processing).  This week we are going to be work on developing that first initial mix. The starting point you’ll use for each song in the set. We will also be touching on automation within your DAW. This is also when those navigation markers really start to come in handy as well. But before we dig in, during the Ingest week, 2 weeks ago, I talked about two schools of thought about the dead space in the recordings. Some prefer to chop the audio clips up while others (like me) prefer to automate a bit more to really clean up the noise floor. Either way, I like to have whichever method I do done before I start mixing so that I don’t have to stop and get those more mundane tasks out of the way. 

At this point, you’ve gotten all your clips locked in, you have the video file imported so you can keep an eye on what’s going on organically in the room, you’ve dialed in the dynamics and FX that you’re going to use and it’s finally time to get down to the brass tax. Typically I have a bit of a mix going as I dial in the dynamics of everything but this is where I really turn my ears on and listen through each song and really dial things in. If possible, I love to do this right after a significant break so that ear fatigue isn’t playing a role. The biggest thing you can do here is to use your ears. That sounds superficial but it’s really key. You are literally staring at a computer screen. It’s really easy to fall into the meter watching trap and not really listen and critique your mix. I love to just shut my eyes and sit back in my chair and start seeing what of the inputs I know are there I can hear and how they are sitting. Whatever you need to do, really do it. Take your time. It’s easy to rush through this phase so buck the trend and slow down. 

This is also a great time to talk about mix relationships. There are just some things that need to fall in place together. For instance, the kick and snare need to both blend together and have an equal attack. The bass guitar needs to either be ducked for the kick hits or leave room down in that frequency range so that both can be heard clearly. I love dialing in the guitars as well. Electric guitars, especially if there is more than one, need to both be clear and understood but not stomp on vocals. Same for acoustic guitars as well as their relationship to the piano. Pianos become the glue to your mix. They don’t need to be super present but if they aren’t there, something feels missing (that’s a great tip to remember: if something feels missing in your mix, bring up the piano and see if that solves it). The blend in the vocals is also something that is incredibly important because if it’s off, it’s really noticeable. The philosophy for how they should be mixed is often a mixed bag so make a judgement call but the key here is to make sure that if you can see it on the broadcast video, you need to hear it. That is why it is so important to mix along with the video that you’re working with.

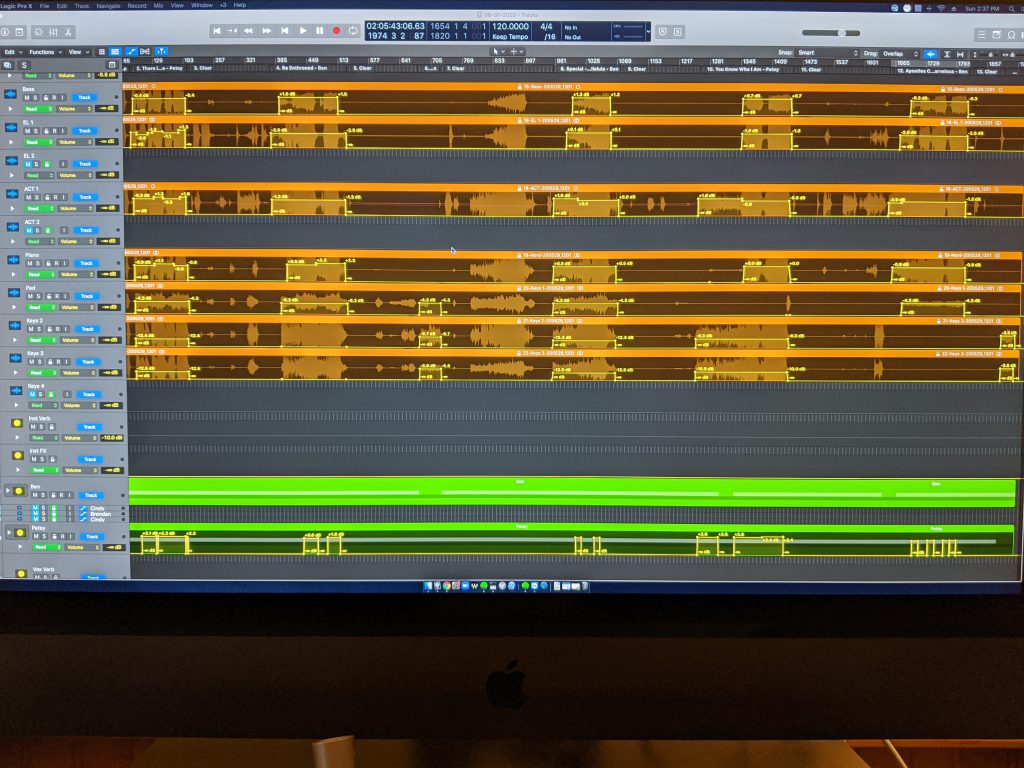
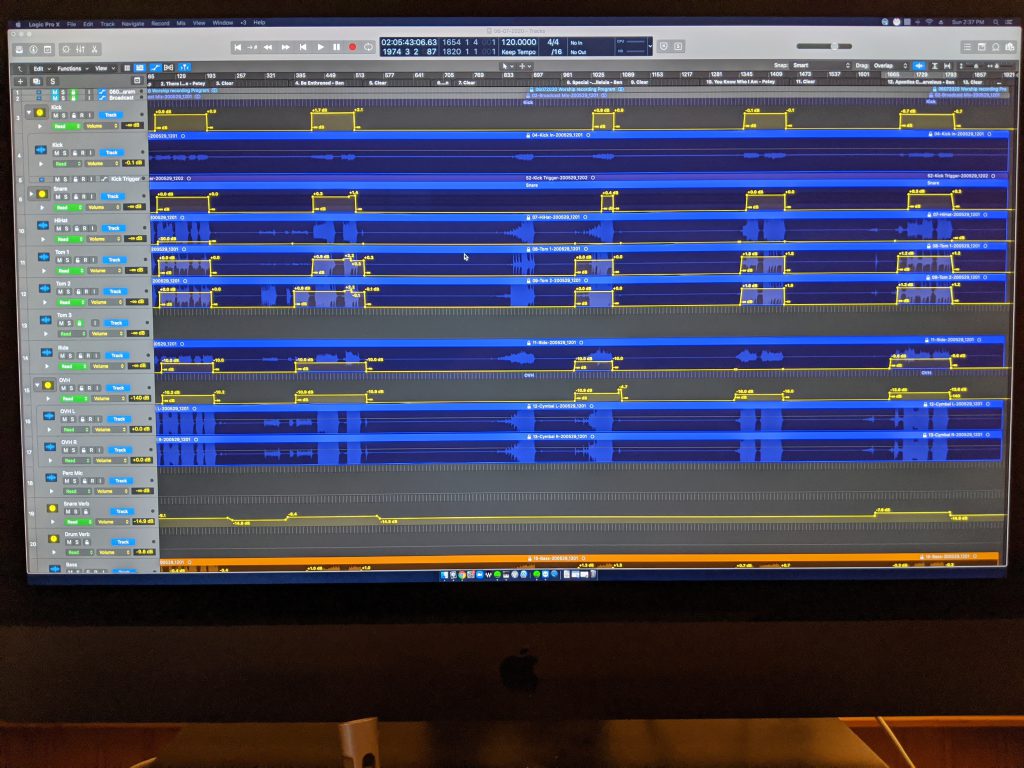
After you’ve got that basic mix, this is where you dig into the weeds and start automating. Up until now I usually use my control surface and faders to mix so that I can respond a bit more organically but after I’ve got that initial mix and I’ve drawn in some simple automation I usually switch to the mouse and keyboard that I can easily make broader changes that may not be in real time with the mix I’m listening to. How much you automate your mix is completely up to you but just like at FOH for a live production, the more active you are, the more you respond to what the music is doing, the better things will sound (generally). I’ve included a couple pictures of the automation page from a recent mix so you can get an idea of what I do generally. You’ll see that instead of cutting the clips up I just automate faders. This helps eliminate the noise floor of unused channels but also allows for easy sync of additional tracks if they need to be dropped in. Please, don’t be afraid to reach out to me either in the comments below or on Facebook with any questions you have. I’d love to follow up with you and hopefully learn something from how you do things. If you’re looking for things to pay attention to, listen for the instrumental solos or when those guitars are playing that songs lick, ride those verb returns (especially at the beginning and ends of songs), really listen in on the BGVs, I find that I’m riding them a lot more than I am the lead singers for that song so they can be heard but not overtake the leader. Lastly check in on those mix relationships that apply to your mix during each song/element. Don’t be afraid to get started on this step and take a break for awhile or overnight if you feel like you’re stuck or things just aren’t locking in like they usually do.

That wraps it up for this week. Next week I’ll be digging into my abbreviated mastering process and standards and the format that I export with that meshes with our video team effectively. There has been a fair amount of learning while doing that has happened but I’ve landed on a consistent process. If you have any questions about this week’s or any previous post, just drop those below or on Facebook. Make sure you subscribe so you don’t miss out on any posts (to subscribe, follow this link). I hope you are all finding your stride and keeping busy as we are continuing through this crazy time in history. See you all on the flipside!