
Welcome back to part 2 of our “Making a Broadcast Mix” series. Last week I talked through my recording process. Hopefully that was helpful and gave you a few things to think about the next time you need to record. This week is all about getting your showfile setup for mixing. Whether you’re using Logic Pro, Pro Tools, Cubase, or Reaper, at some point you are bringing all the files in and getting setup. Hopefully at this point, you have a template with some bussing and FX setup but if you don’t this is when you’d get that going as well. I’d recommend always setting up at least the bussing before you import tracks so you can start saving templates without all the files muddying the waters.
Now is the time to start dropping in the tracks. If you weren’t able to label the tracks in your recording DAW make sure you drop them in the right spot. If you have some stereo tracks that were recorded as two mono tracks you can either sum them in the box or join them with the help of your DAW. If you decide to join them, make sure you disable any processing you have active and pan them accordingly to ensure you are getting what you want. Globally, I’ll usually have each group of inputs summed in a buss first. Then all of those busses (i.e. – drums, instruments, tracks, etc) sum to one “music” buss. All of the speech vocal sum to a “vocal” buss which then gets summed with the aforementioned music buss, and a third speech buss. This allows for group compression if needed and the ability to move one fader in small increments if the artist/customer would like to make global changes (like if they want just a bit extra vocal throughout).
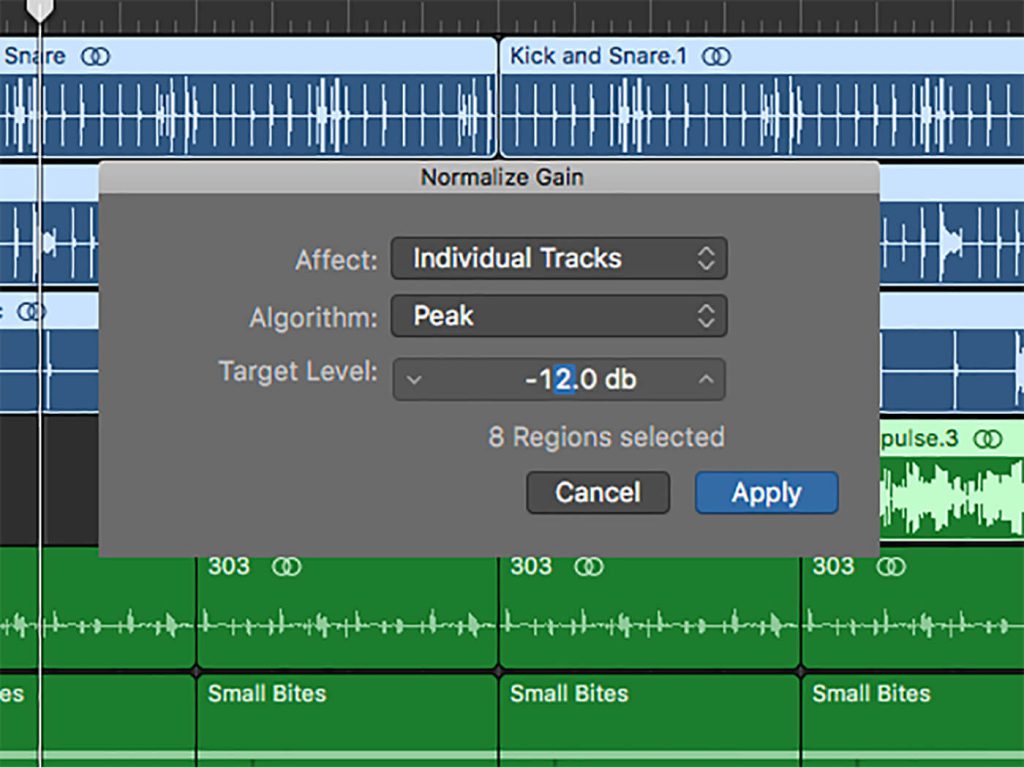
After that’s done you have a choice to make. You can normalize all your tracks to the same point (usually ~12dbfs) or just add or subtract gain as you need to with your workflow. Most of the time I just add or subtract gain through the use a gain plugin and manually change it when needed but I’ve started to experiment with normalizing those things I always find myself gaining up (for me it’s been the tracks inputs from Ableton). Just remember, when you gain or normalize, you are also bringing up the noise floor of that track.
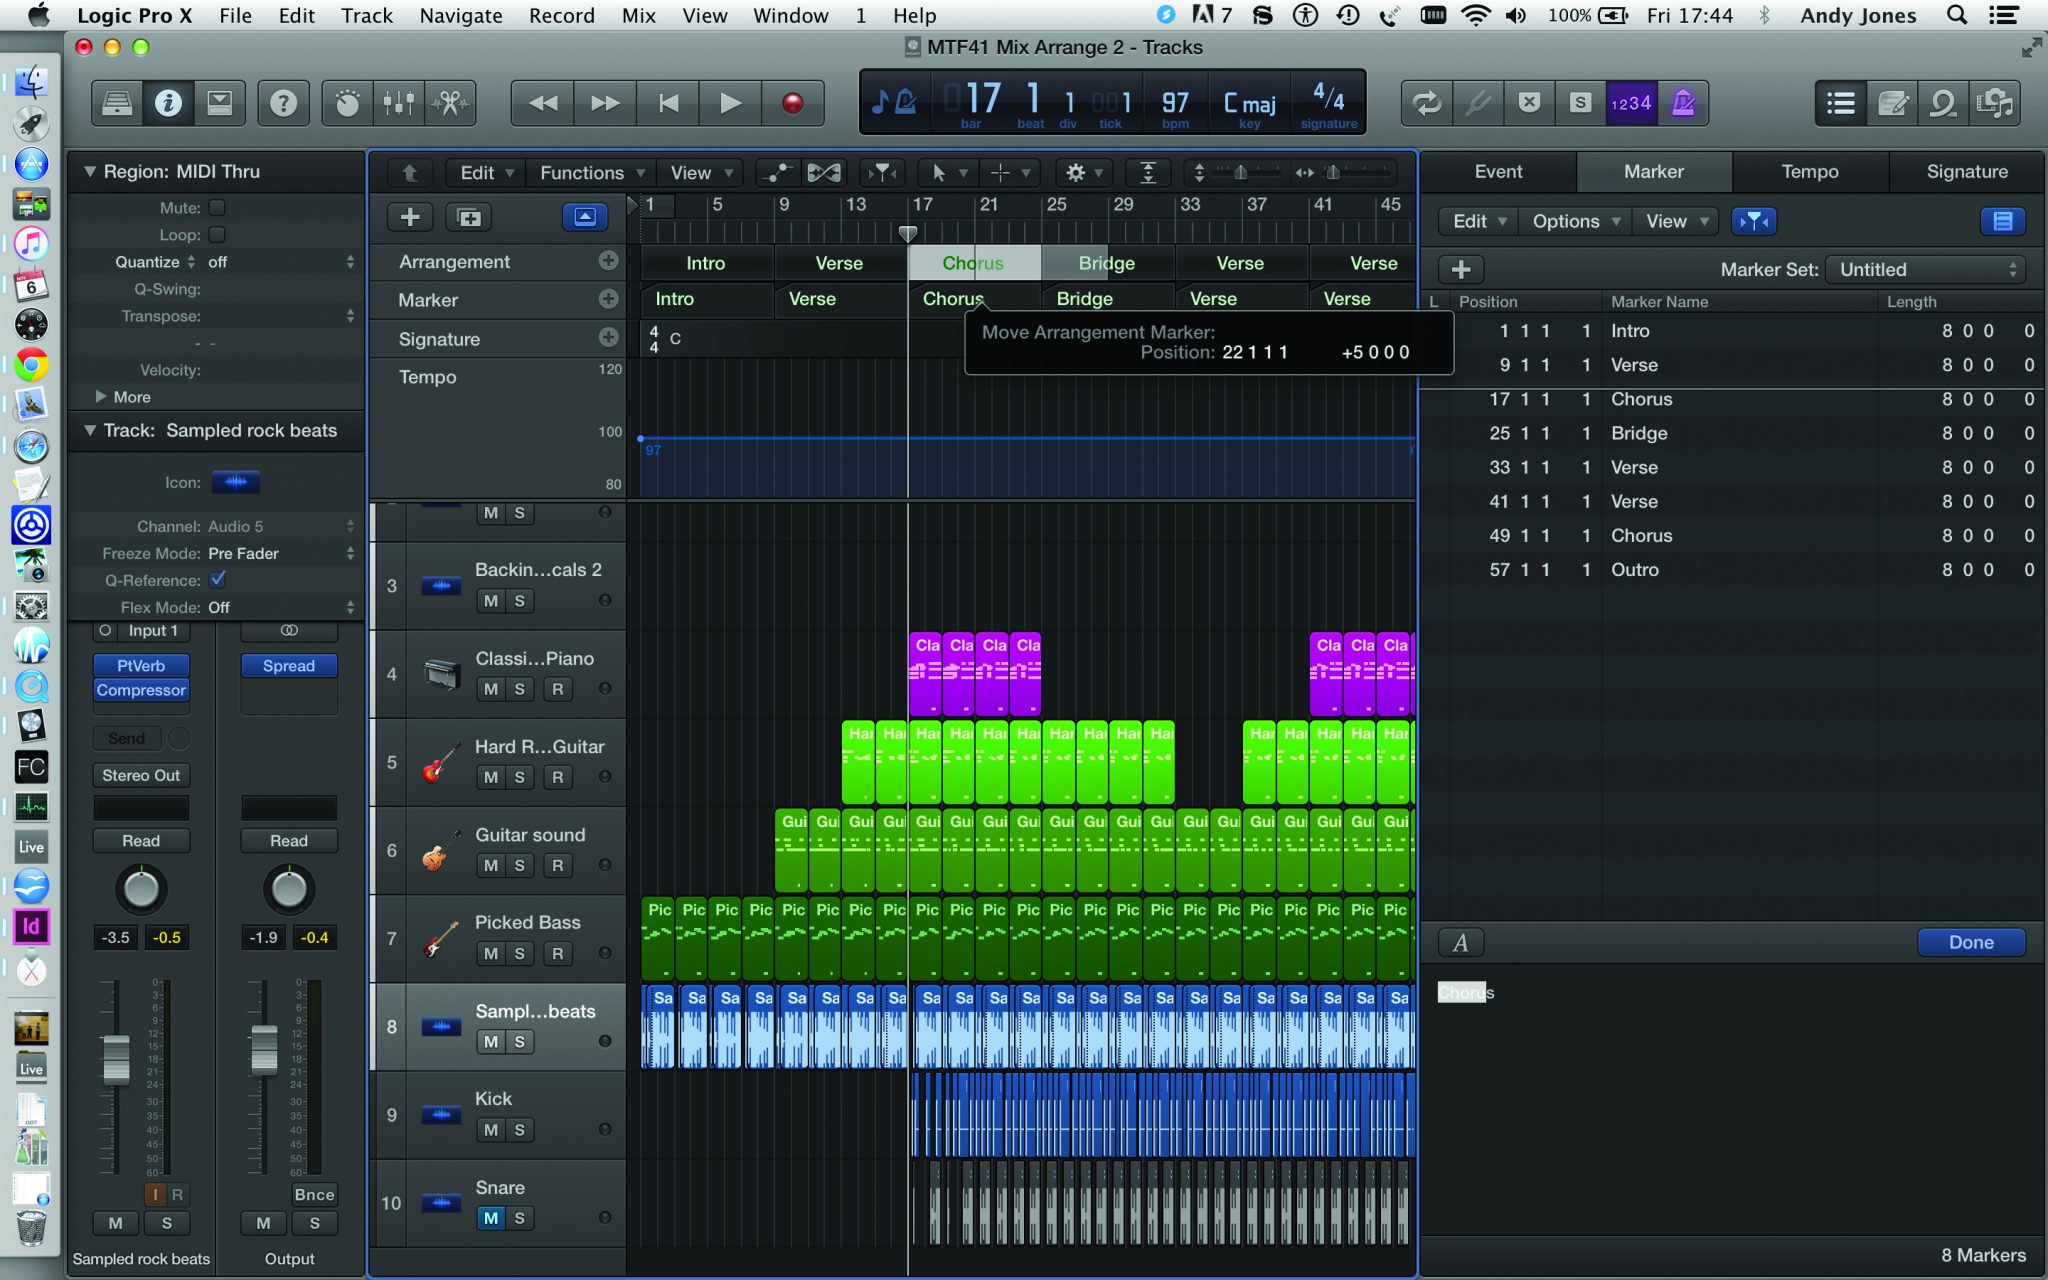
This next step is important, though it isn’t very fun to complete. You really need to set markers for your recording. Not only will this help you navigate quickly as you mix things but it will also be helpful for anyone who opens up your files down the road. I am usually doing one file now for multiple songs as well as speaking portions so I insert markers for the beginning of the section and the end. I also try and use this time to get familiar with the tracks in their “untouched” state and make notes if I need to. I’m only present for the recording every other week right now and so this has been a great time to hear things raw so I have a frame of reference when I get to work. Initially I would also use these markers to help expedite the editing process (cutting out dead space) I don’t do this anymore as I’ve gotten more and more into fader automation. If the fader is all the way down that’s the same thing so you can save yourself a bit of time if you’d like here.
Well that’s it for this week. Next week we will go over what’s next, the processing! Probably my favorite phase as I get to get out the toolbox (powered by Waves) and get everything cleaned up and dialed in before the real magic happens. We will go over everything from EQ to dynamics so be sure to keep an eye out for that post. If you want to receive an email with a link as soon as it’s live, sign up at this link to subscribe! As always, if you have any questions or thoughts, please don’t hesitate to comment below or on Facebook. I love hearing from you guys and reach back whenever I can! See you all on the flipside!