Tips and Tricks: Mixing in Post – Part 3

It is week 3 here for our “Mixing in Post” tips and tricks series and this week I wanted to do something a bit different. I am going to go through a few of the mistakes I made through this process. Some of them may not be “wrong” per say but doing it differently had positive results for me as I was working on each week’s mix. If you had a different experience than I did with one of these examples, let me know in the comments!

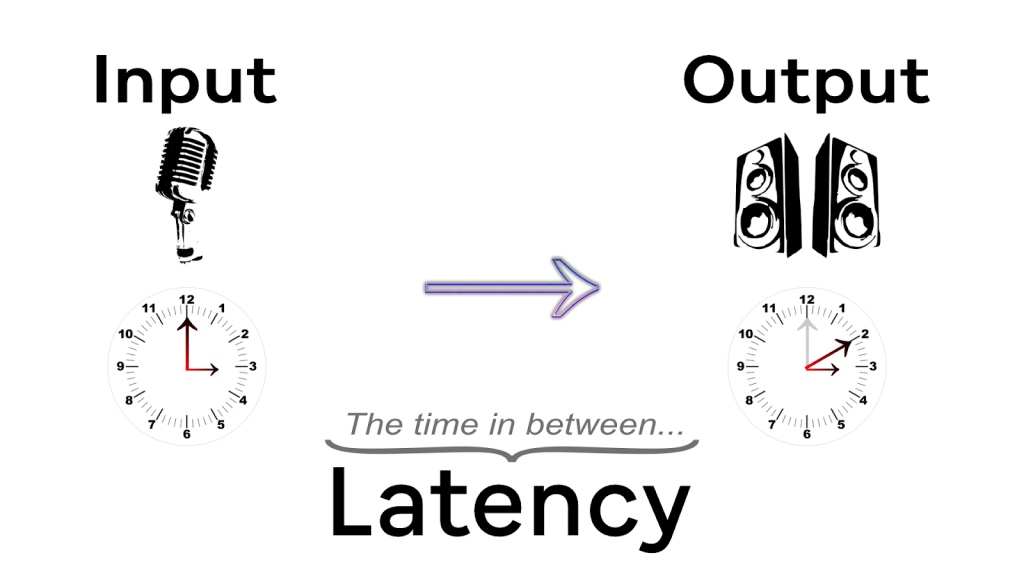
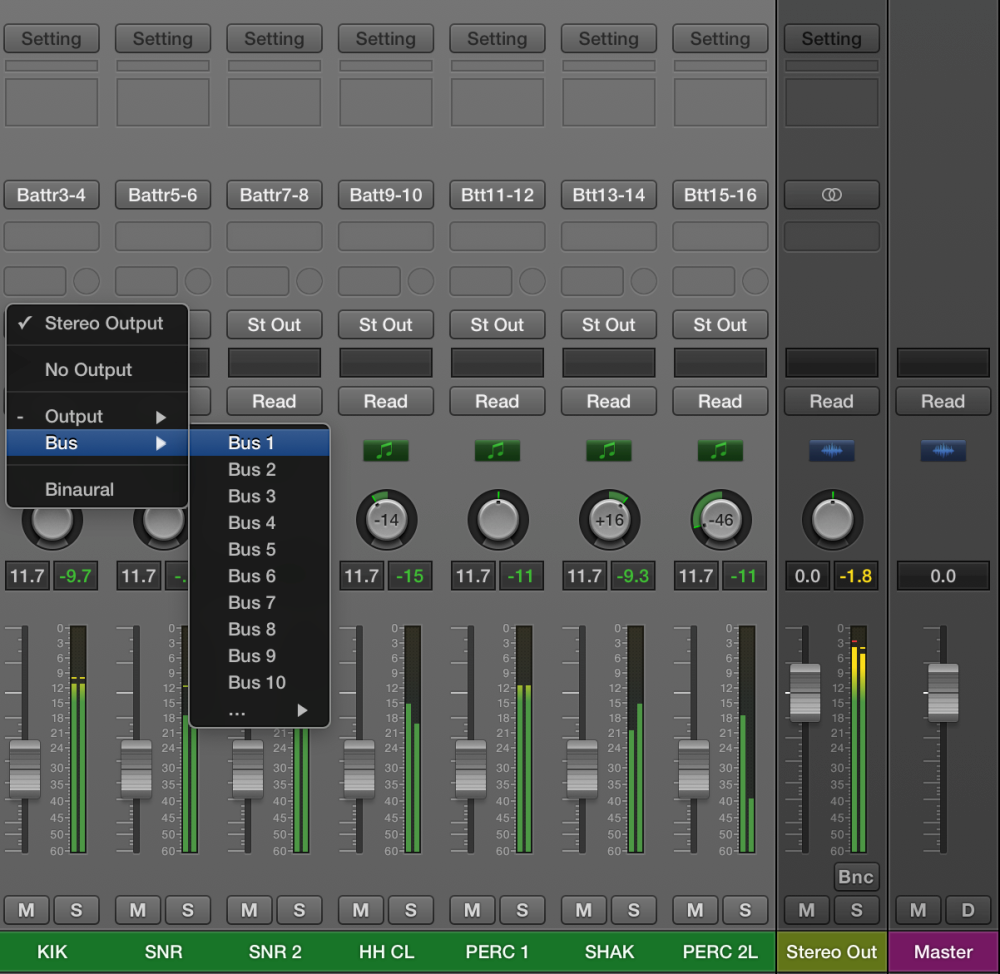
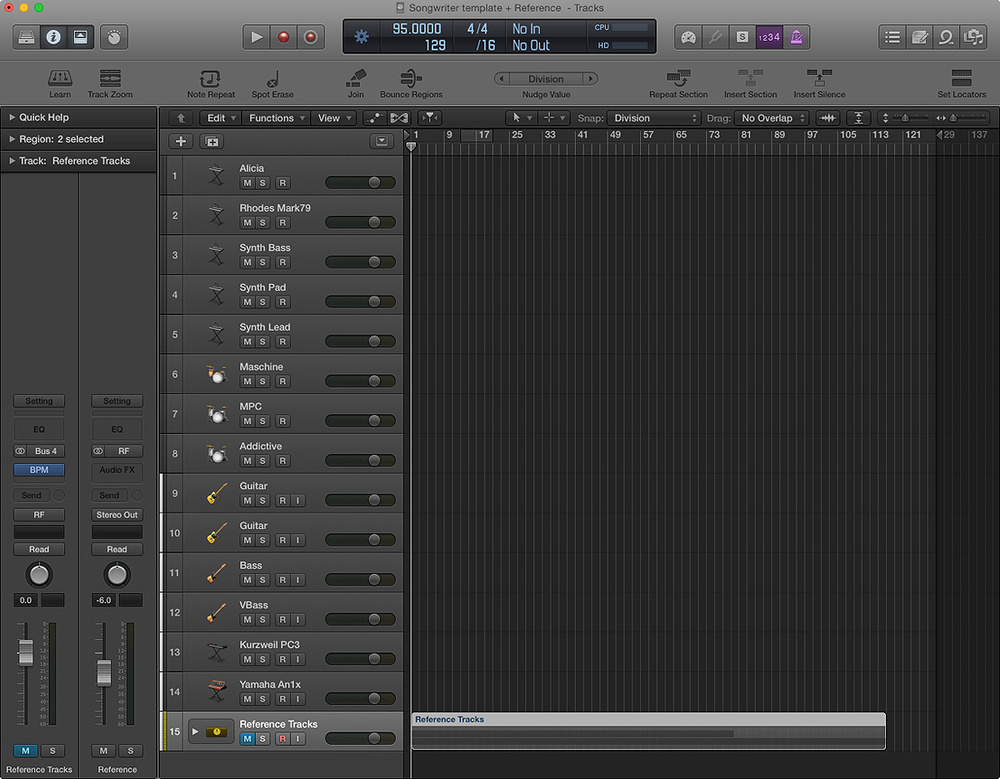
The first problem I learned to fix very quickly. Ensuring that all your recorded tracks are in time with each other should be a heavy priority in your workflow. For me, it’s not as if I didn’t think about this but early on I didn’t utilize the SMPTE features of my DAW. As you know by now I extract the speaking portions of any worship focus or in song transitions to a different speech track for that vocalist to bring greater clarity to those moments. Having the files locked to a SMPTE time really helps prevent any unwanted movements in the timeline thus helping to keep everything in perfect time so everything just locks together. Another hiccup to this for those of you heavy Waves users like me is that the StudioRack plugin defaults to “SG” mode when it is instantiated. If you’re able to run all your tracks on your server this isn’t really a problem. However we only have a Server One and run about ~70 tracks in our DAW so we run all input level tracks locally and all effects and summing busses on the server which allows us to maximize the use of both our external server and the iMac Pro we are mixing on. Where this gets complicated is with the auto delay compensation in Logic. I’ve noticed that it doesn’t work too well at times if things aren’t setup correctly (if you send an input to the server instead of keeping it local). Additionally there are some plugins that we can use that use large amounts of lookahead which make them heavily latent. All of this to say that the tip here is to pay attention to your internal latency within your DAW. Be sure to be listening carefully as you mix as well for issues. Sometimes timing issues are hard to spot if you’ve been working awhile on a mix but sending drafts out to friends will help you catch these issues as well. Secondly, treat your mix layers as closely as possible. Process all your input level plugins on the same machine, process summing busses similarly, do everything you can with similar plugins if possible. The idea here is to keep it simple. The more complex your setup, the more compensation will be needed, the easier it is for you to have an issue that will be hard to dig out of. This isn’t to say you can’t go nuts if you need, what I like to say is do what you need and clean up the rest. Try any plugin you need but make sure you clean up your experiments when you’re done so they don’t end up negatively affecting your mix.

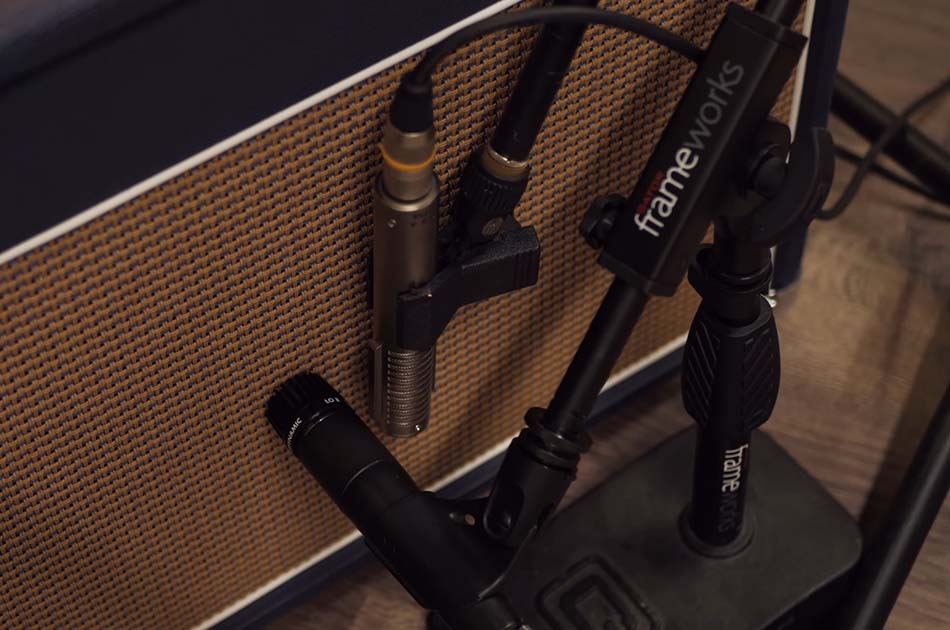
This one I’ve said before but it bears another round. Be sure to check mic positions before you start recording. Drum kits are big ones to check. They sit down and adjust everything and move a mic without thinking about it so I love to stop by after they’ve been playing for a bit during the warm up and make sure it’s all where I like it to be. Secondly, think about issues you’ve had in the past with bleed and see if there is anything you can do to help. For instance, I used to have the overheads perfectly centered and on axis with the drum set. But I kept getting way too much hi-hat in the mic. So one week I decided to experiment rotation the mic so that the hi-hat would be off axis with the mic and it made a big difference. Another great example of that is with a cello player. We were already experimenting with the best mic but never thought about micing the cello at an angle not only to put the drums in the null but also the piano. We use a keyboard so it’s not piano bleed that was an issue. Believe it or not, we could hear the pedal fairly clearly. Just about an inch of change made a huge difference. Little improvements in the source material make a big difference in the end product. Especially when it comes to audio whether it’s live or recorded. 

This last scenario is sort of just situational but it’s impact can be felt either way. Early on in the transition from live to broadcast mixing I had a 24 hour turnaround. This necessitated a few shortcuts to be implemented to help speed up the process. So I developed my mastering chain and dropped it on my master buss. I was able to save quite a bit of time and mix through mastering but there were a lot of things I’d likely change about those mixes if I was redoing them today. The biggest reason for not mixing and mastering at the same time is that limiters can work against you if you’re not paying attention to them (the same goes for buss compressors). While my mixes turned out pretty good, I was not good at monitoring what that chain was doing at any given time which lead to more work fixing it. If you need to turnaround a project really quickly, find a way to really keep an eye on your master buss as much as possible. But, if you’ve got the time for an extra mastering pass, as I definitely do now, take the time to separate those processes. Maybe even export your mix and start a new showfile if you can do that within your workflow (this doesn’t fit within our workflow but might in yours and it’s what a lot of pros do on the regular).

No matter how you do things, I wanted to end this series with a bit about not overthinking your mix. We had to realize early on that this is a broadcast mix not an album. This doesn’t mean it shouldn’t be as good as we need it to but it is a broadcast mix. It should feel like a live recording not an album. That feel leads to higher interaction with the music and it’s what we wanted in our mixes. Know your customer, know what they want, and be sure to work accordingly. Hopefully you’ve enjoyed this series and learned something helpful to your situation. As always if you have any questions reach out in the comments below, on facebook, or email me at daniel@studiostagelive.com. If you’ve liked what you read and want to know when a new post is up, follow this link, fill out the form, and you’ll be emailed when a new post is up. Happy mixing!

Tips and Tricks: Mixing in Post – Part 2

Welcome back to our tips and tricks series talking about broadcast mixing. Last week I started talking about all the things I’ve learned over the last dozen or so weeks switching from live to post-production mixing. I detailed my process in the last series (here are the link:  Week 1 – Recording, Week 2 – Ingest, Week 3 – Processing, Week 4 – Mixing, Week 5 – Mastering, Week 6 – Farming it Out). Last week I talked a lot about some more architectural tips like not altering your project too much each week so it’s easy to update your template and using a plugin like StudioRack to augment your computers processing capability by offloading plugin processing to an external server. This week we will dig into a few of the audio centric stuff that I have started to do based on tips from studio professionals I’ve received as feedback when I’ve sent my mixes out for review. 

That first tip is to put (or at least consider this) some compression (i.e. maybe your multi-band comp if you’re using one) before your EQ. While I’m mixing live I love to EQ first as it gives a more warm tone which is important in a live room as you fight harshness but if you reverse that you end up with a clearer tone which is helpful when you’re in the box. Before I started experimenting I just did it the way I did it live but the farther I went along the more I swapped this around. It started with vocals, then drums, not long after I was doing it with the instruments as well. Now, all inputs are compressed first with a C6 and then EQ’d to taste after (usually follow up with a 76 or 2A). One area that I didn’t change this was at the buss level. For my mix busses I’m almost always EQ’ing first (if even necessary) and then touching up with a buss compressor like the SSL Buss Compressor. I found an article to read that goes into a little bit more detail if you’d like to go deeper (EQ, Before or After Compression?). But there is also a third ideology, and that is subtractive EQ before compression and additive EQ after compression. Which if you think about it makes sense. You get the benefits of cutting the crap before it gets overemphasized in a compressor and a few extra because what you add isn’t going to be making the compressor work too hard (in the case of non-multiband compressors at least). Either way the takeaway here is that you should experiment with your layout, you might find something you like better than your current method. Just remember, that as you stack EQs you’re adding filters which can affect how your source is interacting with other inputs (phase) and as you add compressors, you are basically multiplying the ratios of each compressor which can really hurt how dynamic your mix feels. Everything comes with a cost, don’t lose track of that as you work through your mix. 

The next thing I’ve learned is that you can buss things however you want. Bussing is important because your are normally compressing at a buss level which will tend to help you glue multiple inputs together (like a drumset or a bunch of keys inputs). There are so many people out there advocating for certain layouts but in the end there are two key factors that should have an impact on your setup. The first is that you need to be able to understand how things are being routed. If you copied some crazy setup from someone else’s file and you just can’t wrap your head around how things are being processed then it’s time to clean it up and start over. Secondly, your bussing structure is important in that you need to use it to bring cohesiveness to your mix. For me, I try to keep things as simple as possible. I have a track in my template to represent all the actual physical inputs I would actually use when recording. The buss structure for my broadcast template looks a lot like my live console setup. All inputs go to their corresponding groups, those groups are summed to a shorter list of submaster busses which sum to the master output buss. The one thing I add is an extra layer of busses between the group busses (drums, instruments, tracks, vocals). I sum all the band busses (drums, instruments, tracks) to a new band submaster with no processing. The vocal buss is sent to the same things, a new submaster with no processing. Then all my speech channels (think announcements, song intros, worship focuses, etc) are sent to my third submaster. Why add the extra layer you ask? Well I saw several industry pros doing this because it makes it really easy to make client adjustments on the fly without much effort and have utilized this more than once. Any other crazy things I want to do I just add in when needed. 

The last thing I wanted to share this week was what I do for speech tracks. In the live environment, most of the things I automate for vocals involves fixing the difference between singing and speech. But in the post world, there is an easy solution. Just cut out the portion of the vocal that’s speech and drop it to a track dedicated for that. Not only do I end up EQ’ing and processing quite a bit differently but I can drop the compression in the front of the EQ and run a softer amount of compression and de-essing. While leaving the speech on the vocal tracks didn’t sound bad, I picked up a lot of intelligibility and clarity by doing it this way leaving things sounding, in my opinion, much more natural.

Hopefully these two weeks of tips and tricks have been helpful and practical. I’m sure I don’t know everything there is to know and that someone is doing something smart as well so if you hear something I didn’t talk about please give me a shout out. Secondly, if something I talk about hits home, let me know. I’d really like to try and get a gauge how much or how little this stuff helps out to you guys. Next week I’ll be wrapping up this series discussing a few of the mistakes I’ve made and how I’ve fixed them. That promises to be the most practical post of this series so be sure to stay tuned for that next week. You can subscribe to the blog which will then setup an email to be sent to you whenever a new post goes live (sign up at this link). See you all on the flip side!

Tips and Tricks: Mixing in Post – Part 1

Hey guys and gals. Hopefully you had a great holiday and are finding yourself rested after a long weekend or able to get some extra rest today. I wanted to do a bit of follow up on the last series I did and do a short series on some of the little tips and tricks I’ve learned while making the switch from live to fully in the box post production mixing. These will be discussed in no particular order and I think I have a few weeks of tips for you guys (I’d just do them all today but that would be a really long post). Hopefully you’ll find these to be helpful and as always just hit me up with any questions you have. We will start this off with some big picture tips that really helped me get situated and comfortable mixing in post.

The very first thing I did, and if you’ve read anything I’ve written hopefully you’ll know this about me, I developed a process to step through each week. You’ve been reading about that process over the last month or so. The best thing you can do is think through the things you do every week and make a framework with that. I know this sounds cheesy or unnecessary but if you want consistent mixing, you have to be consistent and patterned. Then even more important is that once you’ve developed the process, you’ve got to stick to it. Every detail. Consistent processes nearly always produce consistent results. There were several weeks where I was writing down the things I did differently so that if things worked well I could bring that into my process. As you learn, you adjust your process so that each week builds on the last.

Because of my process, I treated each week like I would need to be able to update my template in logic. Traditionally in DAWs I like to trim out unused tracks each week so that things are nice and clean. However during this time I’ve started leaving my template as intact as possible in order to be easily able to empty out all the media and update my template with fixes for any changes or issues. Doing this allows me to keep my template up to date with any tricks I learn along the way without spending too much time going between files. My template either has a channel for every input or a preset to be recalled within Studiorack. I’ve really tried to dance the line between having something for everything and keep things streamlined as much as possible for DSP efficiency. The thing to remember is this. Most DAWs have what Logic Pro calls “Dynamic DSP Loading.” That means if there is no audio file associated with a track and no audio passing, it will not activate those plugins leaving you with more DSP for what you’re actually using. This feature allows me to run extra tracks at no extra cost. 

Speaking of DSP usage, Waves StudioRack has been one of the most useful plugins throughout all of this. We were already Waves users at FOH and so it was a natural migration to using them in the box. Because we weren’t using our server there we just brought it over to the studio, installed StudioRack and got everything setup and we were off and running with external DSP assisted processing. Now, I didn’t migrate everything off to the server because the iMac Pro we are using with Logic is well equipped but I did move all the main buss groups and all effects tracks off to the server which helps a lot with stability. We also had the benefit of bringing in presets from SuperRack and using those as a good starting point for developing my presets for mixing in post. When we are back to normal I can use these presets I’ve developed in our new LV1 setup for broadcast as well. So if you’re not using Waves stuff that’s totally cool, however, from my experience, their ecosystem, especially for outboard DSP is one of the best on the market. Others have external servers but they aren’t near as robust. Plus having the presets easily follow you wherever you go is a big plus. If you don’t have a beast machine to edit on, be sure to look into Waves StudioRack

That’s it for this week. Next week I’ll get into the mechanics of my template which should help you to be able to refine yours (i.e. bussing, plugin generalities, etc). One thing that everyone does differently is how they buss through the showfile so I’ll definitely be hitting on how and what I do. If you want to make sure you don’t miss that or any other post, subscribe at this link, and you’ll get an email when anything is posted. If what I talked about today only served to muddy the waters a bit in your situation, don’t be afraid to drop me a comment below or shoot me an email at daniel@studiostagelive.com. See you next week!