Blueprints: Production Computers Part 4 (BONUS WEEK!)

So I decided to do this bonus week sort of on a whim. Recently my posts have drifted a bit from the super practical to the theoretical (just a tad). In an effort to bring some practicality and to show you guys what I’ve been writing about I’ve decided to do a bonus week that does three things: osx settings checklist for production machines, windows settings checklist for production machines, and a build list from Amazon for a typical computer. We’ll just jump right in with the last one. I’ve decided to make this just a standard base model production machine with no specific purpose. But you can take this model and add 10k hard drives for a multi-track recording machine or perhaps add a few touch screens and make it a lighting focused machine. The biggest thing here is that you see what I actually do when asked to design, build, and setup a production computer. For ease, I chose to build a windows machine because if you need a mac, the best recommendation is still to buy one.

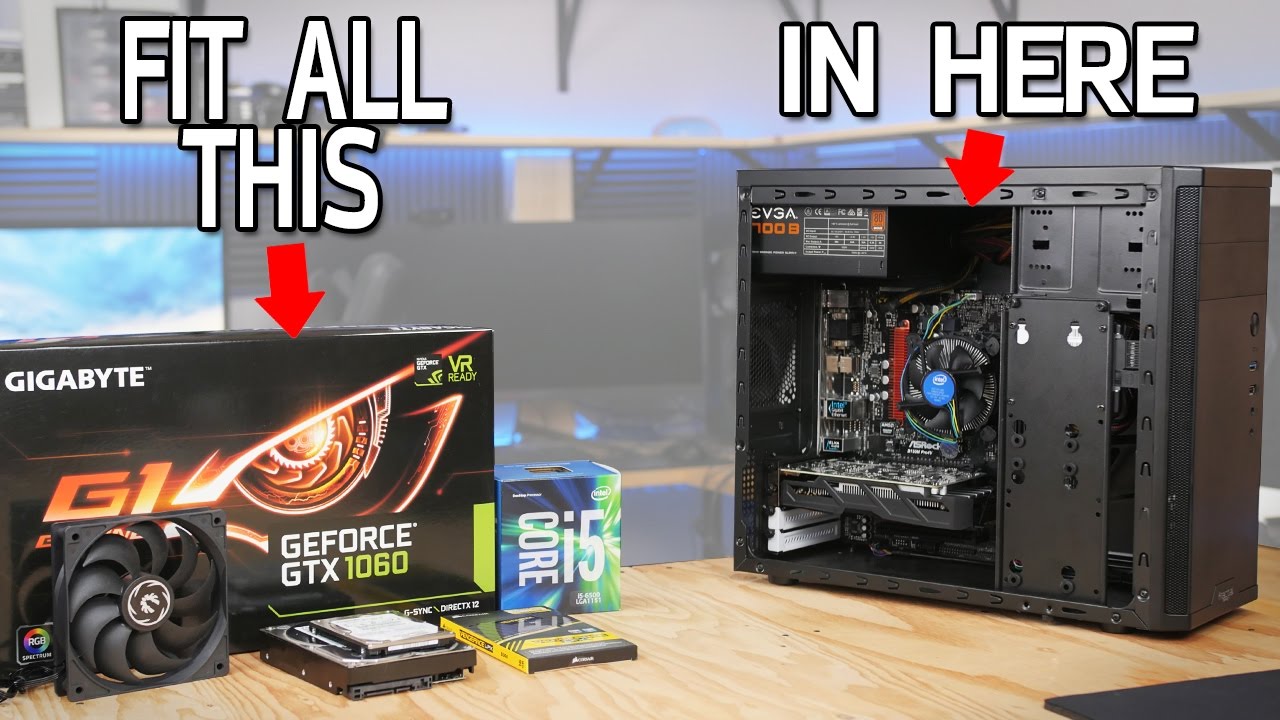
Here is a basic build I just put together within the last day. I found a couple of deals and ended up with a renewed PSU (which I’m ok with Amazon because of their customer service and it is still 80 Plus Gold certified) as well as a great GPU and processor. All in, with a great monitor and backlit keyboard/mouse for under $1000 (with a rackmount case!). Check it out and let me know what you think.

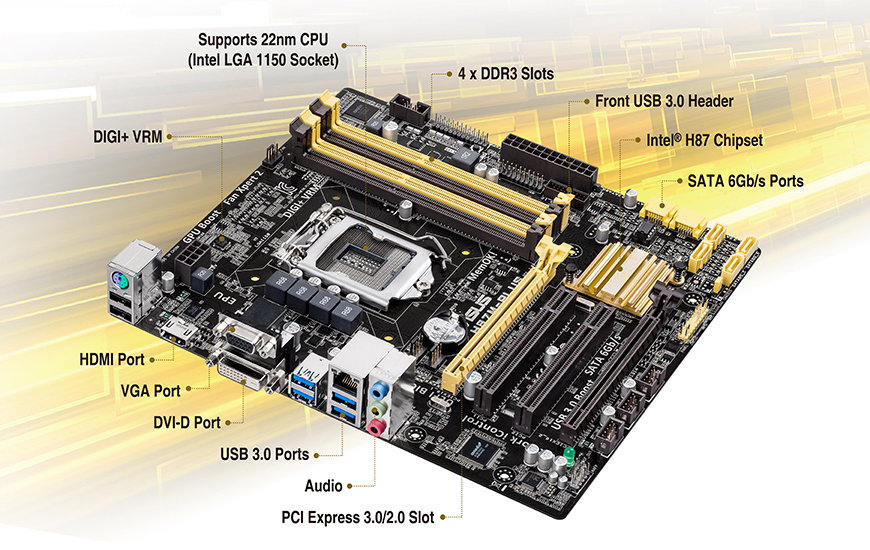
CPU/16 GB Ram deal (Ryzen 7 2700X and 16 GB 3000Mhz RAM): $328.47

Current Gen Mobo with Type C: $129.94

Corsair HX1000 Fully Modular Power Supply (Renewed): $89.99

RX 580 Overclocked w/ 8GB VRAM: $180

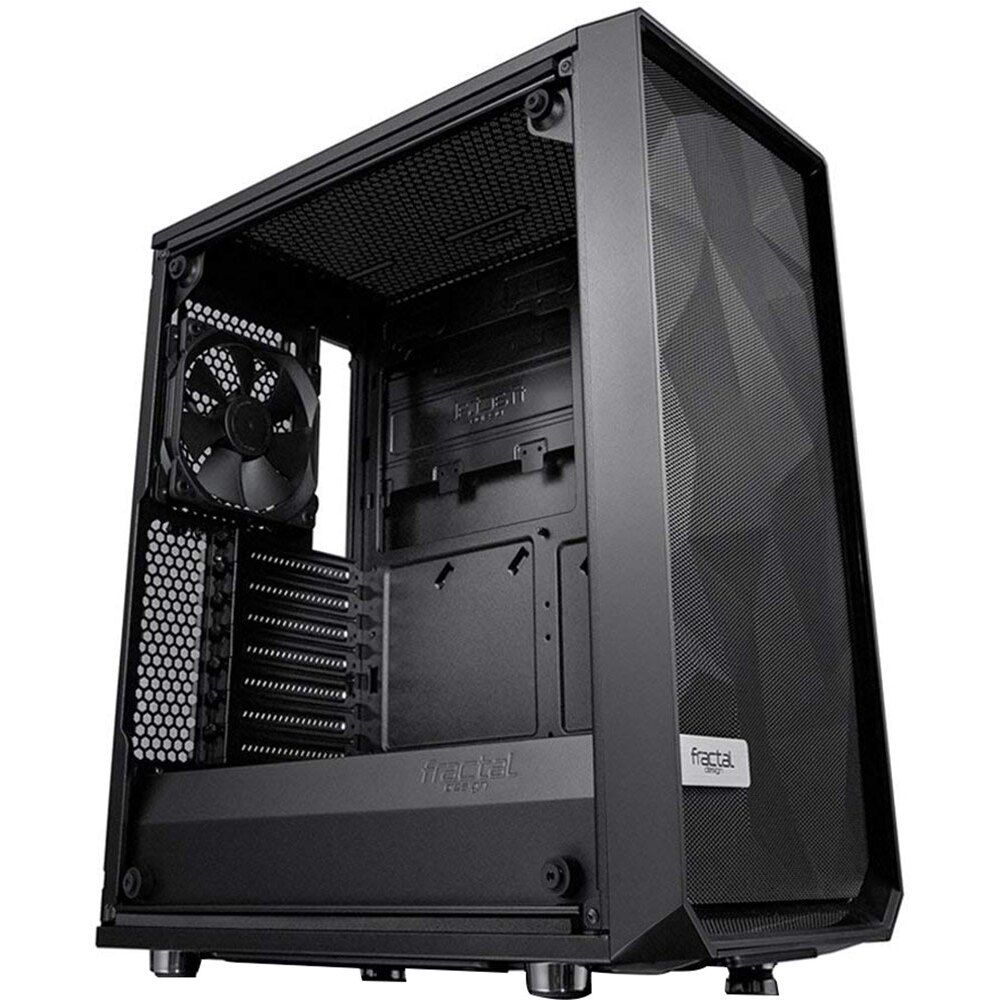
Rackmount Computer Case w/ Fans: $99.99

24″ Adjustable Height HP Monitor, IPS, w/ VESA Mounts: $109.99

Backlit Keyboard/Mouse: $29.99

Now obviously this is quite a machine. We spec our machines to last at least 4 years to handle whatever we throw at them. You’d be hard pressed to purchase a machine with similar specs at under $1000. You might find a couple of workstations used at similar pricing but the GPU won’t touch the 580. In any case, I’d love to get your opinion on this build. Let me know in the comments below or on facebook!

Lastly I wanted to post up a couple of checklists for you guys to show what I typically do to new computers that are rolling right off the assembly line. Let me know if I forgot anything!

OSX Checklist:
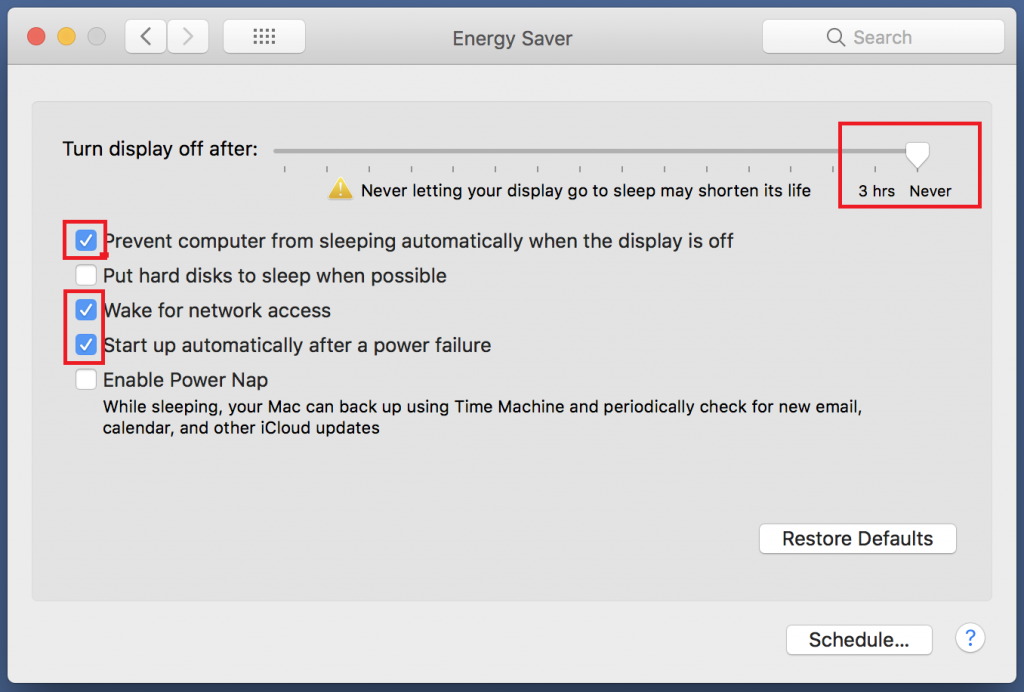
-Adjust power settings in the settings menu (options vary by OS version and hardware)
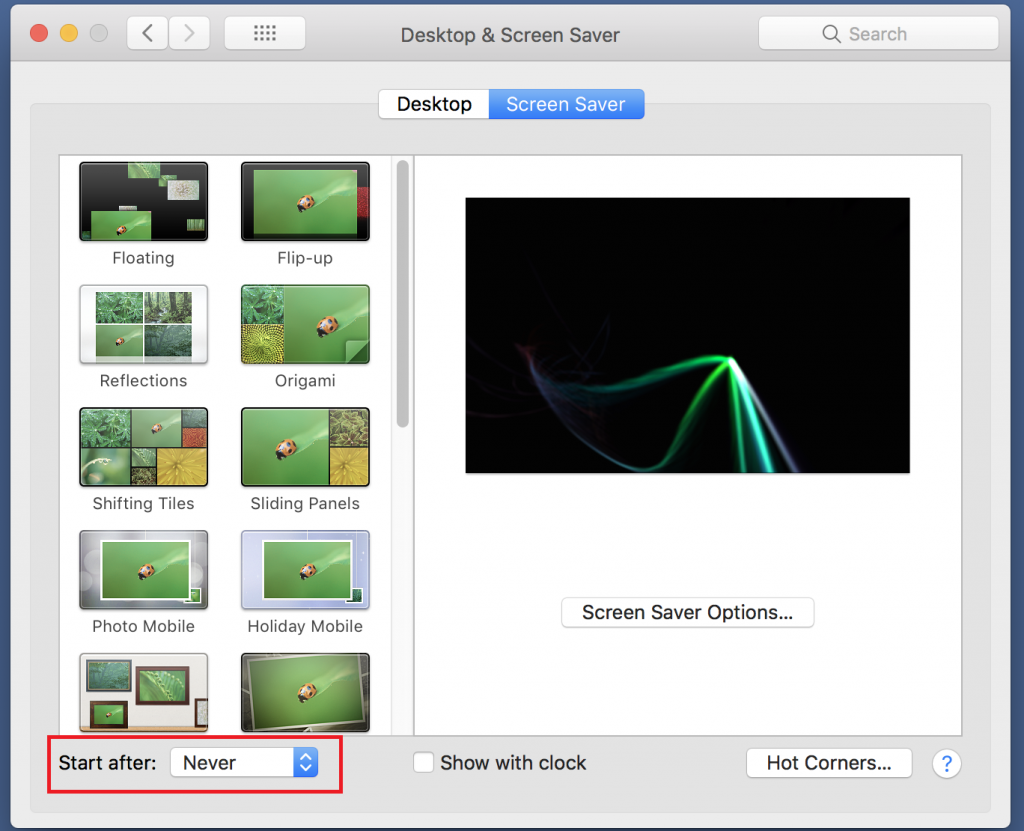
-Screen timeout to 3 hours or never
-Sleep to never
-Uncheck the box allowing the hard drives to sleep when possible
-Check box which causes the mac to start after a power outage
-Disable power naps
-Turn off screensaver (if using an iMac set the screen to shut off after three hours, if using external monitor just turn off the monitor when leaving if needed)
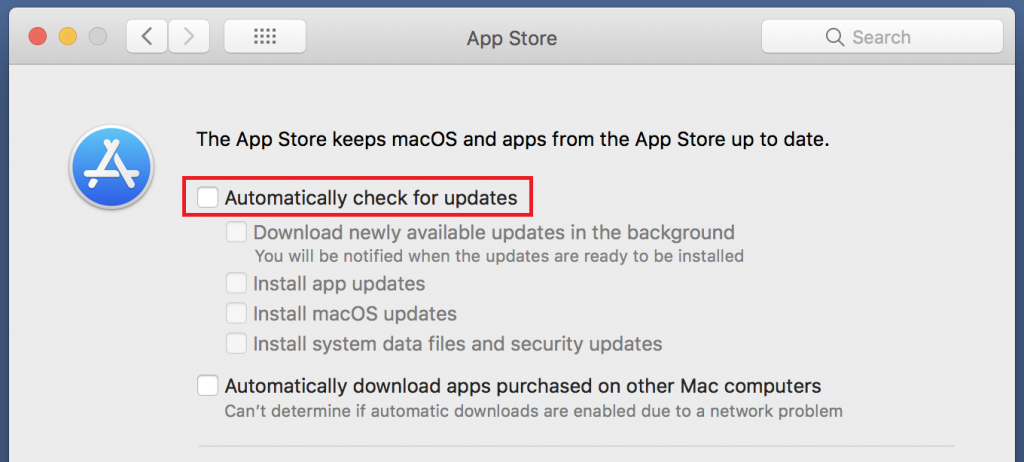
-Disable automatic checks for updates (automatically disables all other options)
-Install remote access software if you use anything specifically
-Manually check for updates and install

Here are some photos to assist in finding the settings.

Windows Settings:
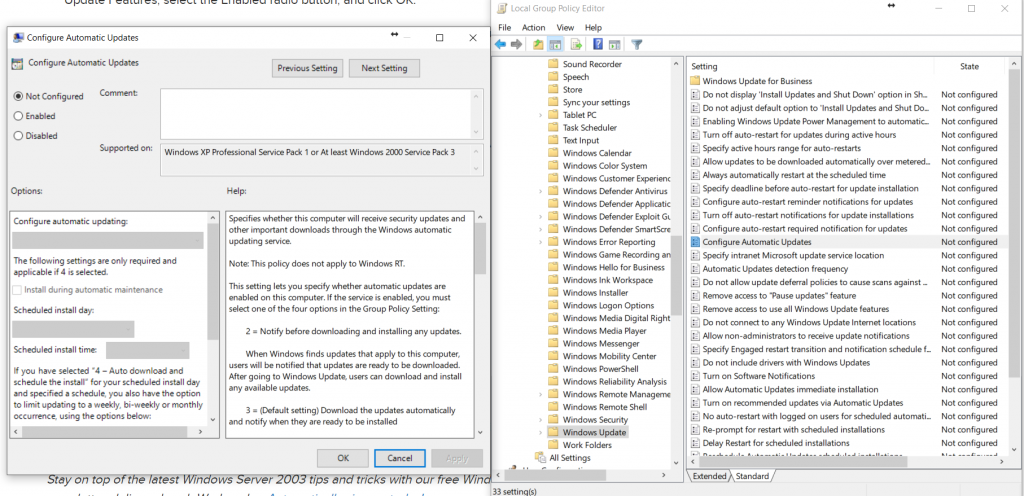
-Shut off windows update via group policy (set calendar event to run manually once a month, here is a page about doing this)
-Power options (use old control panel)
-Choose performance power plan (sets a lot of options for you automatically)
-Set screen timeout to never
-Set sleep timer to never
-Install remote access software if you use anything specifically
-Run windows update manually and install

Here is a pic to help with setting the group policy.

Well that’s it for this week. I hope this series was helpful or at least generated a bit of discussion. If you have enjoyed what you have read and want to be notified when new content is available, sign up at this link, to be added to an email list. If you have questions or thoughts please don’t hesitate to comment below, leave a note on Facebook, or email me at daniel@studiostagelive.com. See you all on the flipside!

Blueprints: Production Computers Part 3

Here we are in week 3 of our series and we are finally to my favorite week, computer building. Less than 10 years ago building a computer was a much more dangerous proposition. However since it has grown, manufacturers have made it easier than ever before. As much as I’d love to go through the steps of building a PC I have some links to a few you-tubers who have made and published some great videos (JayzTwoCents, Bitwit, LinusTechTips (no build videos but many other on the subject matter)). What I do want to go over is a process that you can follow to get the parts (assuming you’ve already agreed on a budget (see part 1 of this series), install an OS, and get your computer off of its’ feet.

For me, once I have the go-ahead to spec and build a machine I make a quick checklist to ensure that I buy everything that I need. There are several parts that without, nothing will work. I’m going to walk through an example build that I’d use. The first thing I pick out is a power supply. For me, it’s always 1000w supply made by a reputable company (usually corsair, sometimes Rosewill or one of a few others) that is 80Plus Gold certified at least. This is for two reasons, first is that with larger power supplies you can actually use it its’ entire life with multiple machines. Because it’s going to be used a long time, efficiency is important. I leave my production computers on all the time so I want a power supply that doesn’t over-generate power or waste it. Lastly, with certified supplies, they are often using name brand quality controlled caps and parts helping the unit last a longer period of time. The price difference for me is negligible between 1000w supplies and 850s or 700s. If you’re willing to look, PSUs of this caliber can be found for 100-120 bucks. 

Secondly, comes the processor in use. I choose this next because my selection determines a lot of other things. There are some uses in my environment where Intel is required, other than that I usually buy AMD. The run a bit hotter and use more energy with load but you are getting much better bang for your buck which in my job is important. At this point I’m checking hardware specs from the software I want to use and verifying that my processor can handle what will be pushed to it as well. When a processor is chosen I’m picking out a motherboard. Over the last few years I’ve learned not to cheap out here. Every time I have it’s come right back to me and I’d have to upgrade. There are sales that you can follow but in general start with the one that your website is selling with the CPU in a package and compare from there. 

Your motherboard will determine maximum RAM speed so this is next. I will always buy the fastest ram that you can get for the motherboard. The price is only a bit more from the cheap stuff and you are going to get a performance boost for just a few bucks. Try to stick with well reviewed RAM and ignore the brand here. Even corsair has had bad batches in their RAM so read reviews, look at the comments, name brands just cost you more at this point. The only thing I’d say is that don’t get bare bone sticks, get some RAM with a chassis covering it up. They really help with heat dissipation. If your motherboard has an m.2 slot in it and you can afford it, get that for your main OS Drive. Typically I’m buying is an SSHD that is 1 TB in size. That is a hybrid spinning disk drive that is augmented internally with an SSD to increase write speeds. If they are playing media, I’ll pick up an extra SSD to play and store the media on. I’ve found that only have the OS and applications on the main drive and media storage elsewhere, that makes recovering from a failure (either mechanical or software) much easier. Installing applications on secondary drives isn’t as beneficial as you think (with the exception of video games). I’ve seen more glitches this way than not and you’d have to reinstall them again anyway if the OS drive goes down so just keep them on your main drive. 

The last thing I pick out is a case. This can be cheap or expensive. I have a couple cases I choose from to keep things standardized but you can do whatever you’d like. After all those parts are in a cart online I go back and double check that are the parts are compatible. Did I get the right motherboard that has a matching processor slot to my CPU? Is my RAM compatible? Do I need extra cooling fans for my case? I can’t tell you how many times it took me to get the right RAM during the DDR4 switch-over a year or two ago because I just wasn’t paying attention. Learn from me, double check, then check again. 

After everything is all setup, I turn it on and configure the BIOS. For me this is setting the power to be always on (it’s a production machine, if there is a power loss I want the motherboard to turn the computer back on as soon as it senses power) and make sure the memory settings are correct so I get all the speed out of the RAM that I paid for (usually defaults to slowest possible to ensure compatibility). Than it’s time for the OS, I have a couple of thumb drives all setup to install windows (and OSX as well, for macs or the occasional hackintosh). After you’ve reached the desktop, go ahead and install any and all updates and get the software up to date. Short of setting the computer to never go to sleep I don’t touch any other settings for now. At this point I’m going to load up the main piece of software the computer will use and set it to run indefinitely crunching on a video or audio files, etc so I can get a good real-world test for the hardware and my cooling setup in the case. I expect to come back after 24 hours to see the program still running and the exhaust air to be warm but not roasting. I know there are break-in tests but I’ve found hardware that passes those and can’t survive actual use. Plus, using actual programs utilizes multiple resources simultaneously and in my opinion better tests hardware. 

That’s all for this week. I know I know, sort of a teaser ending here but I realized that I’m going to do a bonus week this series. I started writing this and realized it was already long and I wanted to spend some time talking about the tweaks I implement on both Windows and OSX to use them in the production world. So come back next week for my tips and tricks, OS tweaks, etc. I promise it’ll be worth your time. I know I’m writing it so I can bookmark it and send it to anyone looking for how to turn off automatic updates. If you like what you read and want to know when more comes out, sign up at this link, to receive an email blast when new posts are released. If you have any questions feel free to reach out in the comments below, on Facebook, or by email at daniel@studiostagelive.com. Happy mixing!

Blueprints: Production Computers Part 2

Welcome back to our short series on production computers and a process to follow when designing the computer and buying/building the machine itself. Last week we talked about the design process, this week we’ll be talking about buying a computer instead of building it. While not the most cost effective in comparison to building the machine you can still get some pretty good deals in this arena if you are more flexible on the hardware and able to do some basic upgrades when necessary. Whether it’s mac or windows, buying a premade machine brings with it a warranty and the knowledge that you bought something that works as it sits. That warranty often comes with customer service if you have issues and the possibility of RMAs and external support. But that “feature” comes at the cost of price. In my experience, purchasing a pre-built machine can cost about 15-20% more than building it yourself. The other thing you often get are features that you may not actually need. Often times pre-built machines come with things like card readers, disc drives/burners (does anyone use these anymore?), etc. All of those unnecessary items add cost to the bottom line. 

But there is a silver lining here. If you want to buy a machine, I’d buy a workstation computer (like this one). These are streamlined workhorse machines (with varying levels of power). They rarely come with features you won’t use. Rather they are packed with parts that are incredibly reliable and powerful for the price you pay. If you are even willing to buy last year’s model you can get a great deal. The best part is that you are getting high core count CPUs (Intel Xeon processors most commonly found in these machines are primarily used for servers) but coupled with that you are getting low dollar commercial GPUs which have the advantage of better firmwares and fewer software upgrades. So the key to workstations is to add some simple parts to these machines in order to upgrade them. Get the RAM count up to 32GB (I’ve not found anything in production that actually needs more than 32), add an SSD or SSHD for the OS drive (they are commonly simple 5400RPM mechanical drives), and consider upgrading the GPU with whatever money is left (if you plan to do this upgrade you can often get the desktop sans a GPU so you can save a few bucks). Even bone stock, these machines can do pretty well at editing and process heavy applications simply because of the core count. The other great feature of a workstation is that they are often incredibly quiet and maintain excellent thermals even under heavy load. 

You can get these machines just about anywhere but the first place I’d look is a local warehouse or electronics shop. A lot of them sell old workstations for large corporations and it is here where you get the best deals. If you can’t find any connections in this arena start looking on Amazon and Newegg. Both offer decent deals on both new and used workstations. Because these are often server CPUs the parts aren’t as recognizable of the consumer versions, be sure to check out PassMark and put in the model of your CPU and compare it to what you need as far as hardware requirements or against other purchase options. Probably the only guideline I’d give you is to stick with the biggest brands, HP and Dell (IBM for laptops). Both of these companies have great customer service and many years of experience manufacturing machines and a history of reliable hardware. 

The other machines I’d most definitely buy is when form factor for the machine itself comes into play. Sometimes you need a small puck sized machine to attach to the back of a machine or you need a really slim 1U computer for a travelling rig. Manufacturers have already done the legwork of modifying components, sourcing specifically sized parts, etc and when you need something like this you can easily find these machines just about anywhere you can buy a computer. Waves sells a setup for a processing server and control server that both fit into 2U of rack space. They are a bit pricey but you are getting a rack mount machine so if you need that in that form factor, it’s worth it to buy those instead of trying to engineer that yourself. Thermals can be really annoying in small builds, trust the R&D that manufacturers have done in this arena. 

I know this next part may not be as popular but it’s an option I wanted to be sure to bring up at some point in this series. That option is to just re-purpose a machine that you have sitting around that either isn’t being used much or at all. These older machines can easily be given a few simple upgrades for less than $100. This could entail installing an SSD and maxing out the RAM slots. If it’s a desktop machine, feel free to upgrade the GPU as well. If you are just needing a machine to play music from or load up a website, these older laptops or desktops can be incredibly useful in that space (think planning center online, microsoft word, etc). With upgrades I just discussed many of these older machines can be given new life doing light recording/editing as well. All for just about $100. Just consider it next time you need a machine for a purpose or a second computer to offload some computing to another machine. Even waves multirack can be run from these machines as it’s just running the software. The biggest thing to check is the system requirements listed on developers websites. That is readily available information so don’t miss that step. Lastly, if you bring back an older machine, take the time to actually wipe and reload the operating system, get it up to date, and just get it cleaned up (as in get all the dust cleared out). Obviously results will vary, but most of us work in an environment where there is an old machine sitting on a shelf. To help out things a bit (having multiple machines that is), check out a program called Synergy that allows you to share a mouse and keyboard across a network. I would also argue that this is a reason to reasonably overs-pec any machine you build so that even after it’s not useful to you, perhaps you can re-purpose it to a different task. 

Hopefully this week you’ve learned a bit about buying machines and the thought process I try to employ as I consider adding a production machine to our arsenal. While we have leaned towards building machines because I can exchange parts between machines really easily (we’ll get to this next week) I have been encouraged to take a look at workstations as we can because they do tend to have a much longer life than consumer based machines do both in performance and quality. If you have any questions please feel free to drop a line on facebook, here in the comments section, or shoot me a quick email at daniel@studiostagelive.com. As always, if you like what you are reading and what to know when new content is released, subscribe to this blog at this link, and you’ll get an email when a new post is up. Happy mixing!