
Here we are in week 3 of our series and we are finally to my favorite week, computer building. Less than 10 years ago building a computer was a much more dangerous proposition. However since it has grown, manufacturers have made it easier than ever before. As much as I’d love to go through the steps of building a PC I have some links to a few you-tubers who have made and published some great videos (JayzTwoCents, Bitwit, LinusTechTips (no build videos but many other on the subject matter)). What I do want to go over is a process that you can follow to get the parts (assuming you’ve already agreed on a budget (see part 1 of this series), install an OS, and get your computer off of its’ feet.

For me, once I have the go-ahead to spec and build a machine I make a quick checklist to ensure that I buy everything that I need. There are several parts that without, nothing will work. I’m going to walk through an example build that I’d use. The first thing I pick out is a power supply. For me, it’s always 1000w supply made by a reputable company (usually corsair, sometimes Rosewill or one of a few others) that is 80Plus Gold certified at least. This is for two reasons, first is that with larger power supplies you can actually use it its’ entire life with multiple machines. Because it’s going to be used a long time, efficiency is important. I leave my production computers on all the time so I want a power supply that doesn’t over-generate power or waste it. Lastly, with certified supplies, they are often using name brand quality controlled caps and parts helping the unit last a longer period of time. The price difference for me is negligible between 1000w supplies and 850s or 700s. If you’re willing to look, PSUs of this caliber can be found for 100-120 bucks.
Secondly, comes the processor in use. I choose this next because my selection determines a lot of other things. There are some uses in my environment where Intel is required, other than that I usually buy AMD. The run a bit hotter and use more energy with load but you are getting much better bang for your buck which in my job is important. At this point I’m checking hardware specs from the software I want to use and verifying that my processor can handle what will be pushed to it as well. When a processor is chosen I’m picking out a motherboard. Over the last few years I’ve learned not to cheap out here. Every time I have it’s come right back to me and I’d have to upgrade. There are sales that you can follow but in general start with the one that your website is selling with the CPU in a package and compare from there.
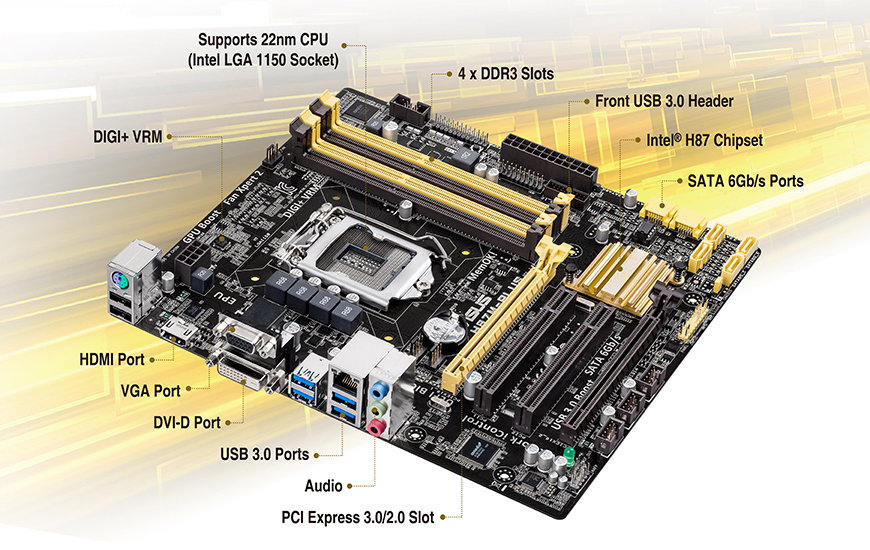
Your motherboard will determine maximum RAM speed so this is next. I will always buy the fastest ram that you can get for the motherboard. The price is only a bit more from the cheap stuff and you are going to get a performance boost for just a few bucks. Try to stick with well reviewed RAM and ignore the brand here. Even corsair has had bad batches in their RAM so read reviews, look at the comments, name brands just cost you more at this point. The only thing I’d say is that don’t get bare bone sticks, get some RAM with a chassis covering it up. They really help with heat dissipation. If your motherboard has an m.2 slot in it and you can afford it, get that for your main OS Drive. Typically I’m buying is an SSHD that is 1 TB in size. That is a hybrid spinning disk drive that is augmented internally with an SSD to increase write speeds. If they are playing media, I’ll pick up an extra SSD to play and store the media on. I’ve found that only have the OS and applications on the main drive and media storage elsewhere, that makes recovering from a failure (either mechanical or software) much easier. Installing applications on secondary drives isn’t as beneficial as you think (with the exception of video games). I’ve seen more glitches this way than not and you’d have to reinstall them again anyway if the OS drive goes down so just keep them on your main drive.
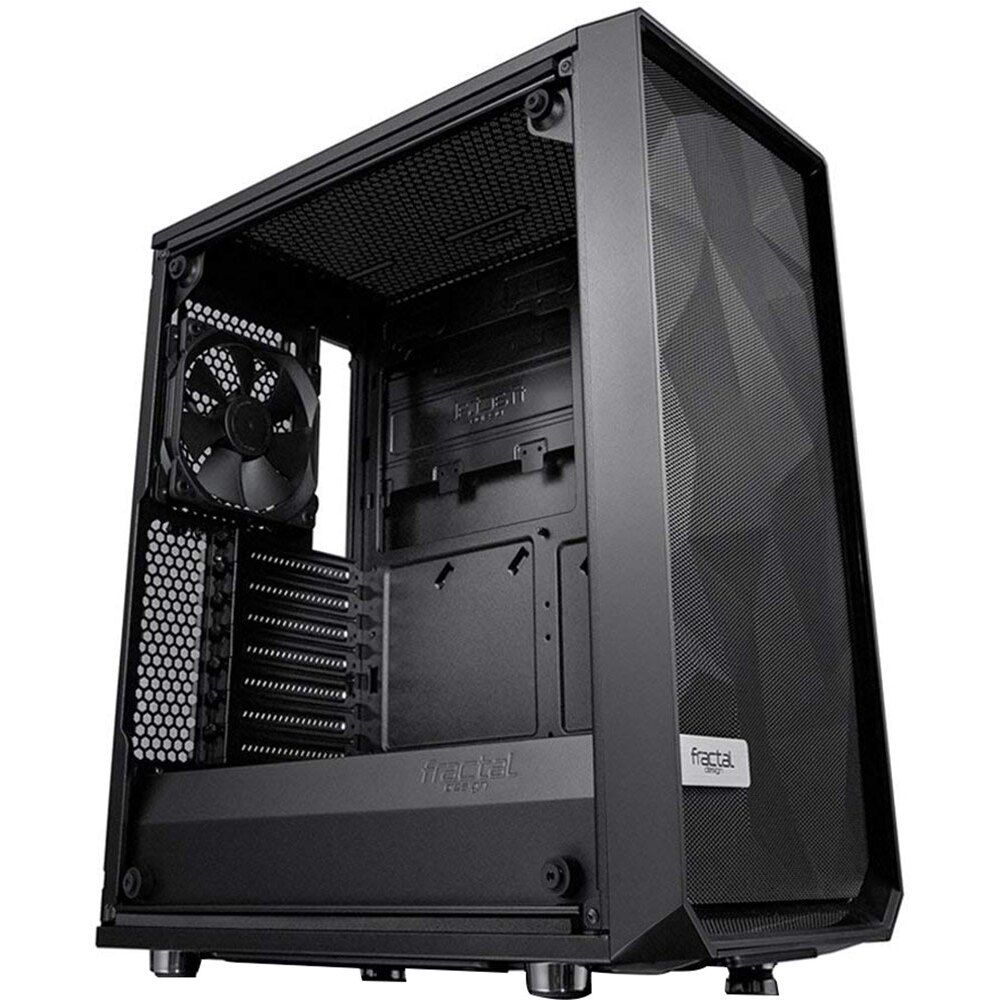
The last thing I pick out is a case. This can be cheap or expensive. I have a couple cases I choose from to keep things standardized but you can do whatever you’d like. After all those parts are in a cart online I go back and double check that are the parts are compatible. Did I get the right motherboard that has a matching processor slot to my CPU? Is my RAM compatible? Do I need extra cooling fans for my case? I can’t tell you how many times it took me to get the right RAM during the DDR4 switch-over a year or two ago because I just wasn’t paying attention. Learn from me, double check, then check again.
After everything is all setup, I turn it on and configure the BIOS. For me this is setting the power to be always on (it’s a production machine, if there is a power loss I want the motherboard to turn the computer back on as soon as it senses power) and make sure the memory settings are correct so I get all the speed out of the RAM that I paid for (usually defaults to slowest possible to ensure compatibility). Than it’s time for the OS, I have a couple of thumb drives all setup to install windows (and OSX as well, for macs or the occasional hackintosh). After you’ve reached the desktop, go ahead and install any and all updates and get the software up to date. Short of setting the computer to never go to sleep I don’t touch any other settings for now. At this point I’m going to load up the main piece of software the computer will use and set it to run indefinitely crunching on a video or audio files, etc so I can get a good real-world test for the hardware and my cooling setup in the case. I expect to come back after 24 hours to see the program still running and the exhaust air to be warm but not roasting. I know there are break-in tests but I’ve found hardware that passes those and can’t survive actual use. Plus, using actual programs utilizes multiple resources simultaneously and in my opinion better tests hardware.
That’s all for this week. I know I know, sort of a teaser ending here but I realized that I’m going to do a bonus week this series. I started writing this and realized it was already long and I wanted to spend some time talking about the tweaks I implement on both Windows and OSX to use them in the production world. So come back next week for my tips and tricks, OS tweaks, etc. I promise it’ll be worth your time. I know I’m writing it so I can bookmark it and send it to anyone looking for how to turn off automatic updates. If you like what you read and want to know when more comes out, sign up at this link, to receive an email blast when new posts are released. If you have any questions feel free to reach out in the comments below, on Facebook, or by email at daniel@studiostagelive.com. Happy mixing!