How To: Making a Broadcast Mix – Part 3

Here we are on week three of my series on my step by step process for creating consistent online broadcast mixes. The first week was all about the basics of recording and last week covered my ingest process. This week I’m back and finally getting to the good stuff. The mixing! This all of course presumes that you have at least a little bit of a template (I do plan to share a link to my Logic Pro Template at the end of the series). So what if you don’t have one? Well start this week and create one. When you’re done with your mix, wipe out all the project specific files and clips, all the markers and automation, and lastly, any weird routings you did for something specific, then save. You now have the groundwork for your template! Building a template progressively allows you to get more and more feedback and mix more and more projects right now, which then moves you closer and closer to a really dialed in template. I didn’t really have anything going into this but 10 or so weeks in, I’ve really got some great details sitting and waiting for me in each show thanks to my showfile. I find that EQs still need some tuning along with any multi-band processor but what it saves you is the routing for mixes and summing, built-in FX already setup, and a basic loadout of plugins assigned and loaded with a stock setup you usually end up using. That’s all I’m talking about here, don’t make it too complicated. Just have in the file whatever you find yourself doing for every mix. 

When I sit down to mix, I love to use the process I use for FOH work (maybe this hurts me but I’m proficient with it so it works for me). I love to pull up whole groups of inputs and work with them as a group (soloing when needed of course), then move onto the next group, and so on then start pulling them all together. For me, mixing is all about context. I want to hear that source in context with other relevant sources and fix problems as I hear them. Practically for me I start with the drums, listening to the relevant relationships (I’ll dive more into this next week! Click here to subscribe!) and stepping through all the inputs as I can. I do try and move pretty quick because just like in FOH work, ear fatigue is a problem. So I try and get through each group in about 15 minutes. Next is the instruments. This group can take a bit because you’ll often have to make adjustments to the dynamic EQs and harmonics of each guitar to not only suit their role in the song but help to carve out a space for each so they don’t fight for attention. This whole group should be mixed such that if you give any of them just a little boost they jump right to the top. While I include the piano in this group, often the pads and synths I lump in with tracks because of what they are for. Next is the tracks. I love this group of inputs because it’s always such an interesting blend of instruments. For me this time is less about balancing and more about listening. Often these tracks are already fully processed so you shouldn’t need much EQ or compression for their use in broadcast. If I find problems, presets can really be effective to help find solutions quickly. As I’m listening I try to make a mental note about times when these tracks should move from the background to the foreground in the mix and be sure to make that happen as I begin to automate in the next step. The last group is the vocals. I save presets for each vocal I process so that I can always have a starting place for each individual vocal. My vocal always start with a tuner (usually Waves Tune Real-Time) then into a de-esser (usually Sibliance or the Renaissance De-Esser) and it’s off to the races from there. Lately I’ve been experimenting with compression before EQ with a follow up slow and minor compressor at the end but it seems like I mix it up each time. The key is to experiment and keep trying things until things just lock in. I love using Waves Studiorack for this because it’s really easy to just move plugins around until I’m able to find what I want. All in all, I try to get through all that in about an hour or so and take a break right after (P.S. – if you didn’t already know it, they came out with a new version of StudioRack! Be sure to check it out!).
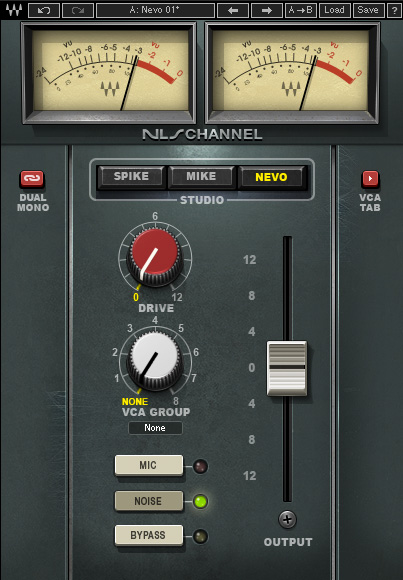
The last thing I wanted to talk about is a few quick tips and tricks I use while I’m working through this stage.  First, on all my channels is the NLS channel plugin (NLS is also found at the end of my busses as well). I use this to help glue the inputs together as a whole as the plugin works hard to manage the summing emulation as if they were all running through a console together (adds warmth and I think cohesiveness). There is some magic sauce here when used correctly (make sure not to turn the drive up to much or you’ll start hearing that noise floor). If you don’t believe me, I’d really encourage you to A/B the plug with and without and hear the difference.

Secondly, for speed, I try to keep my bussing as simple as possible. Much like at FOH, simplicity brings consistency and speed. I know guys with more complicated setups and there are times when I need to create a more robust structure to accommodate for special circumstances but I like to try and keep things as simple as possible. I have 4 buss setup for the band (drums, instruments, tracks, and vocals with any FX fed into the one that fits of these four), 3 submaster busses (Music – all the non-vocal inputs, Vocals, Speech) and those three feed into the master. Having things grouped out like this allows for easy changes to large groups of inputs which makes the mastering much quicker (in my experience and opinion)

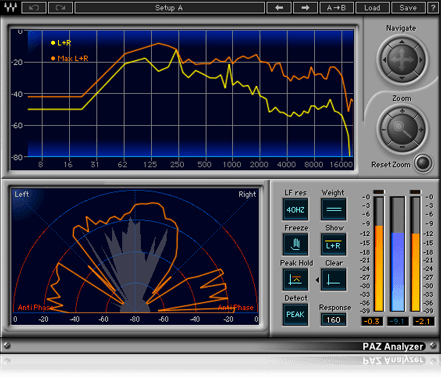
Lastly, if you’re getting stuck and just can’t find the sound you’re looking for, delete the entire plugin chain and start over. Think logically. Start with EQ. Pull your favorite EQ and start trying out some presets to get a new vibe (I love presets for this because they aren’t what you created, someone else did so you’re always on new ground). Once you have something, think about dynamics, don’t do what you always do, pull up something new. Experimenting is the key. Use your ears and hear your way out of the problem (if need be switch to headphones or speakers or your cell phone!). One of two things always happens to me when I do this. Either you find a new and often better way to do things or you learn that your original way actually sounded pretty good. Just don’t give up, keep experimenting, it’ll lock in eventually. One thing you can always experiment with is pan (careful here). If things sound weird, pan off some of the FX or tracks to the side a bit and give your mix some depth. I love using the PAZ-Analyzer to check the width of my mix.

Well that’s about it for this week, I was already a bit longer than I wanted but hopefully it has been a helpful read. As always if you have any questions sound off in the comments below or on Facebook. Next week I’ll be going over some of the ways I dial in a mix for broadcast and how I manage multiple songs that will be played back to back using automation. I’ll also be digging into mix relationships as well and talking about ways I mitigate bleed (especially in the drums). Sign up at this link to subscribe to the blog and you’ll get an email when that goes live! Remember we are all in this together, see you next week! 
How To: Making a Broadcast Mix – Part 2

Welcome back to part 2 of our “Making a Broadcast Mix” series. Last week I talked through my recording process. Hopefully that was helpful and gave you a few things to think about the next time you need to record. This week is all about getting your showfile setup for mixing. Whether you’re using Logic Pro, Pro Tools, Cubase, or Reaper, at some point you are bringing all the files in and getting setup. Hopefully at this point, you have a template with some bussing and FX setup but if you don’t this is when you’d get that going as well. I’d recommend always setting up at least the bussing before you import tracks so you can start saving templates without all the files muddying the waters.

Now is the time to start dropping in the tracks. If you weren’t able to label the tracks in your recording DAW make sure you drop them in the right spot. If you have some stereo tracks that were recorded as two mono tracks you can either sum them in the box or join them with the help of your DAW. If you decide to join them, make sure you disable any processing you have active and pan them accordingly to ensure you are getting what you want. Globally, I’ll usually have each group of inputs summed in a buss first. Then all of those busses (i.e. – drums, instruments, tracks, etc) sum to one “music” buss. All of the speech vocal sum to a “vocal” buss which then gets summed with the aforementioned music buss, and a third speech buss. This allows for group compression if needed and the ability to move one fader in small increments if the artist/customer would like to make global changes (like if they want just a bit extra vocal throughout). 

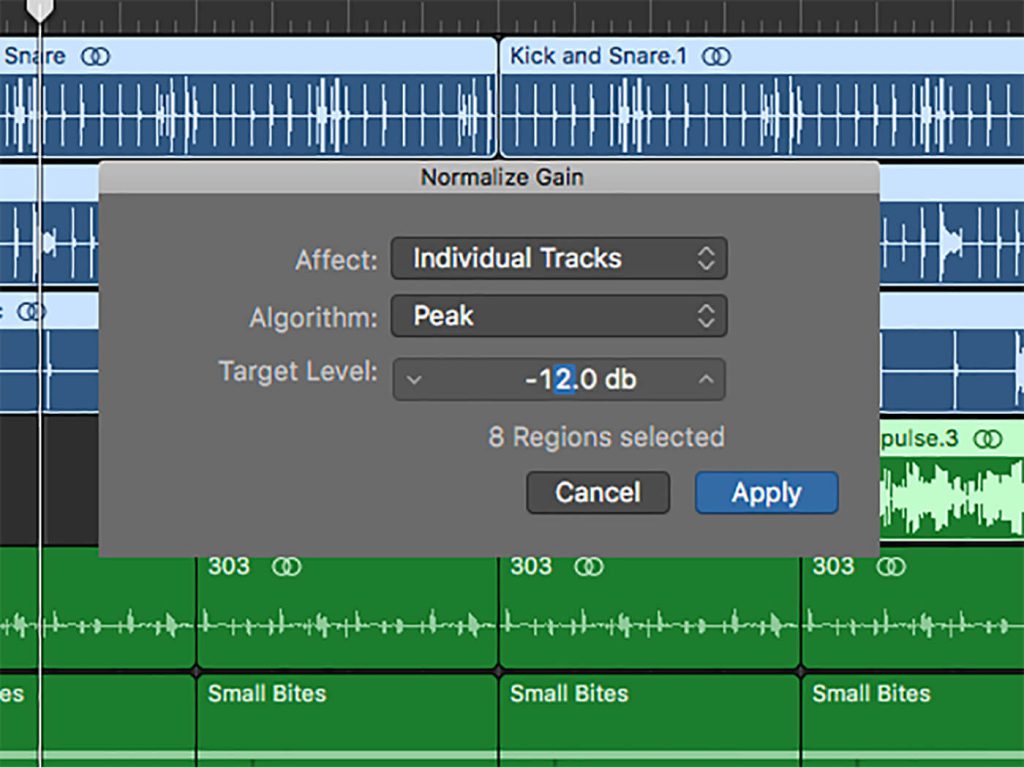
After that’s done you have a choice to make. You can normalize all your tracks to the same point (usually ~12dbfs) or just add or subtract gain as you need to with your workflow. Most of the time I just add or subtract gain through the use a gain plugin and manually change it when needed but I’ve started to experiment with normalizing those things I always find myself gaining up (for me it’s been the tracks inputs from Ableton). Just remember, when you gain or normalize, you are also bringing up the noise floor of that track. 

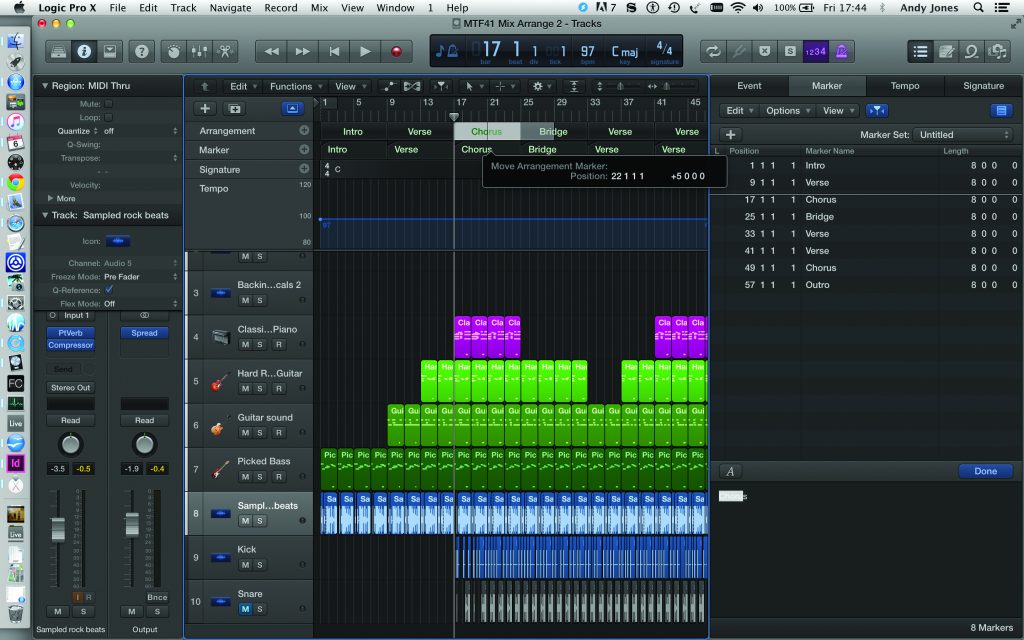
This next step is important, though it isn’t very fun to complete. You really need to set markers for your recording. Not only will this help you navigate quickly as you mix things but it will also be helpful for anyone who opens up your files down the road. I am usually doing one file now for multiple songs as well as speaking portions so I insert markers for the beginning of the section and the end. I also try and use this time to get familiar with the tracks in their “untouched” state and make notes if I need to. I’m only present for the recording every other week right now and so this has been a great time to hear things raw so I have a frame of reference when I get to work. Initially I would also use these markers to help expedite the editing process (cutting out dead space) I don’t do this anymore as I’ve gotten more and more into fader automation. If the fader is all the way down that’s the same thing so you can save yourself a bit of time if you’d like here. 

Well that’s it for this week. Next week we will go over what’s next, the processing! Probably my favorite phase as I get to get out the toolbox (powered by Waves) and get everything cleaned up and dialed in before the real magic happens. We will go over everything from EQ to dynamics so be sure to keep an eye out for that post. If you want to receive an email with a link as soon as it’s live, sign up at this link to subscribe! As always, if you have any questions or thoughts, please don’t hesitate to comment below or on Facebook. I love hearing from you guys and reach back whenever I can! See you all on the flipside!

How To: Making a Broadcast Mix – Part 1

Welcome to a new series this week. In light of current events and the new need to develop our studio skills I thought I’d share what I’ve learned so far and talk through the process I’ve developed to build a consistent broadcast mix from week to week. To preface this entire series I do want to say that I am not studio trained. The first week of quarantine I basically watched every series and webinar I could find about mixing in the box and put together my template in Logic with every tip and trick I found. I feel as though I’ve landed on a good system that can be translated to whoever is interested. My hope is that this series summarizes not only what I learned from those webinars but also the 8 or so weeks of mixing I’ve already done and might save you some time as you continue to learn yourself. So, to help explain it and not have these be term papers, I’ve split this up into 7 weeks. Yep, 7 weeks. This first week we will talk about our recording process, what we do, how we do it, etc. Then next week and the following weeks we’ll talk about my ingest process, setting up the processing, mixing, bouncing, how I farm out the review process, and lastly some tips and tricks. It’s going to be a big series. If you need help now please don’t hesitate to email me at daniel@studiostagelive.com and I’d love to setup a meeting to help out. The way I see it we are all in this together as an audio community during this time. 

So this first week is all about recording. We have a multitracking rig that I built, that tracks literally everything for us. It can do 96 inputs at 96k (our consoles run at 96k). But if you don’t have the ability to track that many inputs, don’t be afraid to get aggressive in what you cut. Really sit down and think about what you’ll actually use. For instance, we usually have a mic on each brass piece in our drum set but we only really use the kick, snare, toms, and overheads in the mix. Also, while it would be preferable to record a stereo piano, if things are tight, just grab the mono send.  After you get your inputs squared away mic placement and strategy is incredibly important. It is unlikely that many have access to a sound stage for a super clean recording so be sure and look at and check your mics before you get started. For instance if you have a cardioid mic on a string player, be sure to put to point the null where it would be most beneficial (i.e. pointed towards the drums). Also, it’s just good to get into the habit of eyeing all your mics before you start anything whether it’s a live event, recording, or a broadcast. 

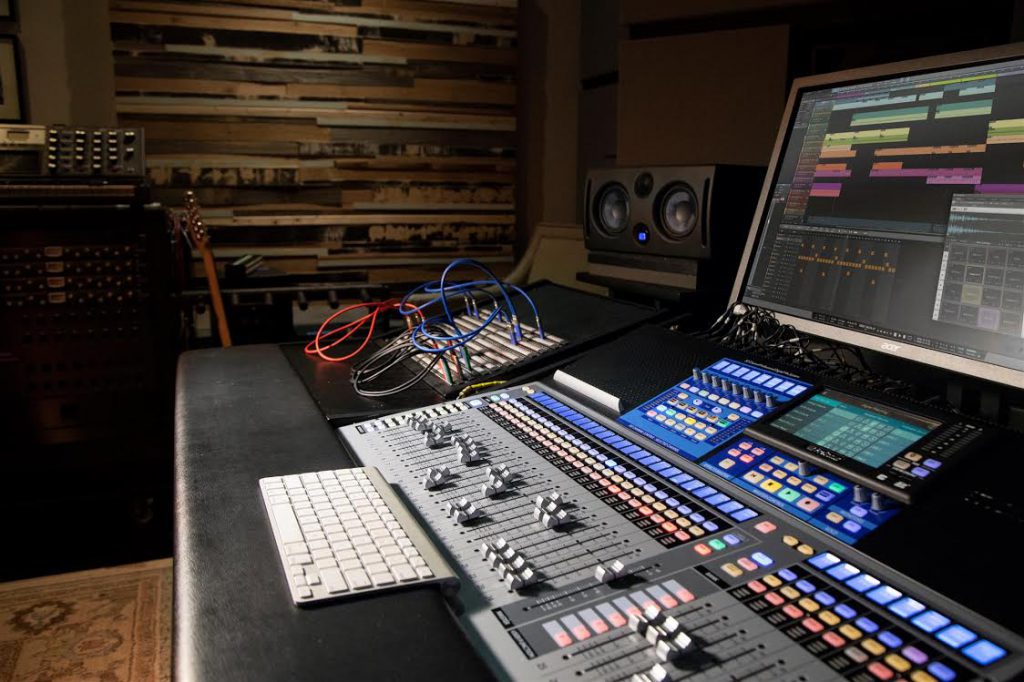
Next, it’s preamp time. As you are making your way through soundcheck, be sure to keep an eye on your preamps. Clipping is the big one. If your drummer plays harder and harder the longer you run, go ahead and dip it down a bit now. Make sure to hear that huge solo from your electric players before you start recording as well. If you have digital trim that is a great way to turn the mic pre down to ensure clean recordings and still give the artists plenty of signal in their ears. Another thing I love to do is tweak your recording DAW to show all your meters (pictured above). Whether that is in the mixer or by each channel. I then set the clips to stay lit until released so I can know whether or not something has peaked in the last run whether or not I see it happen. Once you’re preamps are dialed in, it’s time to check your DAW of choice. Be sure you’re recording at the right settings. We record at 96k because that’s what our consoles operate at but you may not be able to record at that sample rate (and that is ok). The standard sample rate for video is 48k and the standard for audio only (as in not combined with video) is 44.1k. Bit rate depth standards fluctuate but they are usually 16 or 24 bits (usually 24). Be sure to coordinate with your video team if applicable and make sure that they are following the same audio standards you are using or in their final export.

Another big thing to capture is whatever your video team is doing. At least live, as mixers, we are responding to what’s happening in front of us and in the studio we have the artists to react to but if you’re completely in the box you can easily lose sight of the musicality happening. I love bringing that video recording home, even if it’s rough and incorporating that into my DAW session (most if not all DAWs have this option). Then when I’m mixing, I can have that perspective and be mixing with the feed in mind. As you’re recording be sure to be listening as well. 

When the recording is done, in Reaper (our recording DAW of choice), I do a batch convert down to 48k right on the machine. Because we are downsampling it’s a fairly quick and painless process. Not only is Reaper very efficient at this process but also very consistent. I have never had an issue with any of our recordings over the last 5-6 years that was a problem within Reaper and that continues to hold. But, I still bring the original 96k files, the newly converted 48k files, and the broadcast feed, with me so that if I have any issues in the box I have everything I could possibly need. I could mix in the box at 96k but the processing overhead is a pretty steep price to pay. We will be down-sampling later anyway so we just go ahead and dump down to our final sample rate and enjoy the extra processing power on the back end. 

Well that’s about it for today folks. I hope this insight into our recording process has been helpful. After the post here I’m going to list our general input list so you can see what I typically record. If you have any questions please feel free to comment below, leave a message on facebook, or email me at daniel@studiostagelive.com. As I mentioned earlier, next week I’ll be going through my ingest process into Logic Pro and talking about what that first session in the box looks like. See you all next week!

Input List Template:
-Kick
-Snare Top
-Snare Bottom
-HiHat
-Tom 1 (if used)
-Tom 2
-Tom 3 (if used)
-Ride
-OVH (stereo pair)
-Bass
-EL 1
-EL 2
-ACT 1
-ACT 2
-Piano (stereo)
-Mainstage (4 stereo pairs)
-Vox 1
-Vox 2
-Vox 3
-Vox 4
-Vox 5
-Ableton (14 channels plus Click/Guide)
-Room Mic Pair
(that’s roughly ~45 inputs on the average week)