This week it’s time to talk kick and snare. Just in case you missed it the first 2 weeks discussed my waves multirack vocal chain and my bass guitar chain. This series is all about how we utilize the waves ecosystem to improve our mix and add increased control over various elements within our sound. Please remember that these posts are very subjective to my room and my setup. Any EQ settings are what work with our room and how we have our system setup. Be sure to always test and test and play around with my ideas in your room before you decide if they are what you go with. The idea for these posts ais to share what I’m doing so you can glean principles and ideas and then apply them with the tools you have in your mix. I am a very practical guy, I never went to school for what I’m doing, I’ve just been mixing for almost 20 years in a variety of situations learning from a good blend of teachers and learning a mix of ideologies concerning mixing both live and in the studio. Everything I do with waves follows those ideas very closely. I use waves plugins like specialized tools to achieve a purpose that I’m looking for. The best thing you can do is A/B everything you add or take away and make sure that you are improving it with every step you take. In that light, we are talking about the kick and snare this week. The signal chain I use for our live environment is often what I end up with in our studio as well if I’m mixing down a song. You’ll notice that I’m not gating these within waves. That’s because I’m using drum triggers and using the on-board gates in my console. This can be done within waves but our on-board processing is quite good so I just don’t need to do it within waves. I also record these triggers in my files because than I can use these in the studio world after it’s all over where I would be setting up side-chained gates like you would normally see. Just about every gate plugin has the option for external triggering so just pick your poison and go with it!
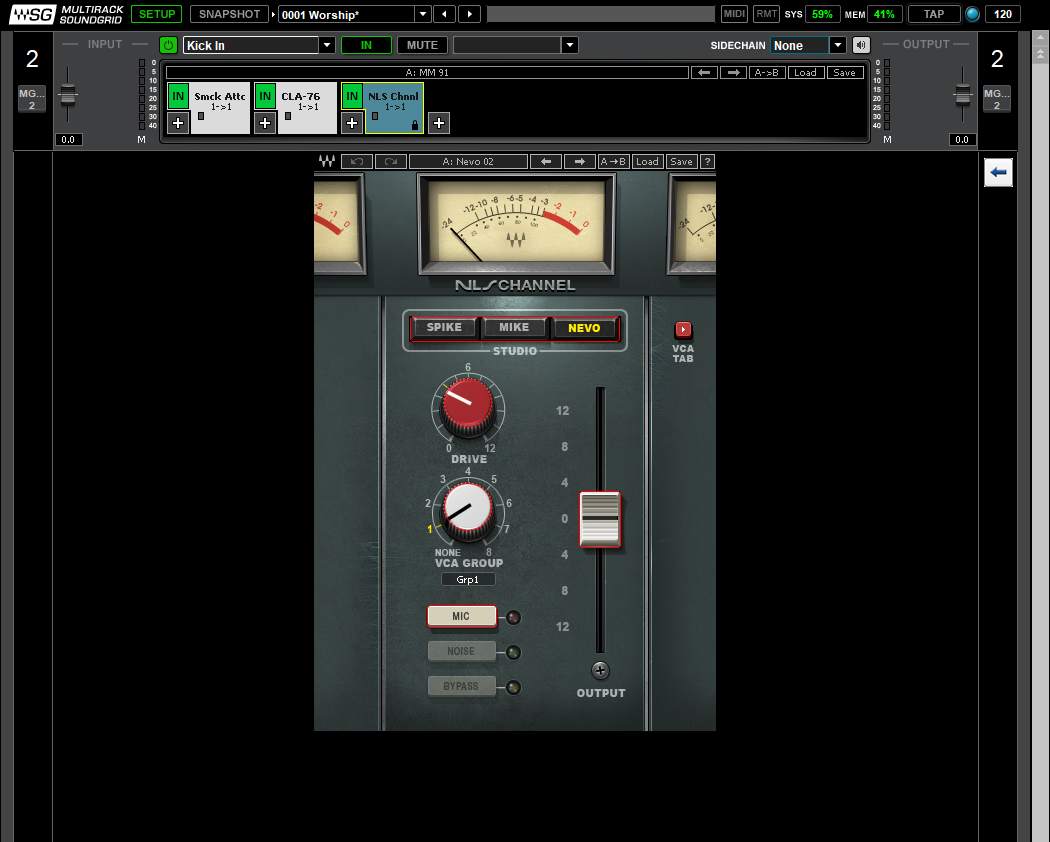
We also double patch our kick drum. Back in the day we used two different mics but recently, about six months ago, I finally gave up the ghost and swapped to only using the shure beta 91A. So one channel controls the punch of the kick and the other controls the slap. Because we are only using one mic there is no phasing issues and we use the onboard EQ to get the desired sounds from each side. In waves they are called Kick Out and Kick In (kick out is the punch, kick in is the slap). Having the ability to on the fly change the tone of the kick has been really helpful to have because of the variety of music we play on a given weekend.
The first is the F6 dynamically adding a bit of punch where I like to feel it in the mix. I use the onboard EQ to help clean out the mud and use the F6 to enhance what I want to hear. I use the F6 because I don’t always want to add the amount it starts at. If the drummer is laying into the kit, the compressor will attenuate to compensate. Bands 3 and 4 both attenuate frequencies that need some extra help at higher volumes. Than the signal hits the CLA-76which is one of my favorite compressors. I love it on vocals and percussive instruments because it is so fast and so transparent. You almost don’t realize you are hearing a compressor. There aren’t many compressors that can attack/release as fast as the 1176. At the end of the chain, as you have read, is the NLS plugin. I have this on everything and love what it does to the mix as a whole at a global level. The key here is to be sure to not set it and forget, be sure to check in every soundcheck and make sure you are using the model that best compliments the sound you want to achieve. That is it, I know some folks will line up plugin after plugin on the kick drum but I try to keep it simple. It’s really easy to over process the drums and the kick and snare are an easy way to keep it under control. With the kick in input, the chain is about the same. However with the addition of the smack attack first in line instead of the F6. We love to use this plugin to really shape the attack side of the kick so we can utilize the transients a bit better overall. By default we are only adding attack but sometimes I will end up shaping sustain for those slower songs where I’m turning off the gates or if I have the gate staying open longer. Either way, this plug also shows what it’s doing over time which makes using it very easy and it has been a great tool to have cued up and ready to go when something unique is needed. From there it goes through the CLA76 and lastly hits the NLS plugin. The difference in being that we use the CLA-76 a bit more heavy handedly on the kick in mic starting at a high default ratio and running into that threshold almost instantly. This really helps contain the clap to a very manageable level while still releasing fast enough that each hit is driving into a freshly reset compressor.
Next is the snare, we also use two different inputs for the snare, top and bottom. The top mic gives us that crack of the snare and the bottom gives us that rattle that we would definitely miss without a mic down there to pick it up. While it’s not in my default chain, I use InPhase to time-align these too mics (using the plugin to find the delay required and then adding that delay on the soundboard itself so if waves dies for whatever reason, I still have an aligned snare hit). Because the bottom mic is farther away from the point of impact I’m delaying the top mic back to the bottom mic (usually a difference of at or below 1 ms). While this isn’t required, it is a little thing that can be done to make sure everything sounds the way it should with no cancellation or echos. Both inputs get the smack attack treatment with the bottom snare getting an enhanced treatment of what I do to the top mic. The onboard gates we use on the snare are made sure to be open long enough (sustain times of around 300ms with 30-50ms of hold) that the sustain we add to the inputs is heard. Smack attack is than dealing with only the snare sounds and then the gates kick in and deal with the bleed from the hi-hat, ride, and cymbals. Each input is then processed through the CLA-76. By default it starts with the black version of the plugin but I sometimes find myself switching the top to the blue model which responds just a little differently. It’s a subtle difference but sometimes it’s merited. For the bottom snare it’s off to NLS but to the top snare, we have torque ready to go if needed. On big shows, we find ourselves playing around with this plugin helping the snare tones sit better with each song but for the standard weekends, we just disable it. Before we got our new snare I was using it a bit more but now that we have a big ‘ole 7 inch deep snare, I don’t usually need to tune it down even farther. For those of you with smaller snares, I’d highly suggest at least demoing this plugin in your rig and playing around with raising or dropping the pitch of the snare to line up with the songs key or just dropping it down a bit so it fits better with your mix, it’ll change the game for you, I promise! After torque, it’s off to NLS and that’s it for the Snare.
Well that’s it for this week. Hopefully you found a couple things you can try in your own environment either with the waves plugins yourself or with something close on your console or in your DAW. If you have any questions or comments please feel free to comment below or email me at daniel@studiostagelive.com. Next week we will be going through how I process both of our electric guitar inputs to bring a bit of diversity between the two all while making them play nice together as well. See you then!

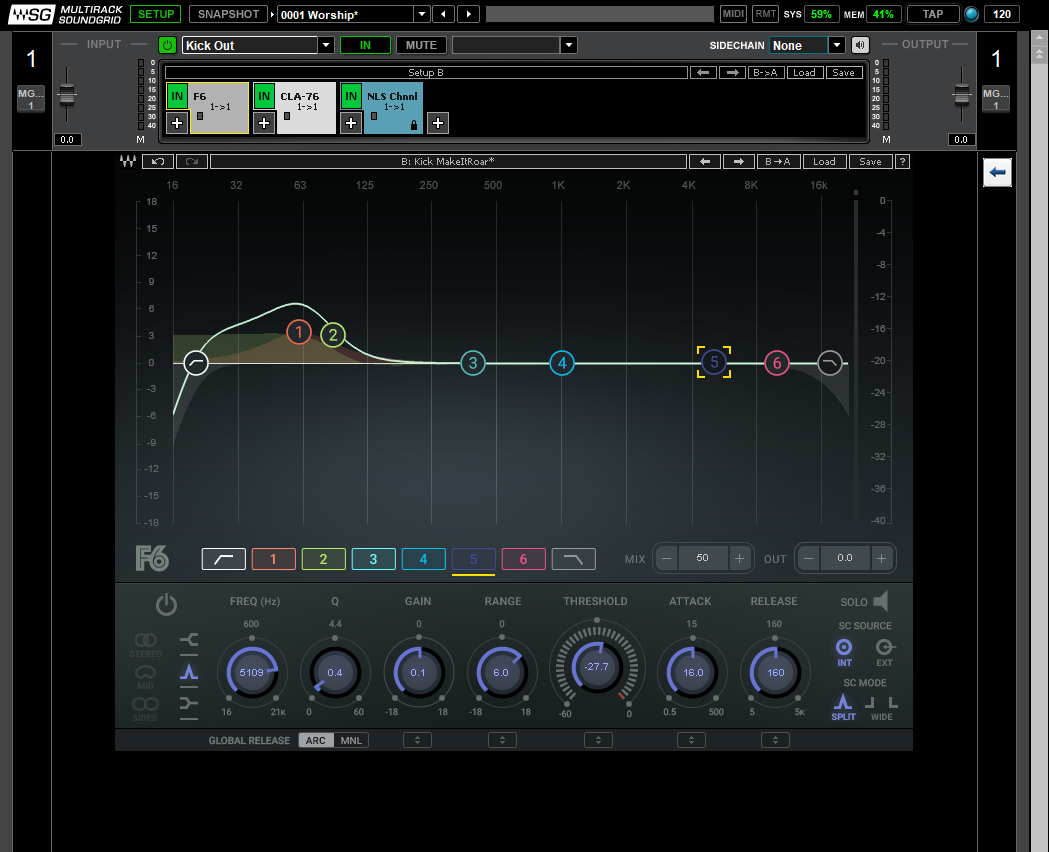
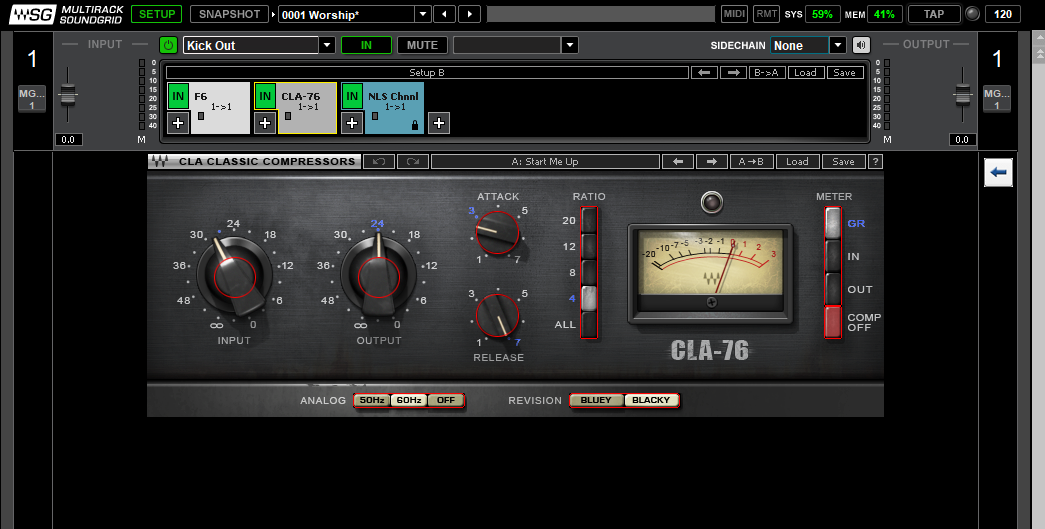
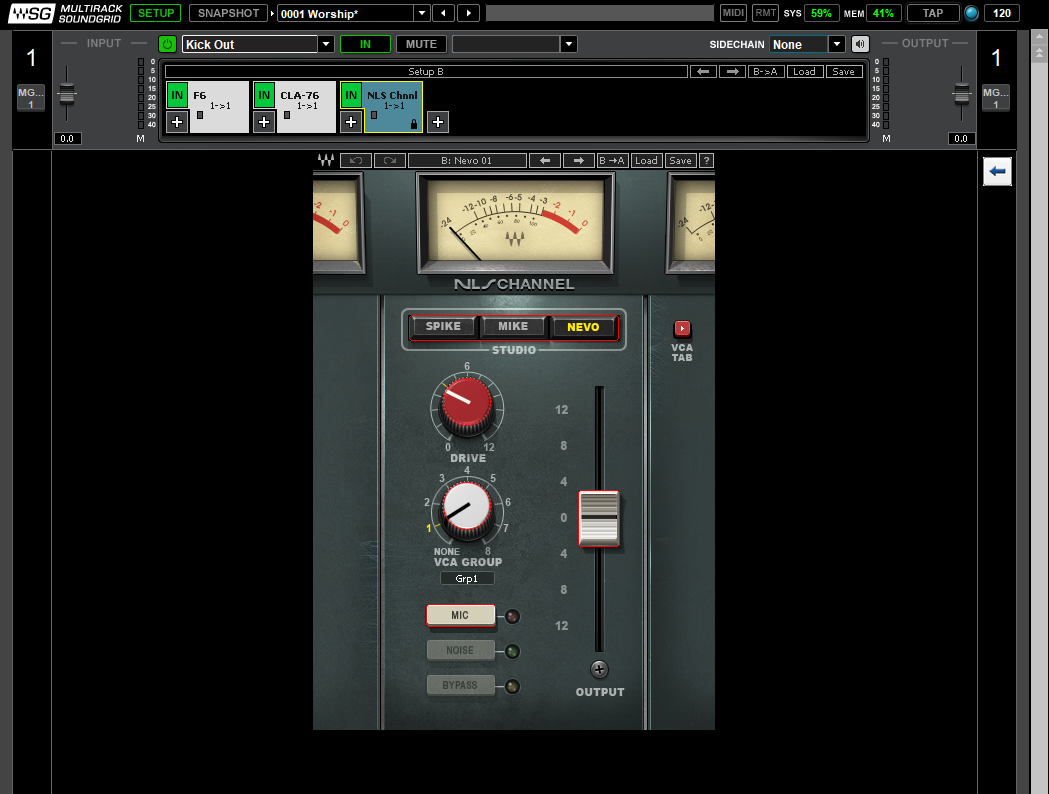 The first is the F6 dynamically adding a bit of punch where I like to feel it in the mix. I use the onboard EQ to help clean out the mud and use the F6 to enhance what I want to hear. I use the F6 because I don’t always want to add the amount it starts at. If the drummer is laying into the kit, the compressor will attenuate to compensate. Bands 3 and 4 both attenuate frequencies that need some extra help at higher volumes. Than the signal hits the CLA-76 which is one of my favorite compressors. I love it on vocals and percussive instruments because it is so fast and so transparent. You almost don’t realize you are hearing a compressor. There aren’t many compressors that can attack/release as fast as the 1176. At the end of the chain, as you have read, is the NLS plugin. I have this on everything and love what it does to the mix as a whole at a global level. The key here is to be sure to not set it and forget, be sure to check in every soundcheck and make sure you are using the model that best compliments the sound you want to achieve. That is it, I know some folks will line up plugin after plugin on the kick drum but I try to keep it simple. It’s really easy to over process the drums and the kick and snare are an easy way to keep it under control.
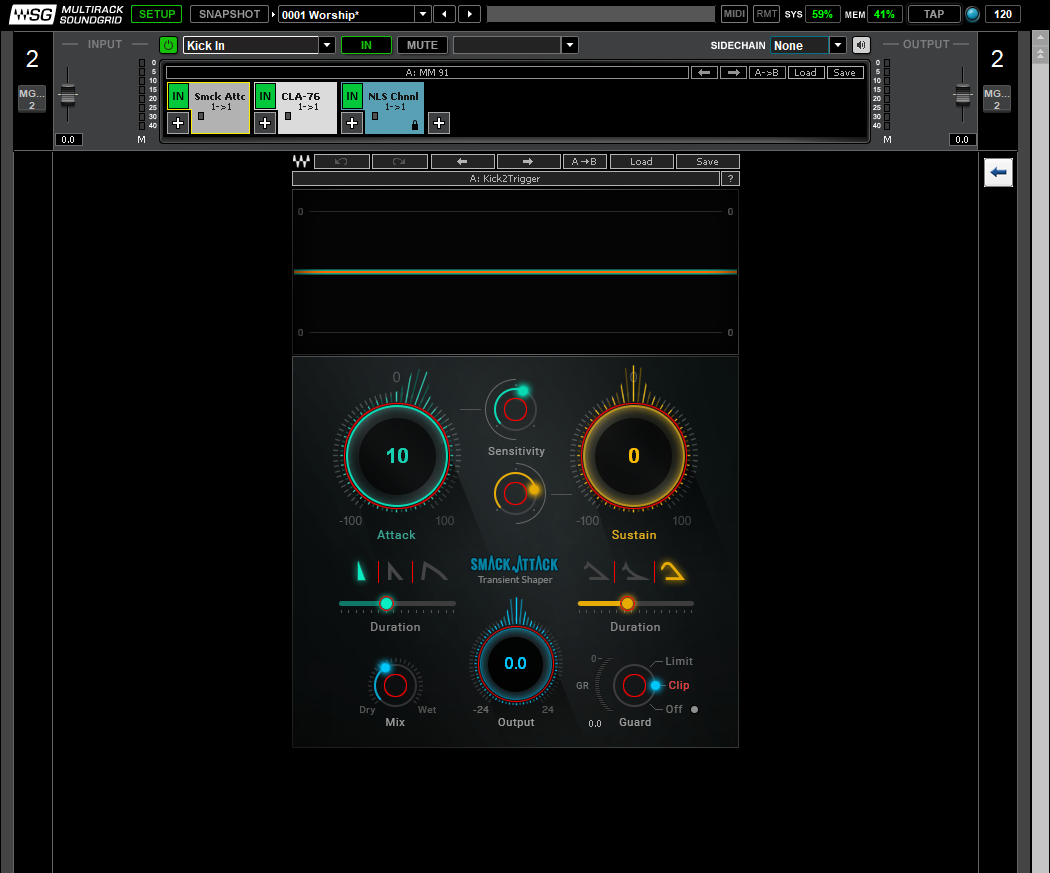

 With the kick in input, the chain is about the same. However with the addition of the smack attack first in line instead of the F6. We love to use this plugin to really shape the attack side of the kick so we can utilize the transients a bit better overall. By default we are only adding attack but sometimes I will end up shaping sustain for those slower songs where I’m turning off the gates or if I have the gate staying open longer. Either way, this plug also shows what it’s doing over time which makes using it very easy and it has been a great tool to have cued up and ready to go when something unique is needed. From there it goes through the CLA76 and lastly hits the NLS plugin. The difference in being that we use the CLA-76 a bit more heavy handedly on the kick in mic starting at a high default ratio and running into that threshold almost instantly. This really helps contain the clap to a very manageable level while still releasing fast enough that each hit is driving into a freshly reset compressor.
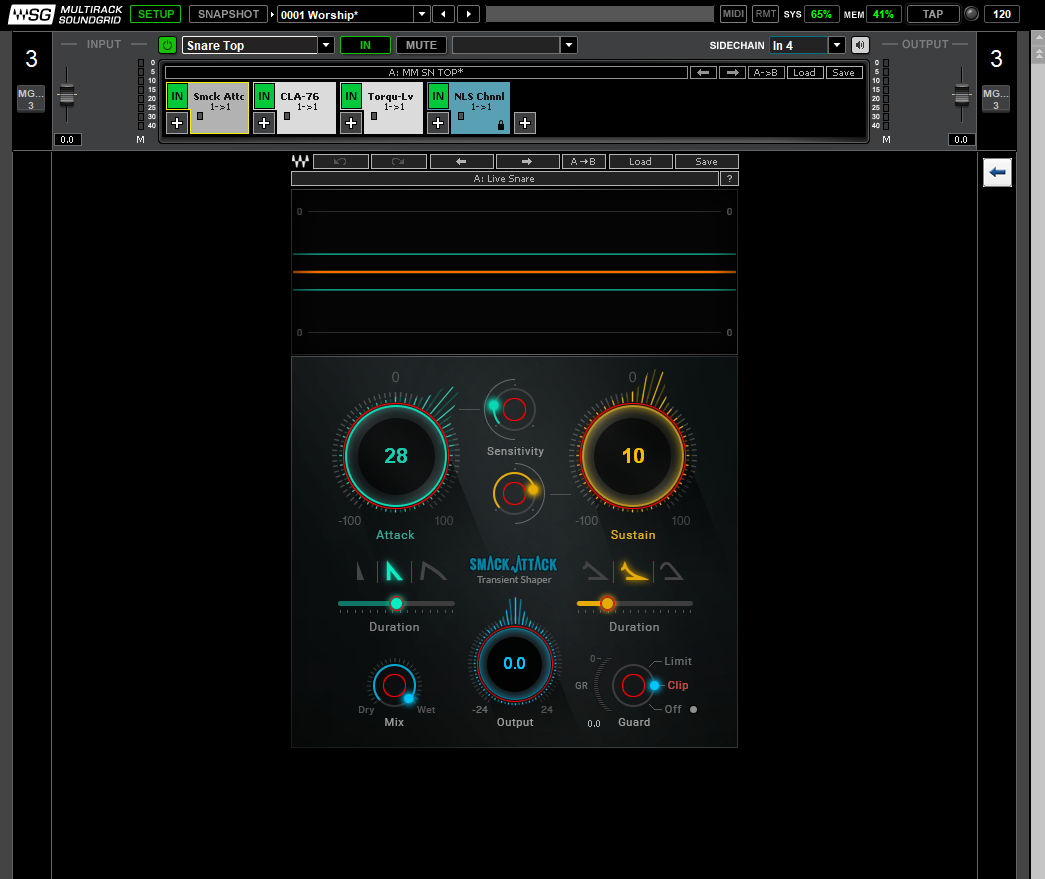
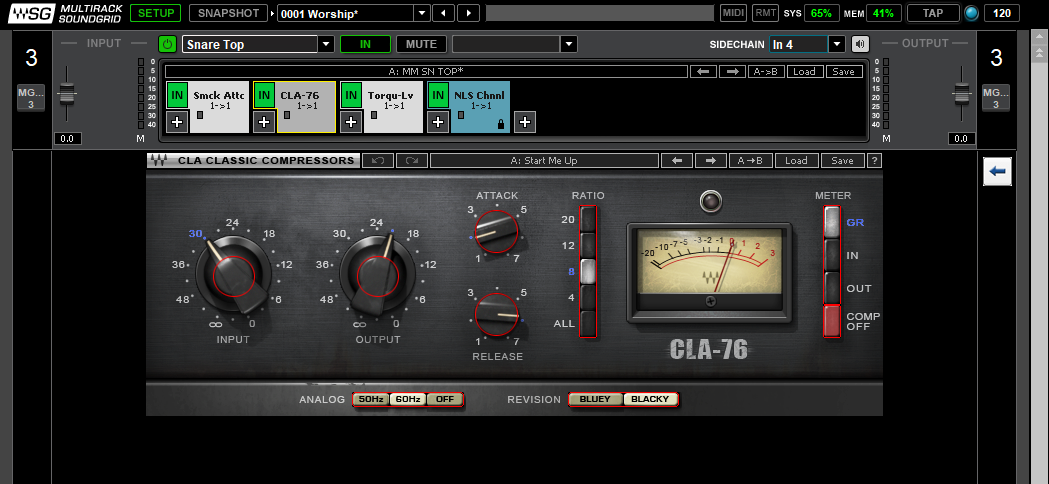
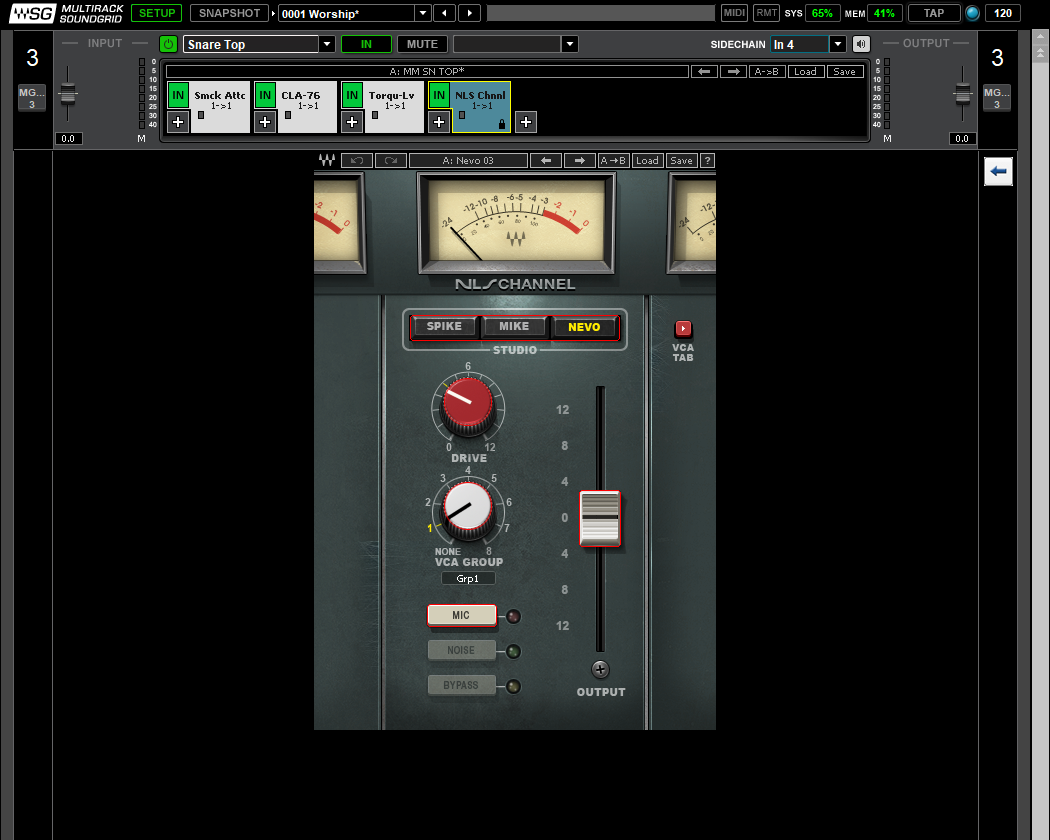 Next is the snare, we also use two different inputs for the snare, top and bottom. The top mic gives us that crack of the snare and the bottom gives us that rattle that we would definitely miss without a mic down there to pick it up. While it’s not in my default chain, I use InPhase to time-align these too mics (using the plugin to find the delay required and then adding that delay on the soundboard itself so if waves dies for whatever reason, I still have an aligned snare hit). Because the bottom mic is farther away from the point of impact I’m delaying the top mic back to the bottom mic (usually a difference of at or below 1 ms). While this isn’t required, it is a little thing that can be done to make sure everything sounds the way it should with no cancellation or echos. Both inputs get the smack attack treatment with the bottom snare getting an enhanced treatment of what I do to the top mic. The onboard gates we use on the snare are made sure to be open long enough (sustain times of around 300ms with 30-50ms of hold) that the sustain we add to the inputs is heard. Smack attack is than dealing with only the snare sounds and then the gates kick in and deal with the bleed from the hi-hat, ride, and cymbals. Each input is then processed through the CLA-76. By default it starts with the black version of the plugin but I sometimes find myself switching the top to the blue model which responds just a little differently. It’s a subtle difference but sometimes it’s merited.
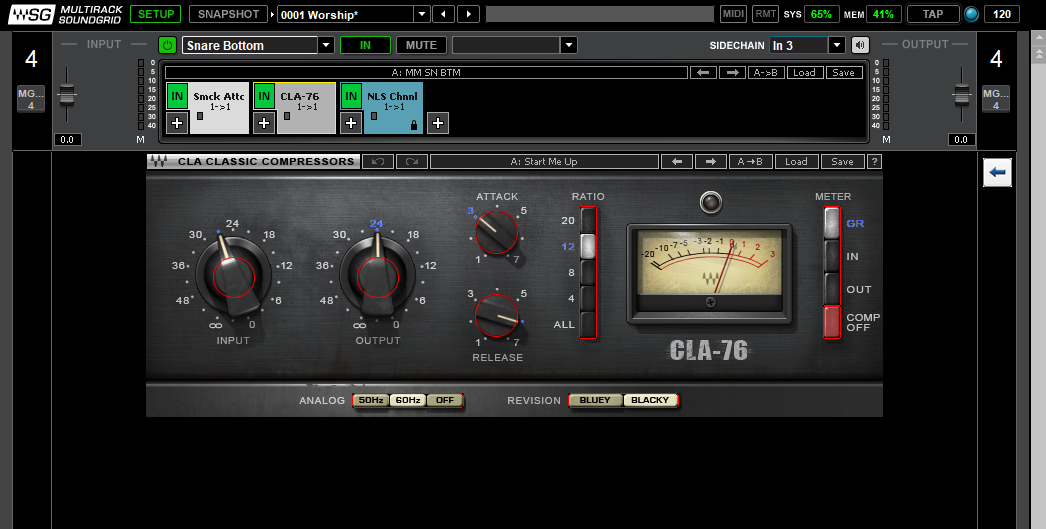
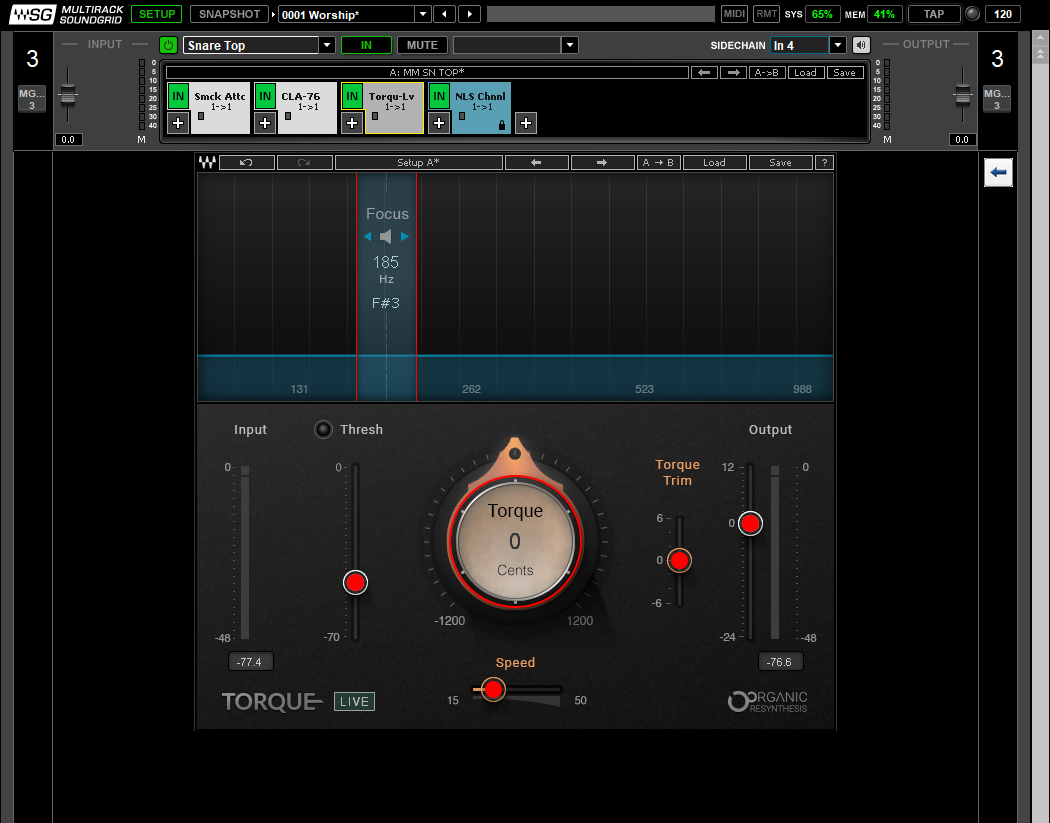
 For the bottom snare it’s off to NLS but to the top snare, we have torque ready to go if needed. On big shows, we find ourselves playing around with this plugin helping the snare tones sit better with each song but for the standard weekends, we just disable it. Before we got our new snare I was using it a bit more but now that we have a big ‘ole 7 inch deep snare, I don’t usually need to tune it down even farther. For those of you with smaller snares, I’d highly suggest at least demoing this plugin in your rig and playing around with raising or dropping the pitch of the snare to line up with the songs key or just dropping it down a bit so it fits better with your mix, it’ll change the game for you, I promise! After torque, it’s off to NLS and that’s it for the Snare.
Well that’s it for this week. Hopefully you found a couple things you can try in your own environment either with the waves plugins yourself or with something close on your console or in your DAW. If you have any questions or comments please feel free to comment below or email me at daniel@studiostagelive.com. Next week we will be going through how I process both of our electric guitar inputs to bring a bit of diversity between the two all while making them play nice together as well. See you then!
For the bottom snare it’s off to NLS but to the top snare, we have torque ready to go if needed. On big shows, we find ourselves playing around with this plugin helping the snare tones sit better with each song but for the standard weekends, we just disable it. Before we got our new snare I was using it a bit more but now that we have a big ‘ole 7 inch deep snare, I don’t usually need to tune it down even farther. For those of you with smaller snares, I’d highly suggest at least demoing this plugin in your rig and playing around with raising or dropping the pitch of the snare to line up with the songs key or just dropping it down a bit so it fits better with your mix, it’ll change the game for you, I promise! After torque, it’s off to NLS and that’s it for the Snare.
Well that’s it for this week. Hopefully you found a couple things you can try in your own environment either with the waves plugins yourself or with something close on your console or in your DAW. If you have any questions or comments please feel free to comment below or email me at daniel@studiostagelive.com. Next week we will be going through how I process both of our electric guitar inputs to bring a bit of diversity between the two all while making them play nice together as well. See you then!