Welcome to our new 5 week series from the Tips and Tricks section. This category is all about peeking behind the curtain of what the pros do to bring their mix to the next level. This week we are going to talk about getting great Piano and Keys sounds and over the following 4 weeks we will discuss the dynamics of drums and effective gating, properly setting up guitars for wireless packs, getting the most out of your tracks inputs, and leveraging google to improve documentation and backup of your critical files. These are the topics you probably won’t hear many people talk about or see as the subject in breakouts at your local tech conferences but they are all things that if you don’t do well, will greatly impact your recording session and/or service.
As I just mentioned, this week is all about the piano and keys. We all know the battle here, feedback vs. tonality. Often by the time you’ve gotten that perfect sound from your piano with the perfect locations/combination of microphones, you then add in the band and it’s all messed up or causing all kinds of feedback with the PA at full volume. Why is that? Well to be fair, you did just put two condenser mics on a stage with a live drum set. Be something must be done. You have that piano out there for two probably reasons, the first and most common is just that your grand piano sounds better than your keyboard and brings a certain aesthetic to the stage that people like to see. Probably a lot better. The second is feedback and bleed. Whenever you mic up piano on a band stage with a drum set and full band, you are always fighting bleed from your PA and the drum set and that all brings feedback. Believe it or not there is a solution to be had, in fact, I’m going to propose two!
The first option involves making sure your have a great keyboard or if you can’t afford a new one, have spent a fair amount of time going through and picking the right settings on what you have and going out into your space with the keyboard and really dialing in the sound your PA gives it as well. Even cheap keyboards can be made to sound fairly good with some effort. If you do have a little money than I’d recommend one of two options. The first is to look for a Nord Stage keyboard. This is the keyboard you will see a lot of touring bands use. That is because it sounds amazing. The keys are perfectly weighted and feel like you are playing a real piano rather than just being spring loaded like most keyboard. If you can’t afford the full Nord Stage than they have a version that is just piano without the extra sounds and patched for pads or organ, it’s called the Nord Piano and is priced a bit more affordably. If that is still a bit steep for you check out Roland’s new Juno Keyboard. It’s keys are also weighted really well and this keyboard has been critically acclaimed by several recording artists. But I know what you are thinking, it looks like a keyboard. It doesn’t have that grand piano or upright piano look that I really like. Well, there is a solution for that as well. A few years ago before we had really refined our keys setup at CCC we had a guest artist come in for our Christmas show and he needed a piano to play. We knew that we didn’t want to have a live mic’d baby grand on stage with the band but that we needed the piano to sound amazing. So, we took out the action of the piano (the keys, pedal system, basically everything but the strings) and slid in our Nord Stage in the hole we had just created. We then hid all the necessary cables by using the piano structure itself to hide everything. With that setup, we got the look of a baby grand on stage for Christmas with the lid open and shiny brass strings, with the clean and crisp sound of the Nord keyboard without any of the feedback or bleed issues we would usually have. For the first time we had our cake and ate it too! But it doesn’t take a baby grand piano to do this, most 88 key keyboards will fit within upright pianos as well. At CCC, we had a volunteer who wanted to get rid of her family’s half-height upright simply because no one was playing it anymore so we took it, took the action out and slid in our Nord and voila, every weekend we have great keyboard sounds within the aesthetic feels of an upright piano shell. No microphones needed, just a pair of DIs for the outputs of the keyboard. This also works well in the studio for those music video shoots as well and larger band recordings where bleed can be a real issue but aesthetics matter.
The other option a lot of touring groups and churches alike are doing now is using a program called Mainstage. This is a keyboard software that is sort of like the dark horse of the apple software suite in that it never seems to get enough attention but a ton of people are using it. Mainstage is an awesome little $30 piece of software capable of so many things. It comes with a generic suite of sounds that are pretty good but where the good stuff comes in is the sounds you can add. The top three that we use are Native Instruments, Omnisphere, and Alicia’s Keys. Yes, you read that right. There is a patch for Mainstage that is the model of the keyboard that Alicia Keys uses not only for her album but also for her tours. If you pick up mainstage, buy an apple computer (or if you already have one), and pickup some good sounds, mainstage becomes basically the cost of a Nord Piano (potentially cheaper if you already have a mac to run it on). But remember the keyboard you get to work with mainstage is just as important. We used to to use an Akai keyboard that worked pretty well but after a few issues, we just switched to our Nord, which has midi connectivity, to just be the controller for us. All of our players prefer to use the keyboard on the Nord over everything else we’ve used in the past so it just worked out really well. We also wire in the main outputs up so we have a backup keyboard if Mainstage decides to just not work (haven’t had this happen yet but we are ready just in case). There is a definite learning curve here but with mainstage you can get Leslie B3 models, really nice and smooth electric pianos, pads, strings, or really anything you desire. I believe you can also make your own patches from recorded sounds. On top of that, all the sounds are of great quality and can be tweaked to work well in your space or desired sound. Mainstage is basically a plugin rack for your piano. When used wisely, it can be one of the best things you can do. You can also, for that extra cherry on top, can download and use the mainstage patches from bands like hillsong or elevation when you sing one of their songs to get the actual sounds they use.
Well that is it for this primer on great piano sounds. Be sure to comment below with the tricks you use to get that perfect piano sound in your mix. I love learning something new so please, feel free to email me as well at daniel@studiostagelive.com. As always, if you are new to the blog and would like to receive weekly updates or just when new content is released just follow this link, fill out the form real quick, and hit submit. See you next week!
Do you remember this video. It floated around the internet a few years back and I didn’t really think much of it other than the fact that I felt this guys pain of going frantic during the show trying to keep everything together. These days my mixing technique is a bit different. I’ve been mixing for almost 18 years now, most of that has been for a church or para-church organization. I’ve seen worship styles come and go, songs be popular, get oversung, and fall away. I’ve mixed on several boards including but not limited to a GL3300, M7CL, LS9, Avid Venue, SC48, Mackie VLZ 2404, and many more. All this is to say, there have been few things I’ve seen that have changed the way I do things so drastically that I can’t not do them if I have the option to. The first was the use of verb which I experienced when I first went out on my own at college and gained access to outboard verbs and the second was just about 5 years ago when I started mixing at Christ Community on our previous console, Avid Venue. What I experienced was using scenes and automating the console. Never before had I had the opportunity to tweak so much about each song I was mixing and be able to have all those settings saved and recalled in an instant for every song in the set. With the advent of digital consoles and now their proliferation amongst audio professionals it is possible for many of us to automate but it seems like many of us don’t. So, this week, I wanted to take some time and talk through the pros and cons of automating and how I get around those issues and get to utilize those strengths on any given weekend here at CCC. I’m going to do the best that I can to do this as unbiased as possible but I am heavily in support of using automation if you are able to do it effectively. I am going to start with the cons than move on to the benefits that creating scenes within your console can provide.
Probably the biggest reason why some audio techs don’t automate is just that something might shut off or turn on when it shouldn’t. Whether it’s caused by a programming mistake or a glitch in the sound board, if say the pastor’s mic or a lead vocalist for a concert does not come on when it’s time for them to speak, there is an issue and you rest assured people will turn around and look (I know I will). Or maybe it’s just something buried down deep in the fader layers on your console comes on or does something you didn’t want. These are all valid reasons and risks that every technician who automates, including myself, must understand and work to prevent. The key to this one however is not letting the fear of failure prevent you from expanding your skills and upping your game. Mistakes will happen with scenes or without, it’s how respond to our mistakes that can shape our future as audio engineers. The biggest deterrent to this is just to commit to doing it and practice. Whether that is practicing with multi-track playback or just regular old experimentation in some down time, don’t knock it until you’ve actually tried it.
The next big thing that might be the biggest hurdle to most technicians is the time necessary to setup a show. Whether you’re a volunteer at a church or an hourly tech in a studio, time is always precious. Unless you have multi-track recording bands are only stage for as little as possible so every second you have to be mixing during rehearsal is basically gold. On boards that are already setup and working it may only take a half hour just spent in making the beginning scenes. But if you are newer to a console or the automation system isn’t very robust, it may take quite awhile to get things where they need to be in order for using scenes to be helpful. To help combat this issue I often budget and plan for time to get this setup during rehearsal or stay after to get it ready. I have to upload the rehearsal recording anyway so it isn’t that much extra time. Also, the more you automate, the faster you will be able to set things up. It used to take 45 minutes or so for me to get everything set the way it needs to be but now, I can make, label, and tune 15-20 scenes for a weekend in about 5-10 minutes. This is simply because I do it every weekend and I’m committed to automating everything that it makes sense to automate.
The last argument against automation that I’d like to talk about is that automating the board can lead to lazy mixes. Because we set each song up as engineers it’s easy to stop mixing because we’ve already done all the work. This however couldn’t be farther from the truth. Our boards aren’t listening to what they are processing and musically manipulating what they hear. That is our job as operators. We should be treating what we do as art, thus we should always be tweaking and mixing so the art doesn’t become stagnant and moves/flexes with the band as they play. Not just changing stuff to change stuff but critically listening and responding to what we hear but also anticipating what we know is coming. Because of the temptation, it’s easy for the automation system to become a handicap instead of an improvement. That’s why I don’t make scenes for instrumental sections in a song or even make multiple scenes per song. I use each scene as the saved start point for that song. The vocals are aligned and bussed correctly around the lead vocal. The instruments are setup for whatever part will be opening the song. The tracks are pre-mixed to where they need to be to start, and most importantly the snare verb is setup, with the rest of the drum set of course (wink wink).
But enough of the negative, what can automation bring to your mix? Well let me tell ya. The biggest thing is just that automating your console is like stopping time, setting all your busses and effects up, than starting it again. Or a having a personal assistant who manages to in the blink of an eye (or with some consoles fading with the time you set) getting everything unique about that song setup. Maybe this song you want more piano in the verb or need to add the acoustic to an FX send, no problem, just program it, hit go, and you’re all good to go. Because all of that gets done without your intervention, it makes it easy to make sure we actually mixing the beginning of the song not just the choruses or the endings. It used to be that you’d setup a verb for each thing you want to use with verb for that event. You had a verb setup for when a girl leads and the same thing for when it’s a guy. You’d setup presets to use with drums that you would have to flip to in a moments notice. You’d have to write down or remember all those settings to plug into the FX processor and scurry about at the beginning of the song to get them setup hoping you don’t push the wrong button and mess it all up just in time to have to abandon it. But now, I can just program those things into the scene, including FX racks so that when I hit the “Go” button, the board sets all those variables for me and when programmed correctly, works every time! Even complex routing or fading is no big deal as you can specify all of that for each scene. In monitor world it’s really helpful if you have multiple leaders and band members that really only want the lead vocal in their mix because at the beginning of each song, the board makes all those changes instantly. Just this last weekend at church I needed to mute the broadcast feed because we didn’t want broadcast a video that we didn’t have rights to which could cause us to lose our ability to stream on facebook. If I wasn’t automating, this would have been a difficult transition to nail perfectly because I’d have to bring down the band inputs, bring up the video input, prep the opps givers mic because he was up next, and fade down the broadcast output master (basically impossible to do quickly) but with scenes, I just programmed what I wanted each to do, checked it once, and hit go the rest of the weekend. Piece of cake.
Another great reason why we automate here at CCC is to bring consistency between the services. When we automate, we set each cue for how the song needs to start and mix changes from there as the song plays out. Consistent worship is a primary tenant of our tech teams. Having scenes makes sure that no matter which service you come to, the worship will be consistent and predictable and likely sound as good or better than the last time we did that song this weekend. Better you say, yep, because each time we do that song after the scene is made, I can tweak that scene to fix an issue or smooth out a transition. It literally can get better with each pass. Scenes also allow us to make changes in playback that you wouldn’t be able to do if you didn’t have a scene stored. If during rehearsal or perhaps in one of the services we realized we needed more guitar or the kick was just a bit too punchy, in between services or live during the event, we can save in a new setting which will fix the problem next time. At least for me, having saved scenes allows me to mix proactively instead of reactively. If I know my drum sounds are locked in, I can have my finger on the vocals or guitars for the start of the song where they are likely going to need to be pushed instead of trying to get all my effects and stuff set and then getting to the mix sometime around the first chorus and probably missing that opening guitar riff or encouragement from the worship leader.
Lastly, and this applies to lighting as well since they automate as well, if I have created a scene for each song and element in the service, just about anyone who knows how to use the console can step in last minute and run the show. While this doesn’t happen often, a few times in my tenure at CCC myself or one of the other guys who runs FOH will go through rehearsal and maybe even through the Saturday service, call, and say they just can’t make it in for whatever reason. That’s not a huge deal. We have at least a few scenes they they created from rehearsal or a whole show programmed, I just have to walk in, see what’s going on, and take over. To be honest, any of our team members, even our lighting guy, could walk up, learn how to move through the scenes, and use the “go” button to run the show. They don’t even really need to know the service order back to front because there is a scene for everything so at the very least, they can just follow along and try to pull up planning center so I can be ready for anything. This makes mixing accessible to just about anyone in a pinch should something happen.
So if I’ve sold you on at least trying some automation, here are five quick tips to help get you started in the form of some simple guidelines that will help prevent the easy mistakes from happening.
Know what your board is automating. Take some time to read the manual (shocker right?) and learn what your board can store for you and learn how the system works. If it’s anything like my automation on the SSL it will take some setting up. I often bring in a second tech to think through what should and shouldn’t change each scene. A good policy is to store every possible parameter in every scene and only recall the ones that you want to use (if you recall everything but not store everything you can add the ability to recall something without going into the scene first and adding it, so we save everything and only recall some things). At CCC, we only automate dynamic settings like bus assignments, compression, effects, etc. We do not automate EQs on inputs (with the exception of tracks because what is played can vary quite a bit between songs) or the pre-amp setting. This allows us to have a solid base to build on and make it easy to make the EQ changes we make all time to compensate for our room and have those changes be effective in all scenes.
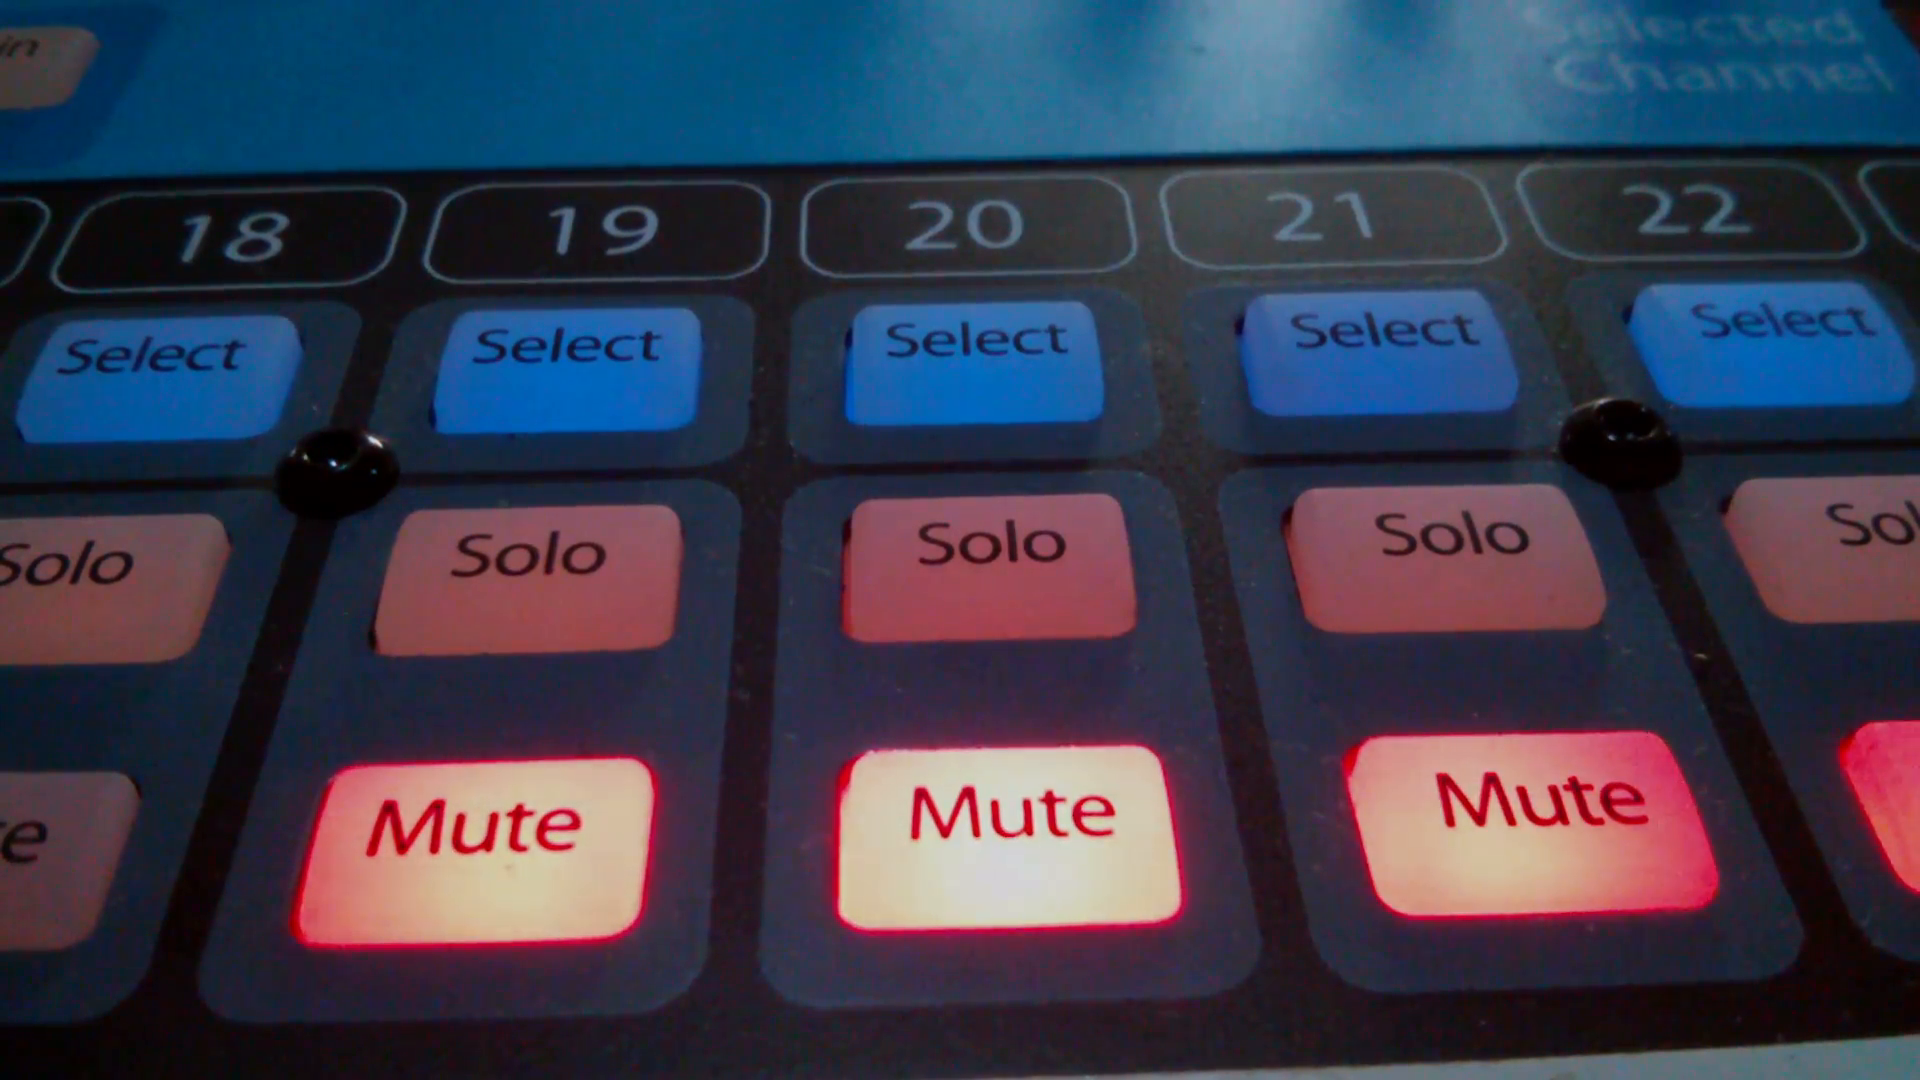
Don’t use mutes, use faders. We do our best never to mute things. Mutes are always triggered at the top of any scene change and because they are instantaneous make them hard to stop without being noticed. Instead of muting, move the fader down. This not only makes things sound smoother but on many digital consoles you can grab the fader and stop it from moving during a scene change. But, once a mute is programmed it, you will have to un-mute it after it triggers. A nice two second fadeout does wonders for making the band not just disappear when a song is over. This allows you to fade the band gently as their ring out is happening making everything cleaner. It also smooths out transition in broadcast mixes as well so things aren’t just snapping around. Probably the only time we actively use mutes is to have a fader up and muted in the scene before it is needed if I need it on quickly but the band to fade out. I don’t want a crossfade there, I want the mic open and at full volume and the band to fade out.
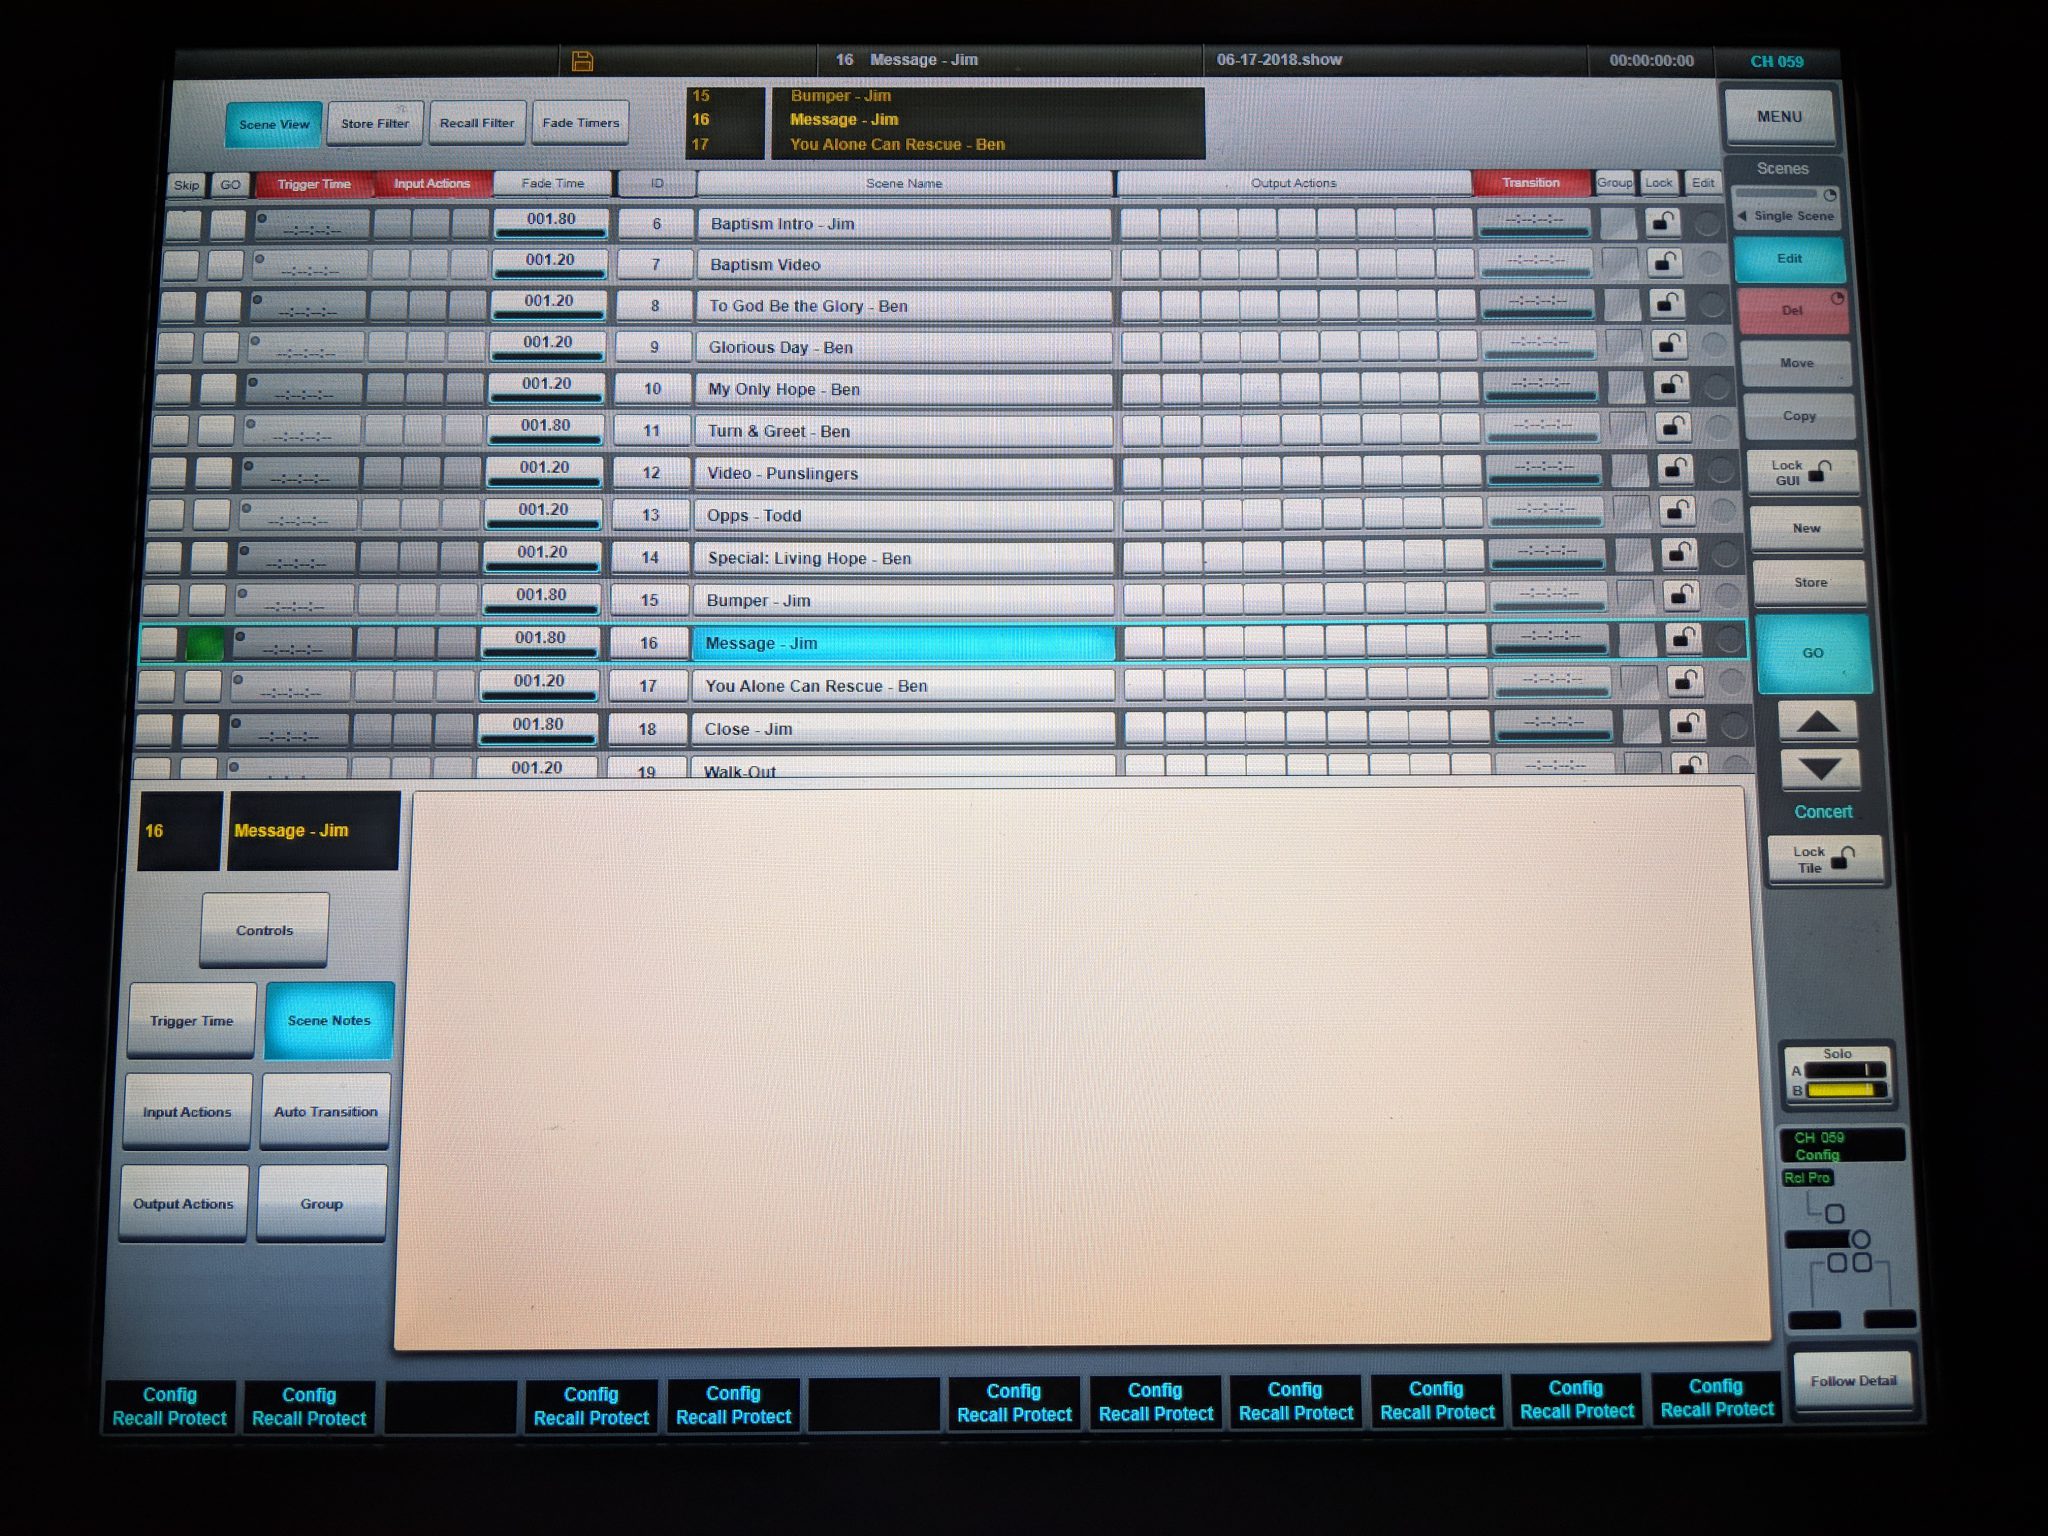
Don’t create all your scenes before you’ve heard at least one run-through with the band. Once you create scenes it becomes much harder to make big changes. At CCC, we create one scene (called the “worship” scene) we use for rehearsal than after we have the band locked in together and a good general mix we then we copy that scene however many times needed for each song. Than in that last run-through you are tweaking that general mix to be more specific to each song. Plus, when it’s all said and done you are left with an extra scene as a go to just in case something happens. I often map this “worship” scene to a hot-button so that if there is a glitch somewhere I can dump to that and have a scene recalled where I know I have a great sound coming from the band.
Find and use a recall protect button. This is sometimes called “safe” sometimes call “recall protect” but in all cases it locks whatever channel you selected in to it’s current status so that it can only be manually changed and isn’t affected by scene changes. This is also helpful if you are just starting out in automation. You can safe out your lead vocalist and pastor the first few weeks as you are learning your board and not have worry about catastrophic issues. I use it just about every week to get into my message cue from our bumper cue. I know that everything has been programmed correctly in the scenes but I do like to manually open the pastor’s channel before I fade out of our bumper and make sure that transition goes off without a hitch so the people in person and in the broadcast can always here that mic.
Lastly, set aside the time to make sure you program things correctly. Whether this is coming in early or staying late in order to do a quick cue to cue or just checking the scenes you’re not sure about this step is key. At the very worst, do your key speakers or singers sound check in their main scene. Once you’ve created scenes, use them. This acts like another check to see if you’ve got it setup correctly. Remember to keep things simple in the beginning. I used to just automate faders and sends and now even I am surprised what I end up automating for big shows. The things you can change with each song are endless so the key here is to make sure you always improving. If automating is just making your life hard, change it up or back up how much you are doing. It is meant to be a tool, not a distraction.
I hope you enjoyed the post. As always if you have any questions please feel free to comment below or email me at daniel@studiostagelive.com. If you like reading these every week, subscribe at this link, and you’ll receive email notifications of new posts. See you next time!
This last week of our expanded From the Booth series is about how I use effects in regards to verb, delay, chorus, etc. If you missed out on the post with the recording I’m discussing, check out this link. This is from our last Night of Worship here at CCC. This week I’ll be discussing how I use effects to enhance and highlight inputs in our mixes at CCC. We have 10 stereo effects channels. Yes stereo, and I’ll tell you why. The first reason is this, we send stereo inputs to them. While we don’t do much panning in house, on our web-stream they will hear the width that we may not hear as well in the room. Secondly, because of the sheer power of our console, it doesn’t hurt us to run this many stereo effects. Even with all that going on we are only at ~10% DSP processing on the board and have plenty of audio pathways left. Some consoles are a bit more limited and so running stereo effects channels might not be the best choice. I say all of this because I don’t want you to see what I do and say, “I have to do that because he does it.” As with all of my posts, my goal is to explain the meat of what I do and give you the opportunity to translate what I do into your world if you want to try it. I would say the meat of what I’m doing here is just that I’m running them on my board rather than through an outboard device. We do that for a lot of reasons, but most of all so that if we have a failure in our outboard waves rig (has only happened once and it was the first week we had installed it) my mix will only be shy on the compression side of things because that’s about all we do with waves (running plugins like the C6, HComp, F6, CLA-76, NLS, etc). Here are the 10 effect channels that we run.
Drum Verb
Snare Verb
Instrument Verb
Instrument FX (basically a chorus setup for instruments)
Bass Guitar Drive
Guitar Drive
Vocal Echo (basically a slap delay meant to help the lead stand-out a bit)
Vocal Delay
Vocal FX (chorus)
Vocal Verb
Now we have some busses setup in case there is anything we want to add for a big event as well (the setup on the L500s is a little labor intensive so having a few stems setup and ready to go is necessary). For instance, sometimes we like to use an overdrive pedal on the vocals and occasionally we have a weird verb that works better for a certain song that we load in from waves or the board. But, for 45 out of 52 weekends, we use these almost exclusively. I thought about posting pictures of my plugins for these but like I said before, these settings are what I’m setup to use for my room, the settings for your room and with your console will vary. The last disclaimer before we get into things is that our room is pretty dead. Because of that we have to run verbs pretty thick to help the mixes come alive and provide some sustain to the music. We aren’t running heavy verbs but we do need to help fill the room a bit more than most rooms. Treat the following explanations as to where you could start improving your effects if you feel they are lacking in a certain area.
The first group effects I wanted to talk about is the drum verbs. We have two effects that we use with drums and as I said before they are the general drum verb and a snare verb. The regular drum verb is nothing too special but here are the basics of how we have it setup. We run our verbs 100% wet and just send less to them, preferably on faders. This plate verb leans heavily on the early reflections to provide depth of sound with a decay of about 2.5 seconds and it could be gated if we want it too. The decay time is something that you’ll have to setup for each room but between 2 and 3 seconds is often a good place to start. We have a diffusion knob in our plugin as well that we use to help lower presence so we can have more verb without it being able to hear it as much as our actual inputs. Couple all that with some dampening on the low end of things and a little at the top to control the upper end of the spectrum that’s about all we do. Secondly we run a bigger verb that is solely fed by the snare drum (sometimes the toms) so the snare itself can have a more sustained sound. This verb is almost identical to the drum verb with a few small exceptions. The first is that we are doubling the simulated room size and adding another half second or so the decay time so the sound just goes on for days! Combine that with a less dampened high end and we absolutely love our snare verb. We used to just run the snare a bit hotter in the drum verb send but found that we liked the results better when we setup an extra verb tailored for the snare drum. To be clear, the snare is in both verbs.
The next group of effects is what we do with our instruments. The general instrument verb is pretty close to the drum verb. We do that so that when you hear the band they all sound like they are getting treated the same. When you do that it keeps your band sounding congruent in the verbs. As you’ll find out the vocals are also about the same as well. Next is the bass drive channel. We just recently added this. This isn’t so much a verb but a double patched bass guitar channel. However, we do not feed this to the subs. We picked up this channel to help us hear the bass guitar primary tones better and help to better balance the to halves of the guitar (this works similar to double micing a kick drum). On this channel we roll up the EQ a bit, insert a bass modeler with the presence and drive settings cranked up to taste and bass turned almost all the way off. We also compress this output quite a bit so stays a pretty consistent level. We also needed to delay the output a little to compensate for waves adding like 23 frames of latency that don’t exist within the board. Having this channel has really helped us to be able to mix quickly the blend of the sub response with the primary notes of the bass guitar and has really enhanced how we use the bass guitar. Secondarily to that is the guitar drive. We use this on the lead guitars for each song to help enhance any instrumental solos that happen. Most of the time instead of mixing the input up during that time we are pushing this bus up to the top of the mix. This one was quite simple as it’s just a mix bus (so we can change which guitar is feeding it as necessary) with a saturation plugin with the drive turned up to taste. Combining that with a compressor that hits pretty hard we get a nice crunchy sound to help make that solo really pop and shine right when we need it to. While pushing the input up does work well, we have found that this gives us a slightly different texture that we really like that perks up your ears when you hear it. Lastly in this group is the instrument FX which is basically a stereo modulated chorus. I primarily use this on acoustics and piano which adds some width and depth that help either of the two inputs be highlighted and easier to hear without being super present. Just try it on an acoustic one time and you’ll be hooked, if you don’t hear it, turn it up a bit more.
The last group is the vocals. Some people ask me why we run so many effects channels on the vocals. They wonder why it all is necessary. We do all this for a couple of different reasons. The best reason is because our mixes are vocal-centric. If that really is the case, shouldn’t they have the most color added to them? The most presence? The most weighting in our mixes? Because that’s true, we pull out all the stops for our vocals. Even to the case of slight side-chain compressing the vocal range out of our other group busses to create room for them to sit nicely in the mix (I’ll be going over this when I discuss the cool things we do in our waves rig). To that end, as I said before we run 4 effects busses for vocals. Primarily, all vocals are ran through our vocal verb which gives them plenty of body and depth and is setup just like the two other general verbs but with less dampening so that it helps the vocals pop even more. We also use the vocal echo on the lead vocal for each song. This is a very fast slap delay with anywhere between 10-20 ms of delay so it’s not a straight double. Basically it needs to be fast enough to double the voice and be distinguishable but not separate from it. Having this effect running really helps our lead vocal be at the top or near the top without needing to be pushed hard to get there. Next is the vocal delay that we tap in. This is exactly what you think it is. We all run one like it. What we do differently is set the EQ to automate for every scene so we change the way it sounds using basically filters (hpf and lpf) to give it a very present sound or low-fi sound. Occasionally I find myself putting that saturator I use on the guitar drive to give it some good crunch as well. Lastly is the Vocal FX which is a stereo de-tuned chorus that runs into a chorus. So the left side of the stereo bus is tuned up like 8 cents, the right side down 8 cents, than it goes to a modulated chorus plugin. This sounds like overkill but adds a good bit of width to the mix. We usually just use this on BGVs because putting it on a lead gets pretty rough on vocals at the top of the mix.
So that is the basics of how we handle effects here at CCC. As I said earlier this is just how we do it. Over the years these have been refined, re-designed, re-tooled, etc as things in our room changes but it seems the team has always landed on this layout. I had always done versions of this stuff but have really loved the consistency of the effects we use. One of the biggest things you can do to bring weekly consistency to your mixes beyond templates for digital consoles is deciding on an effect set that everyone agrees to use. If you have any questions about any of these effects or how we use them don’t hesitate to comment below or email me at daniel@studiostagelive.com.