Waves Multirack: Tracks

This week is going to be a bit different. In talking about what I do with tracks I think it’s better to just discuss what I could do. So many people just run these through their board and assume they are fully processed with no need for EQ or compression. But for me, I treat them the opposite way because more often than not there is an important musical line that really needs to be heard. On my console these 14 inputs are completely automated. EQ is programmed for each song and in waves I tailor plugin selections for what I need each track to accomplish for me. We don’t often use every track for every song and play a lot of songs without tracks but I quickly learned that having a flexible and extensive input list from tracks becomes a necessity to ensure maximum usage and the ability to treat different kinds of tracks differently. Because this varies so much each week I’m going to list my tracks inputs and then make a list of the plugins I might use to really help them shine. Each list is a plugin I have used with that track or am currently experimenting with. I don’t necessarily use each plugin each week but often I’ll load up a bunch of them, play around a bit, and see what fits. The key is keep trying new stuff and see what you can creatively do to enhance the tracks and help them blend in with the band.

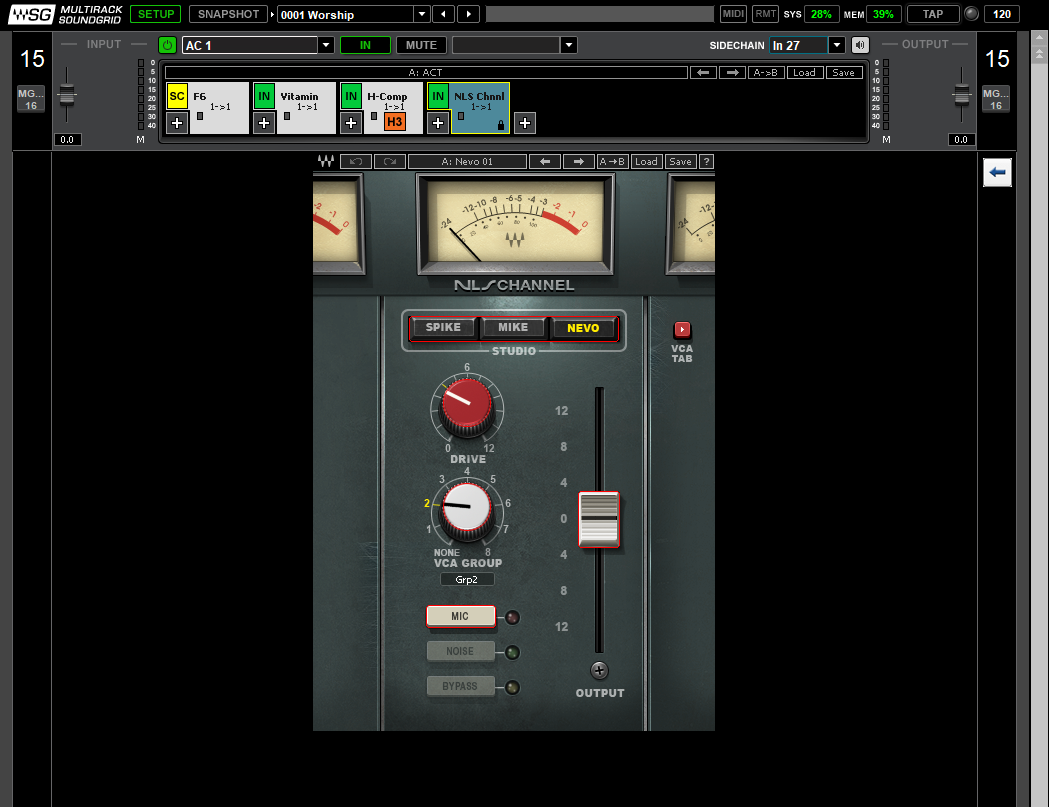
These first four tracks are already mastered from the original artists but occasionally I need to spice them up a bit or reign them in to fit our context.  Besides putting NLS at the end of each chain I’ll often pull up a compressor and on the organ or aux keys something to bring out the unique tones in play. These four channels are all stereo which forces me to make sure I appropriately process each one to keep a nice wide profile.

Trx 1-2 (Pad): Brauer Motion (use with care here), API 2500, CLA-2a/3a

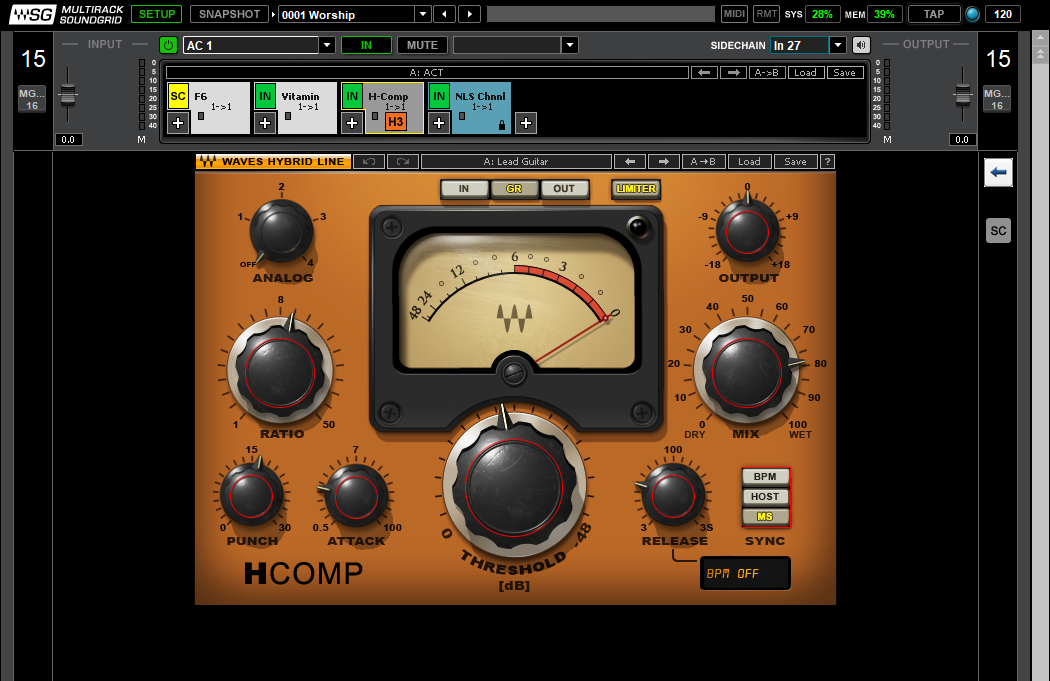
Trx 3-4 (Organ): Brauer Motion, Aural Exciter, API 2500, HComp

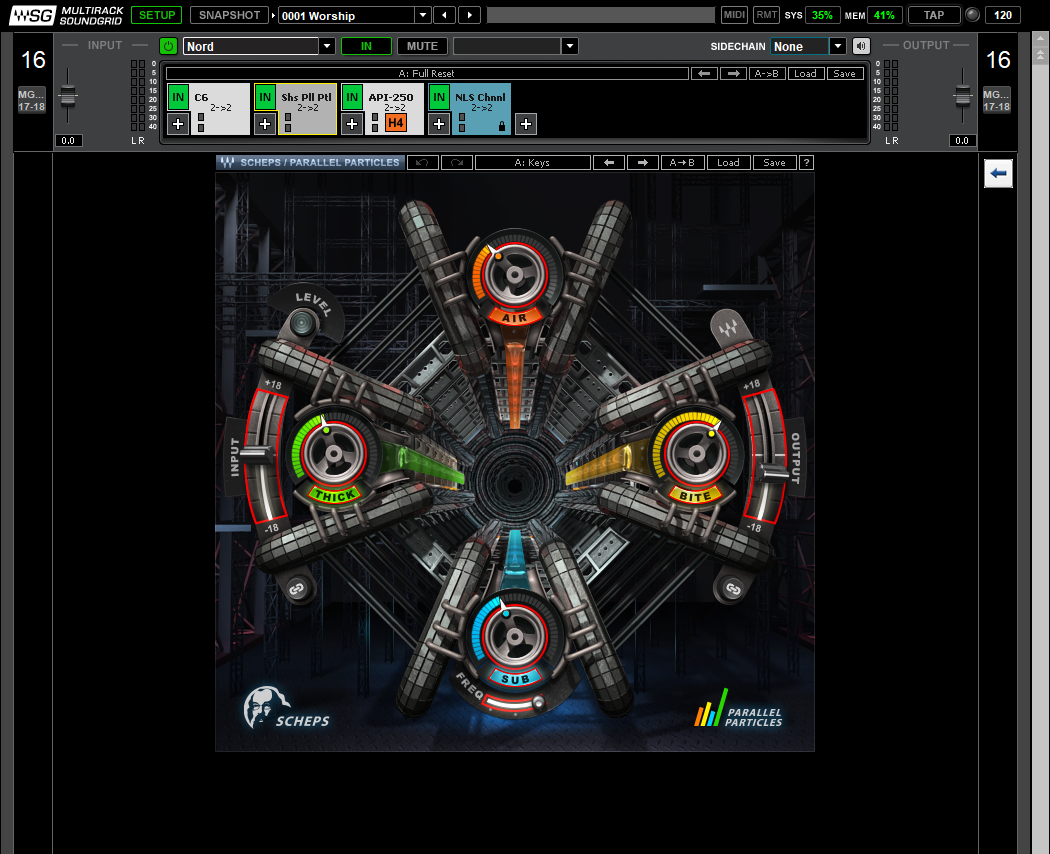
Trx 5-6 (Synth): Scheps Parallel Particles, Vitamin, Aural Exciter, API 2500

Trx 7-8 (Aux Keys): all of the above!

These next three channels are the typical tracks you’d normally hear being used for band supplementation. These are often recorded and pre-processed by our worship pastor so often all that needs to be done is just some small compression to bring them up to the playing field with the band. As with the above, you will find the NLS at the end of each chain.

Trx 9 (Perc): usually just the NLS plugin, sometimes LoAir or Renaissance Bass

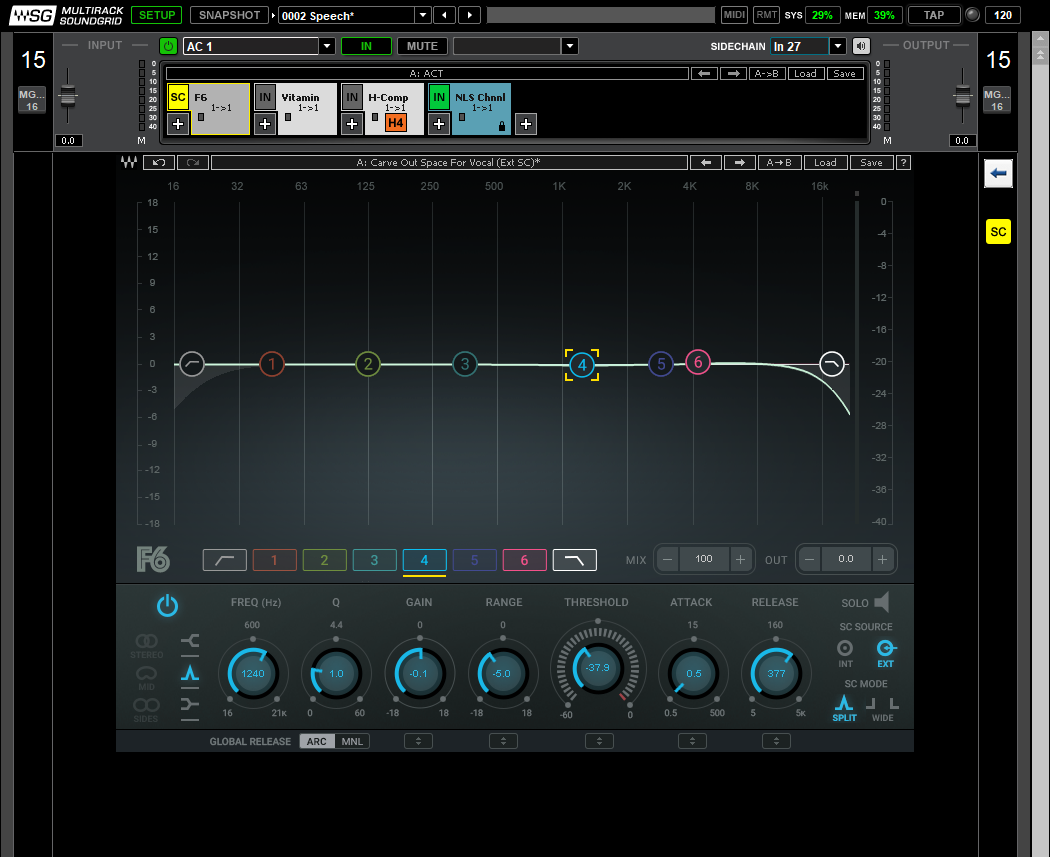
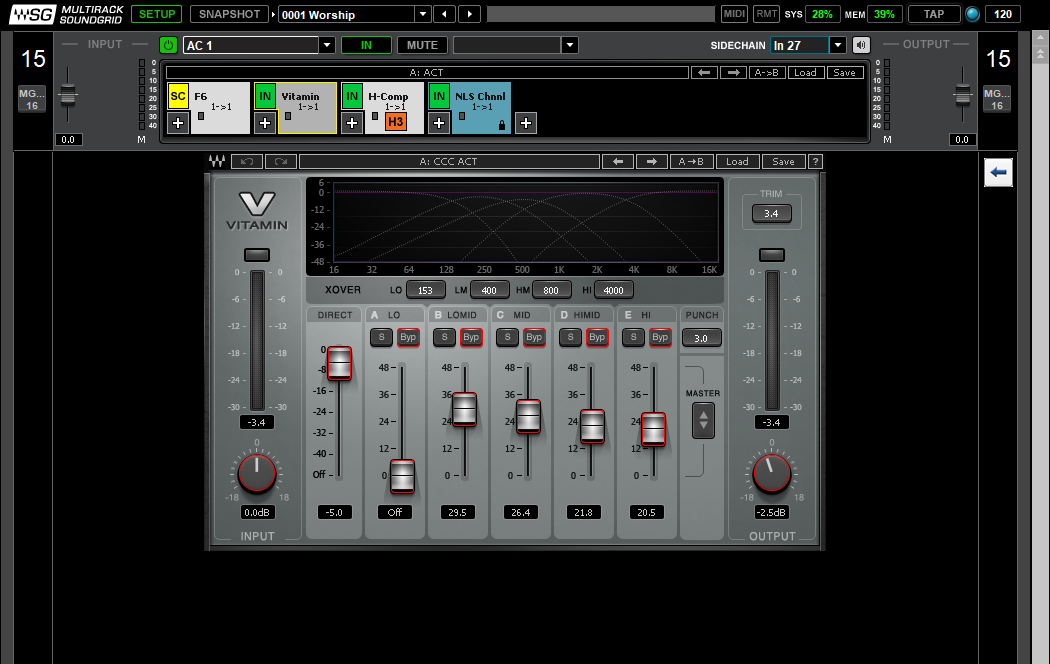
Trx 10 (Electric Guitar): F6, Vitamin, HComp (often treated like a live player)

Trx 11 (Acoustic Guitars): MaxxVolume, Vitamin, Scheps Parallel Particles, HComp

Lastly we have some bonus channels and the BGV channel. How much I process the BGV channel depends on whether or not it’s a processed artist track or a recording we made to have backing tracks. The other two tracks are often the most fluid in our setup as they are used for anything that doesn’t fall into the above categories. The choice of NLS model used varies a lot here as well and sometimes automates with each song to really make sure the right one is used for each track. It is easy however to overprocess these as well because they can be so different. To fight that I always try to use the A/B rule here and make sure that every change I’m making does something positive for my mix.

Trx 12 (Misc 1): anything and everything needed

Trx 13 (Misc 2): anything and everything needed

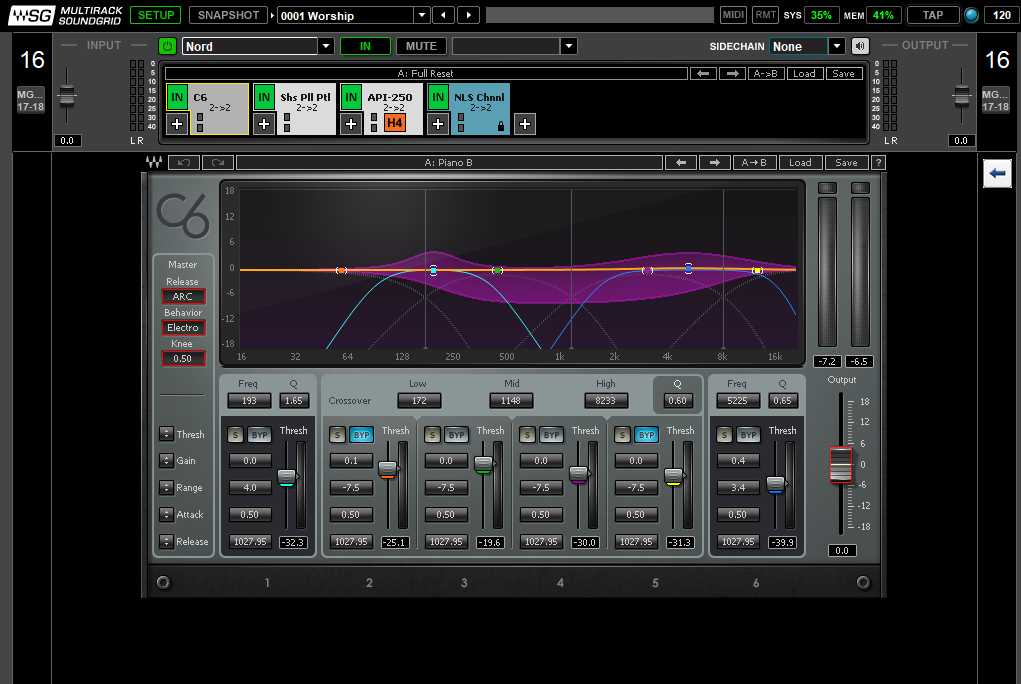
Trx 14 (BGV): C6, Scheps Parallel Particles, CLA-2a/3a

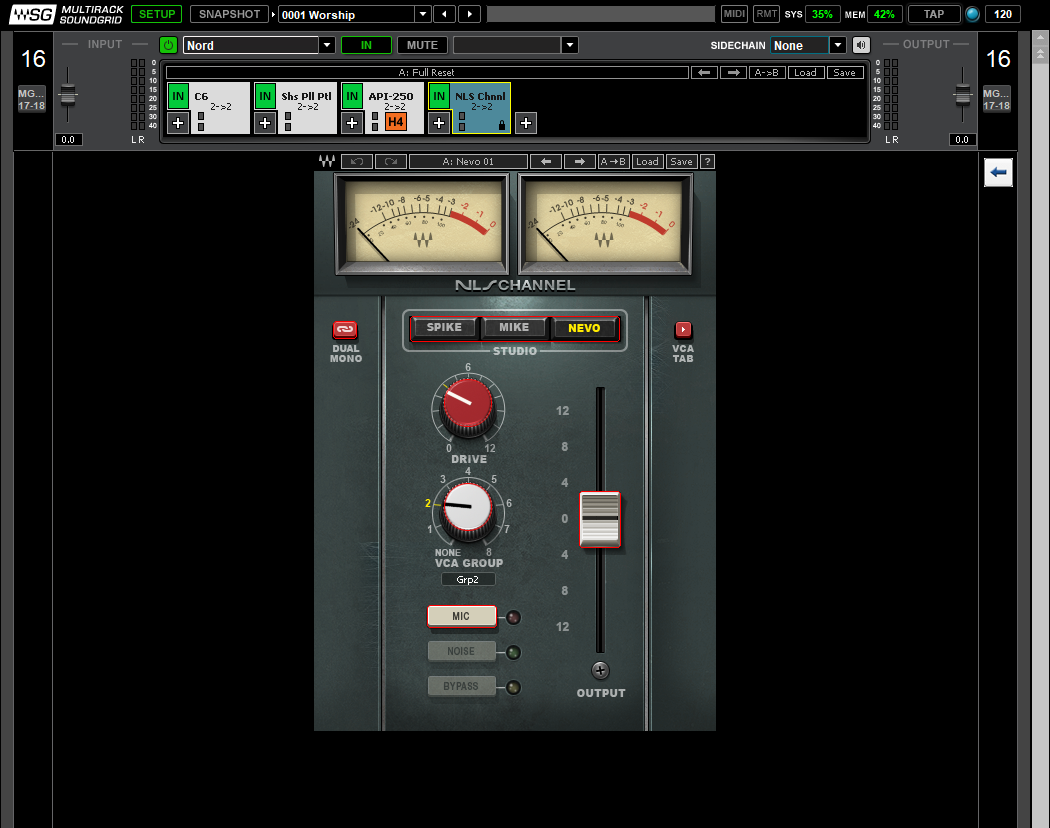
Well that is the breakdown of what one might typically see in our waves setup. As I’ve said before the key is flexibility. One of the biggest reasons I run them through waves is to use the NLS plugin. These are some of the inputs that don’t pass through our consoles preamps so I really like to dial up the NLS plugin to help bring some natural color and warmth to each plugin. But even bigger than that, processing them like I process the band really helps them start to sound more like the band. This brings a sense of congruence that makes things gel together when it comes to the final mix. Tracks need to supplement your bands sound not stand apart or overtake it. Be sure that no matter how many tracks inputs you have or how you use them, their presence lines up with the philosophy your band leader is aspiring towards. Than support that philosophy with how you process and mix them in.  

Tune in next week when I’ll go over the rest of the drumset inputs, mostly the toms, and start wrapping up the series. Than the following week we will close it up by discussing how I process my groups busses through waves which is where some of the magic of waves occurs in my setup. As always feel free to comment below or email me at daniel@studiostagelive.com and subscribe at this link to get an email when new content is posted. Have a good one!

Waves Multirack: Piano and Keys

Welcome back to our first Waves Multirack Series! This is week 6 of the series where I’m going to talk through what I am currently using on my piano and keys inputs. We run a full mainstage rig where I work like so many churches and studios. Because I have that hooked up to dante I have several outputs at work with which I can process differently. We run 5 stereo outputs to our consoles that are as follows: piano, pad, organ, synth, and electric piano. While this seems like a lot to manage but it ensures that we can fully manipulate each input as we like and not have to get to crazy in the automation wing when it comes to different songs and sounds. To help shorten this post a bit I’m going to go through and show what I do for the piano input and then discuss how I handle the rest of the inputs because they are usually just variations on the piano channel. Lastly, I want to say that these inputs, like my acoustic input, are pretty fluid. My tastes and needs change quite a bit with the piano and we occasionally try different samples in mainstage so these, like the rest of my posts, are very much just suggestions. However, having said that, this layout of plugins is working very well for me. They strike a good balance between keeping it simple and processing the gold out of each input. Let’s check it out!

The first thing I do with the piano is drop in a C6. In order for the characteristics of the sound to translate well to being amplified I have always felt that dynamic EQ is necessary a bit for pianos. I use the board EQ to make the piano sound good when it’s just the piano and then use the C6 to help it out a bit when it’s being played with a full band. I use an altered form of the Piano B preset. This layout brings out the bottom of the piano and helps it have a bit more attack when necessary. The green and purple bands are just functioning as basic compression. It would be easy to just slam the piano into this compressor but a good thing to remember is that when the player is playing things like pads and such behind speech, this plugin should be doing nothing and the be doing something when the band is playing with it (good rule of thumb for most compressors).

Next is a new plugin I recently picked up to give a bit of variety to my sonic enhancement lineup. I used to use a vitamin here but wanted something a bit easier to dial in quickly and found that with Scheps Parallel Particles. The link I attached to the title takes you to the video that Andrew Scheps put together talking about the plugin he helped create. Worth your time if you’re interested in how this works. While the graphical interface is visually pleasing, I’m guessing that you don’t use plugins just because they look cool. I’m still dialing this in for my own use but I started with the Piano preset and after making a few changes I think I really like where it’s at. A couple tips, there is a level light, make sure it’s not getting too hot. If you are hanging out in the yellow or red, turn down the input (I also unlink the input and output knobs so I can make independent changes). You have four options that do just what you might think. The sub knob introduces harmonics at the frequency you select, the thick knob is low mid, air knob is lo high mid stuff, and lastly the bite knob is high frequency harmonics that affect presence and crispiness. I did find that this can be a huge gain stage as you’d expect from a sonic enhancer so dropping the output down will likely be necessary. If you use vitamin, you can get similar results, I was just looking for something a little different and found it with parallel particles. This is not just additive EQ, be sure to check out the video on the waves page for more of an explanation.

Next is the ever popular API 2500. I recently picked this up and haven’t turned back. While I miss the parallel compression that the HComp offered this plugin has a unique feature that specifically helps stereo inputs. That is the the link section. I can treat each side of the channel differently! Beyond that section this compressor is a lot like many other compressors with all the typical settings you’d expect. I have most often found myself running the variable release as fast as possible with piano as the compressor seems a little sluggish but have occasionally slowed it down a bit. For me I watch the meters and make sure the compressor is releasing like I want and adjust accordingly. Knowing that there is already compression in the sampling and in mainstage I don’t do a ton of compression and what I do is sort of slow reacting. Once again, in the tone section we have some options that determine knee, thrust, and type which are better explained through just listening to the compressor itself. Some videos online do a decent job of explaining it but you really need to demo the plugin and try it yourself. As far as the link goes, I turn this down to like 70%. I haven’t played much with completely independent settings because I want the piano to sound cohesive but do want the compressors to work slightly differently. If I’m seeing variation from left to right on the input meters in waves I want to see similar variation on the output which before I’ve used this plugin I wasn’t seeing as much as I’d prefer. If you don’t have this plugin to try, I’d strongly suggest demoing it and perhaps picking it up the next time it’s on sale.

Lastly, as you’ve seen, is NLS. It is in dual mono mode so that the stereo channels are both going through their own model. Because clarity and attack are important for me in my settings I have really liked the Nevo model but if I’m looking for a more gritty sound (at the expense of clarity) than I’ll call upon the Mike or Spike settings.

That’s it for my general piano sounds. The rest of my piano/keys inputs are variations on this theme. I usually only use the C6 on the piano but will load it up on the electric piano if I’m having some issues. I do however use the API 2500 on each input as my primary compressor and use either the vitamin or scheps parallel particles if I’m in need of some extra life. The biggest difference for these channels is that I use MaxxVolume on the pad channel to make sure I’ve always got enough pad (the artist controls this volume a lot and I’ve found that the first part of MaxxVolume works really well to add volume on the fly when needed). Than on the synth channel instead of scheps I’ll pull up the Aphex Vintage Aural Exciter instead. I like this more because usually on the synth stuff all I need is just a bit more crunch to make it really punch through the mix when I need it too. Of course this can be done with either of the other two harmonics plugins I’ve discussed but the aural exciter gets me there faster and seems purpose built to do what I’m using it for. This is my motto for plugin choice in general. What’s the tool that seems purpose built for what you need? Use that plugin first and change it out later if you need.

Well that’s it for the piano section. Hopefully you’ve been able to glean a few universal principles that you can apply to your situation. If not, please feel free to ask questions below in the comment section or email me at daniel@studiostagelive.com. I’ll get back to you as soon as possible. I would also ask that if you like what you are reading and want to be sure to know when something new is posted to subscribe to the blog at this link. Next week I’ll be covering what I do with tracks and talk about the unique tools I use to really bring my track inputs to a whole new level. See you then!

Waves Multirack: Acoustic Guitars

Welcome back to this series, thanks for clicking on the link this week and checking it out. We are talking acoustic guitars this week. The hardest part of this week is the sheer variety of acoustic guitars and pickups/mics that will be in use or could be used. As usual these plugins and settings are just the baseline for our setup here which in most cases is a really nice Taylor guitar that is owned by our worship pastor. I’ve mixed with a lot of guitars in my nearly 20 years mixing but this particular Taylor just sounds good all by itself. I’m going to go through the plugins I use to help it stand out with a full band and then go through a few of the other plugins that I use occasionally or with other types of acoustic guitars like banjitars (six string banjo), ukuleles, etc. Please comment below if you’ve got a great idea for me, I would say my thinking around acoustic guitars is ever fluctuating because my needs from it change so much.

This first plugin is probably the most fluid. My thoughts on where to put in this side-chain fluctuate but I usually land with it at the top of the chain. The reality is that the acoustic guitar sits in the vocal range. So to increase vocal clarity I make way for those vocals with a side-chained compressor on the acoustic itself. So I decided to use the F6 because I wanted to also be able to compress the higher frequencies of the acoustic to keep the picking noise under control. Band 4 is side-chained from the input of the lead vocal channel and carve just a little out of the acoustic. Now you have to be careful about doing this. If you have a light player you don’t even really need to do this but usually we have some strong players and since it keys off the lead vocal in the instrumentals and intros/outros it’s not doing anything so we get all the spectrum available when we really want to hear it. Of all of these plugins, this is the one you really need to set and check as things progress to make sure it’s operating correctly. At most, when I use it it will pull somewhere between 3 and 5 db. So it will make a barely noticeable to a noticeable change.

Next is another of my favorite plugins: the Vitamin plugin. I use this to enhance the fullness of the guitar. Sometimes pickups do well and sometimes they don’t do well of giving a full acoustic sound. I’m usually low passed beyond the first band so I don’t use that at all. Then, bands B and C work to add that fullness I’m talking about which is where most of the work is being done. Next band D is where that vocal range sits so I’ll bring that up and down to make sure we aren’t counteracting the clarity we just gained with the F6. Lastly Band E is the presence or attack of the acoustic so I’ll push that up to taste to match the style and needs that I have each event. But there are 3 other options that are incredibly useful that this plugin has: direct sound, master fader, and the punch setting. The first is exactly what you think, it is how much of the input sound is allowed to pass without being altered. We are effectively creating a parallel chain inside the plugin. I usually run this around -5db but that can change if I like the curve I have set within the plugin but want less or more. Next is that master fader, I love this because it allows me grab all the faders at one time. Lastly, the punch setting here works a lot like the hcomp punch setting, you just have to play with it until you like what you here. The last thing to consider with this plugin is that because it’s acting like a gain stage it’s important to think about pulling the plugin output down a bit to compensate if you need to. Just be aware of that happening.

The last dynamic plugin I use on the acoustic is my perennial favorite compressor, the HComp. I have it setup in a pretty standard way for a guitar. Ratio of about 8 or 9, moderate attack, and a longer release time (I play with this a lot!). I’ve been using the mix knob quite a bit more however. That week I had it down to about 60% and ran the release a bit longer to see how I like it and the results were quite nice for things like picking and regular playing. I also just bring up the punch in sound check to taste. I find I should but it in the template pretty low so I am forced to dial this in every time I start a new show or session. If you don’t use the parallel portion of this compressor be sure to lower that release time quite a bit and adjust the punch to match. Lastly, I’ve found myself actually checking out the analog knob, the first two settings don’t actually add too much hum but add a good amount of warmth so check those out if the time is right. If I’m doing an acoustic set and find the acoustic guitar needing to make a more lead role in the instruments I’ll dial this up and see if I like it and often find myself liking what it adds.

Lastly is the ever popular NLS Channel. This is something that I check for each guitar that I run with. That week I liked the dark edginess that it brought but I use the other two models just as often. Sometimes changing the model doesn’t do it and I’ll need to add some drive to really start to hear the harmonics but I’ve learned that it’s often worth it. But this is a gain stage so be cognisant of that addition and adjust accordingly. This plugin does have an output adjustment built-in that I occasionally need to use.

Other plugins I use for acoustic guitars and other guitars like it as well as stringed instruments in general are as follows. The first is the Vintage Aural Exciter. I love it because often times I really need to exaggerate the edge of the guitar to really help it pop and this plugin is perfect for that. There are a few presets to start with but experiment with the different modes and see what works for you. Secondly I’ll pull up other compressors like the Renaissance Axx or RCompressor. These two are very unique but they are rarely my first choice because of the limited options to adjust. But I do find myself using them from time to time. I also use plugins like the Doubler2/Doubler4 to achieve a fun chorus sound for any instrument. Just something to give the guitar some girth amongst the chorus of band and track sounds. Lastly I love to use the GTR plugins.  The Stomp pedals are all unique things to play around with. Personally I love the chorus stomp, overdrive stomp, and the phaser stomp to really bring some life to any guitar and add width to the mix in general. They all require some level of discretion as it’s easy to overuse them but they can be fun things to have in the bag ready to go for that one element that you need it for.

Hopefully you have been able to glean some ideas from all that. Also, hopefully a few of you who read this might have some cool ideas for me to try. In either case, please feel free to comment below or shoot me a quick email at daniel@studiostagelive.com and I’ll respond as soon as I can. Be sure to stop by next week, I’ll be going over how I handle the piano and keys inputs. If you want to be sure not to miss it or any future posts check out this link and subscribe to the blog and you will get an email as soon as new posts are up. See you on the flipside!