Welcome back to week two of our mixing for the web series. Last week we discussed a few options for broadcast mixing while using a console you already own to craft a good mix for an online audience. This week we’ll concentrate more on how to craft a mix when you’ve got the ability to use a second console to mix specifically to an online audience. Using a second console to mix broadcast is by the far the method that has the highest potential for quality because you are never balancing what the audience in the room hears with what the audience from the broadcast hears.
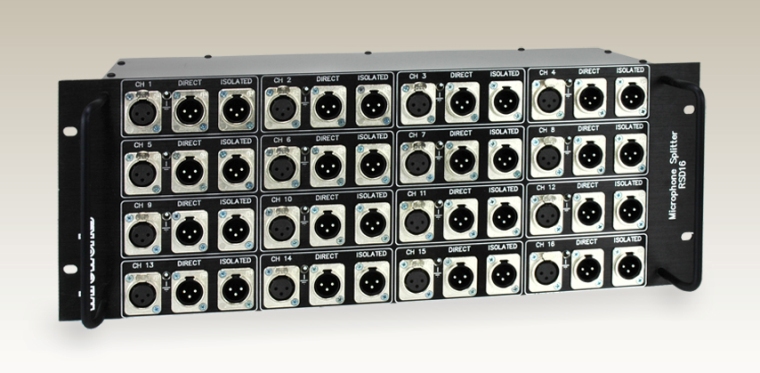
One of the most critical decisions to make when buying a broadcast console is how the sound will get into it. You will have to “split” the audio from one source to two or more outputs. This has traditionally been done via analog splitters that are purpose made for this task. With the advent of digital consoles we also have the option of doing this digitally inside the console. There are of course pros and cons to both options. Analog splits are probably the most “pure” option but they do come with some restrictions. The first being, they are very expensive. Even the simplest splitters are essentially Y cables, but depending on your needs, you may need a transformer isolated split. The main advantage to an analog splitter is that everyone can have separate head-amp control of inputs without affecting each other. Another nice feature of analog splits is that if the main input console goes down, it only affects that console and not everyone using it as a digital split as is the case with console based digital splits. The main disadvantage can be that some buildings aren’t wired in a way to make a splitter useful or it may be an issue where the splitter is isn’t conducive to where the inputs for the mixer are. Most splitters are fairly large, and some installations just don’t have room for them. Cost is the biggest prohibiting factor for analog audio splits.
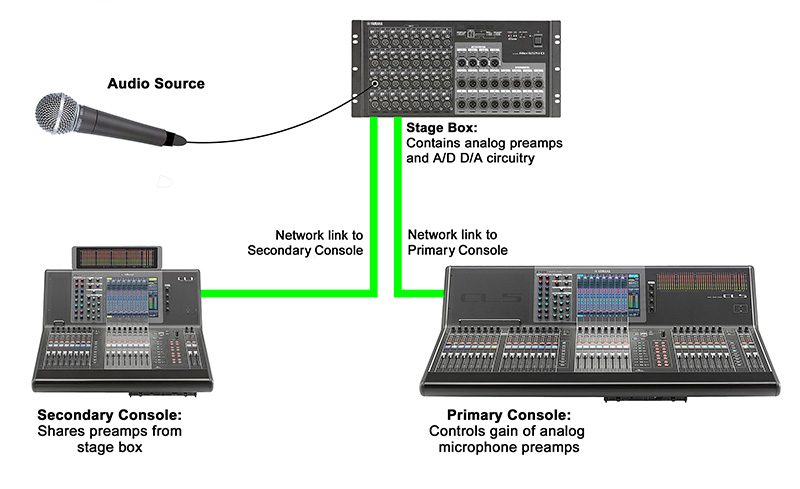
If you’ve got a digital console then you’ve also got a potential wealth of options to do a digital split. This may be a simpler and easier solution but does have the downside that unless you have a Midas Pro console and a stage box with dual pre-amps, one person has to control gain for both users. Most consoles today offer a “gain sharing” function (or manage the sharing behind the scenes). This is where one person has control of the gain and the other user trims digitally up or down. This allows both users to adjust their levels without affecting the other but it’s still affecting gain so if you’re recording multi tracks or have headroom issues you’ll need to gain down your inputs and trim up to compensate for your onboard needs. That aside, digital splits are incredibly cost effective and useful. Digital splits can come in many flavors and depending on your console, you may even be able to mix them and use more than one. While most consoles have their own proprietary format that may or may not be able to split to other consoles of that make or model, there are several digital “transport” methods. We won’t go too much into detail regarding those options but know that the main options are MADI, AES50, and Dante Networking to accomplish a relatively inexpensive digital split. Don’t worry, we are already working on a series to talk about each of these options and how they are used in our industry. Stay tuned!
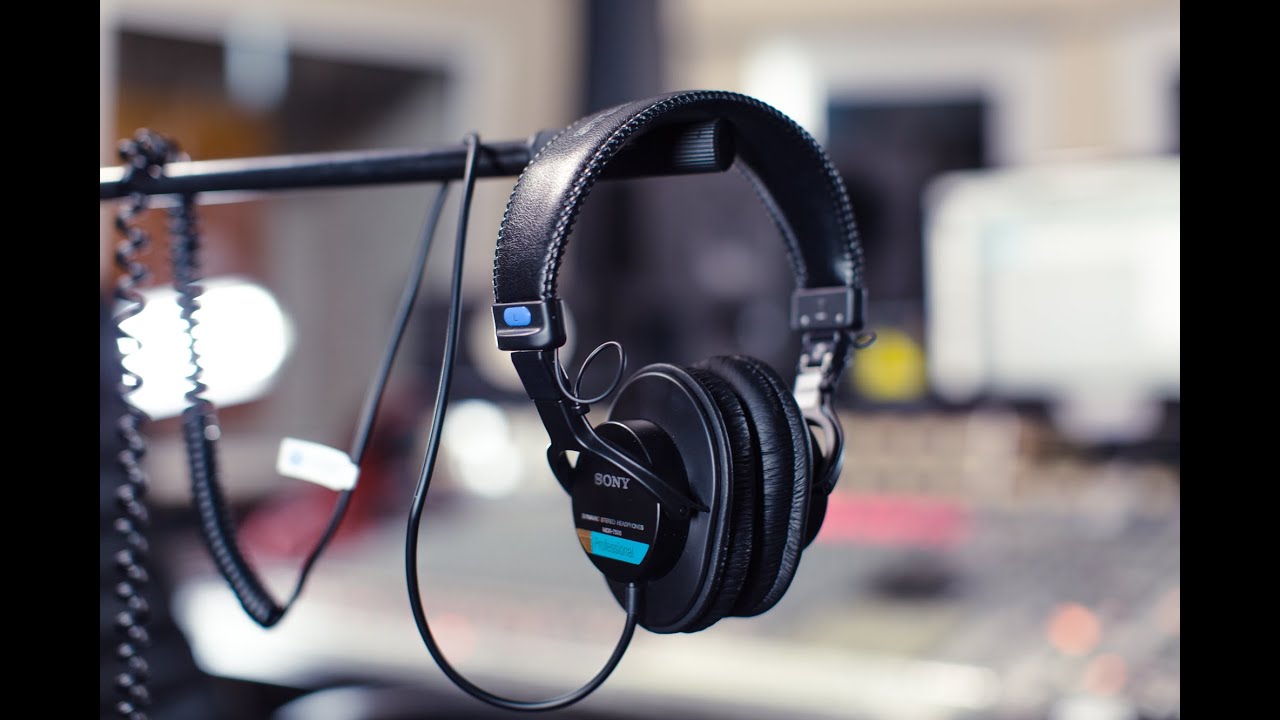
Once you’ve got yourself setup it’s time to be able to listen to your content. If that’s a submit of some kind from your FOH console, I recommend a really good pair of wired headphones. Apple earbuds probably won’t cut it here. I would recommend something like the Sony MDR-7506s or maybe some Shure SRH 440s or 840s. AKG makes some really good stuff as well. I tend to like Shures and Sony for their flatness. I’ve gotten used to what they sound like so I have an idea of what various types of content should sound like in various places when listening to those headphones. If you’re mixing on a separate board and have your own audio room then I’d recommend getting some good quality near field monitors. Computers speakers, even really nice gaming ones, aren’t going to be ideal here. You’ll want something that is purpose made for mixing and making music. I’d even recommend a subwoofer if you can afford it (try to get at least 8” drivers on your speakers if you don’t plan on buying a subwoofer). Quality matters here. I’d recommend the KRK Rockit 8s or the Sony HS8s as a good starting point. There are a lot of options and it’s hard to go wrong as long as you understand what you are getting so do your research. The key is to get professional speakers not hifi home audio equipment.
One thing that I would also recommend is getting something like a Mackie BigKnob so you can easily control volume and flip between mixes (if needed) and even flip between multiple sets of speakers. Next, most control rooms will have “small” speakers from a couple different brands that mimic sound coming out of TV speakers. These can be very expensive, what I would recommend is to buy a pair of cheap computer speakers that may have been around the block a bit. The reason studios and control rooms use small speakers is because most people listen to content on their TV speakers, not thousands of dollars of speakers so we like to check and make sure our mixes sound good on smaller less resolute speakers. What I’ve done at my church is buy a small low rated pair of computer speakers to better mimic what our mixes would sound like on a laptop or a phone. We didn’t have money for Auratones and this was a great way to give us a clue if our mixes sound good on smaller devices that they will most typically be watched on. Again, people won’t be listening on nice near field monitors, they’ll be watching on their phones, tablets, laptops, and maybe their TVs. “It sounded nice in the control room” isn’t a good excuse if no one can hear well on their phones and that’s all the service is watched on.
Regardless of how you split your audio it’s always smart to have good communication between FOH and broadcast. We’ve spent the last two weeks discussing various methods of setting up your mix. Next week, for our last post in the series, we’ll look at the best practices for actually mixing the service. We’ll focus on loudness, metering, tonality, and EQ differences from just mixing at FOH. Thanks for reading, if you like what you’ve been seeing here on the Studio.Stage.Live please feel free to subscribe to the blog at this link so you can get an email when new content is posted. If you have any questions feel free to reach out on Facebook or in the comments below. See you next week, Happy mixing!
P.S. – If you didn’t already notice, we have a new author, Justin Fugett! To help you get to know who is behind the scenes here I’ve launched a new page on the site with bios for each author. Be sure to check it out at this link!