I was on the fence about whether or not I should even have this post as part of my series but when it came down to it, I felt like I should just put it out there and let you guys know what plugins lost out in my battle for the top 5 places in my waves library. I have rarely found waves plugins that aren’t useful when applied correctly but as you’ve seen in the last 5 weeks, there are 5 that I use a lot and for a variety of reasons. They either make my life easier, more efficient, or just provide options that others don’t. But this week I wanted to go through a few plugins that are worth mentioning. I picked out 5 (sort of 6) plugins that float to the top in terms of usage and such when you look at my waves templates.
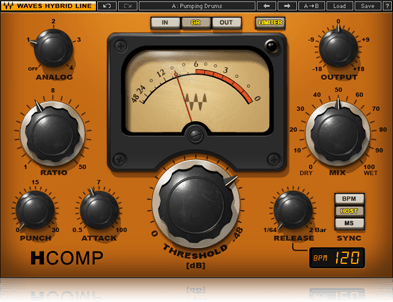
The first that came to mind is the HComp compressor. This plugin is packed with features that make this plugin incredibly useful. Probably the thing that got me using it (and keeps me using it on electric guitars) is the mix knob. With just one knob you can setup parallel compression. I know, I know, it’s a bit different but having the ability to wet/dry mix compression live without the need to suck additional audio paths is awesome. For guitars, I find myself dropping it down to about 70% to start and go from there based on the type and dynamics of the source involved. I’ll find myself backing off even more with acoustics and if I there is a particularly dynamic electric I’ll raise that up a bit. EIther way, using the plugin like this, combined with proper attack and release settings really helps what you want from your source pop through and be present but then sit back in the mix. Secondly, the punch knob. Man, this is a wildcard that I love. It’s quite hard to describe but in my experience, the best way to set it is to start at 0 and turn it up until you like it, than just leave it. Yes it does add punch, but that isn’t all. So get the demo, load it up, and try this out, ASAP!
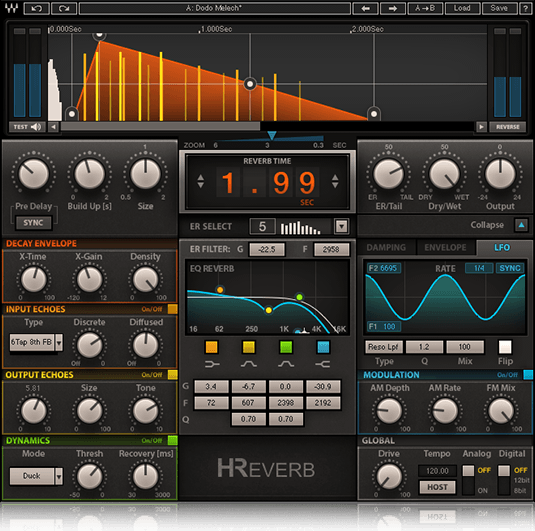
If there is a reverb that if you don’t own you should just go out and buy from Waves, HReverb is it. I know, I know, the Abbey Road stuff sounds but you don’t have access to the number of variables to alter as you do with the HReverb. The tails in HReverb are just the smoothest you can imagine. Let me put it to ya this way, my daily driver is an SSL L500 that has some pretty legendary verbs onboard but I still use HReverb regularly to create a wash verb (like 4-5 seconds of washy verb) that my boss developed on HReverb and I couldn’t get the onboard stuff to imitate it that well. Right in the verb there is a built-in EQ, decay control, slap echo control, dynamics section (I usually run a de-esser here or one right before it in the plugin chain), and even a modulator built right in if you wanted to add a chorus effect. That is all on top of the usual reverb settings. Now, this is a DSP hog so use at your own risk but if you’re after a buttery smooth long verbs, HReverb is where you can find what you’re looking for.

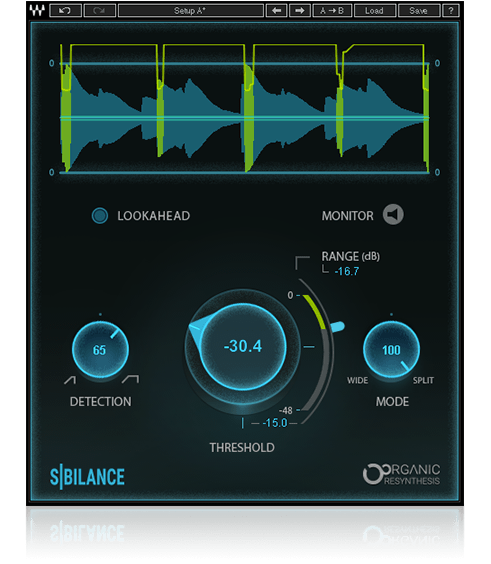
I’m sorry but in my search to find and decide honorable mentions there was a tie with my de-esser of choice. Having a de-esser on most vocals is nearly a requirement. There are a few of the folks who sing where I work where I can get away with not having one but I usually have one in there anyway to catch any strays. For the longest time I was dead set on using RDe-Esser but ever since Sibilance came out I’ve started flopping around a bit. They work quite well with Sibilance better at detecting and RDe-Esser a bit better at controlling how you handle the response. If I had to give an edge for me in my room on my board, I’d go with Sibilance because the live version of it is basically a zero latency plugin whereas the other does introduce a small amount of latency. More often than not I’ll use Sibilance on females and RDe-Esser on males. It’s just easier for me to get each dialed in if I split it up like that. The latency added isn’t enough of a concern for me to stop using RDe-Esser. It’s important to know that the non-live version of Sibilance does contain a look ahead setup for studio use which is incredibly handy in the studio.
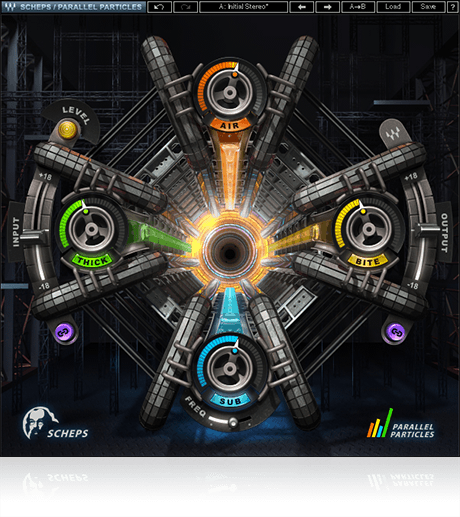
As you read in week 2, if I had to pick I’d pick the Vitamin Sonic Enhancer because of it’s extra features to adjust, but Scheps Parallel Particles in my opinion sounds just as good and is definitely easier to configure. Because I don’t always need all the features of the Vitamin, I have found myself using Parallel Particles in those few places where I just need a simple, harmonics generator. A great example for me is the kick drum. Where I used to use Vitamin, I inserted Parallel Particles and turn off everything except the bottom knob where I set the frequency (I like to boost 50hz) and turn it up to taste. Just like in Vitamin you need to keep an eye on the internal plugin dynamics. What I like about Scheps is the input light telling you what you need to do to set the input volume. If it’s red or yellow, turn it down until it stays green most of the time. I usually end up removing the link between input and output gains as well so it doesn’t turn into a huge gain stage. So if you’re looking for a simple no nonsense harmonics plugin, Scheps Parallel Particles is what you’re looking for.
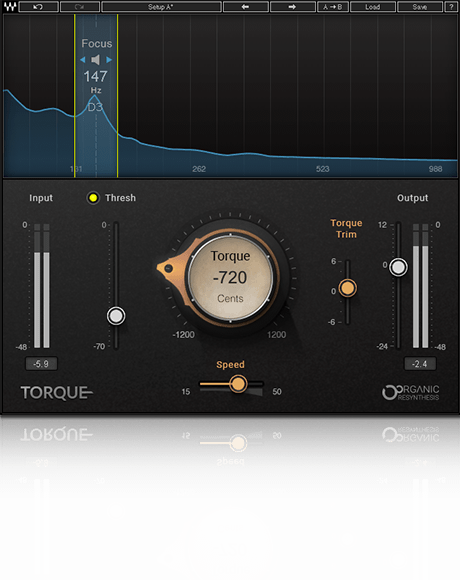
The last plugin I wanted to mention as a plugin to really consider as you expand your toolbox is Torque. As a technician this plugin really appeals to me because I can’t tell you how many times I’ve fought with drummers regarding tuning what notes to pick when you’re doing so. Over the years I’ve learned that the lower you can get the snare note to be the less you have to do to control it. But drummers hate drum heads that are tuned so low that their stick feedback (read how much the stick bounces back to them) isn’t what it used to be. So now, I can tune the drum with enough spring-back to keep drummers mostly happy and then in “torque” it down a bit more so that the snare can really find a home in the mix. Secondarily, I’ve recently started, after a suggestion from a co-worker, tuning the bottom snare mic up a note or two so that you get a great crack tone from each hit and the snares. Typically I’m tuning the top mic down a few notes and the bottom mic up at least one note. The great thing is that it’s easy to adjust and make it fit your sound. In any case, we finally have access to a tuner that works well for percussion instruments and only messes with the attack while leaving the transients alone.
Well that’s it for the honorable mentions. Hopefully I’ve covered at least one or two of the plugins that you use. If I missed a great plugin that you think we should all use more, feel free to leave a comment below or on Facebook and let us know about it. If there are any questions I can answer for you please email me at daniel@studiostagelive.com and I’ll respond as soon as I’m able. As always, if you’ve enjoyed reading this series feel free to subscribe at this link and you’ll get an email whenever new content is posted here at Studio.Stage.Live.com. See you guys and gals on the flipside!