Waves Soundgrid: Top 5 – Part 4

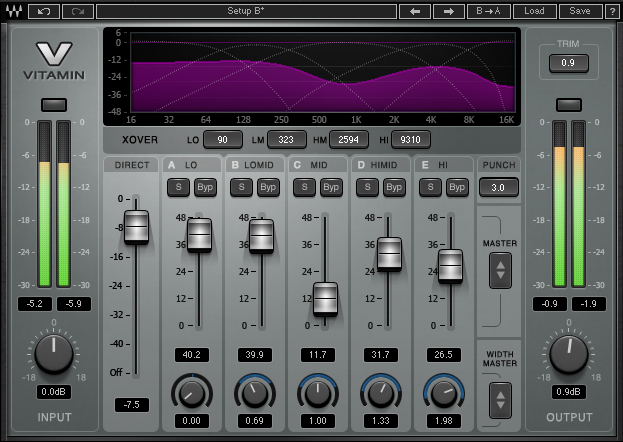
Welcome back to week 4 of our 5 week series on my top 5 Waves plugins. Over the last 3 weeks we have been stepping through my mind and the plugins I’d pick if I could only have a few plugins. I started the series at #5 with the CLA-76, continued at #4 with the Vitamin Sonic Enhancer, and discussed last week the Waves C6 as my #3. In many ways this is my dream team and for that reason I’m really excited about this week’s plugin which I’ve slotted in at #2, ever so narrowly edging out the C6. What makes this difficult is that I probably use the C6 more but the feature set in this plugin makes it much more valuable to me as I inch towards my most favorite and most valuable plugin. My #2 Waves plugin the Schepps Omni Channel. 

Designed by Andrew Schepps this plugin was tailored to his workflow to bring us the tools that he uses in his everyday work. Because once again Waves does such a good job summing up what this plugin can do I’ll reference their publication to list the features available in the plugin.

  • Flexible channel strip plugin based on Andrew’s tried and tested processing combinations
  • Pre, compression, EQ and gating modules, each with diverse options for sonic flexibility
  • DS² module: so much more than a de-esser, with 2 full-range bands and 4 filter types
  • Insert slot: Load an extra Waves plugin anywhere in the channel strip
  • Drag and drop any module anywhere in the channel strip
  • Internal MS/Duo/Stereo routing per module
  • Stereo component provides full discrete control over each channel
  • Flexible shaping of internal or external sidechain input
  • Zero latency
  • ‘Focus’ presets designed by Andrew to focus you on what’s important
  • Artist presets by Tony Visconti, Billy Bush, Ken ‘Pooch’ Van Druten & more

What all of that means is that this plugin is incredibly flexible. You can literally drag and drop the modules to whatever order you like, disable the ones you don’t want to use, and even insert a plugin within the plugin (yep, inception for audio!). 

The ability to insert a plugin within the chain you’ve created dramatically increases the value of this plugin in my mind. For instance, my old acoustic chain used to be 4-5 plugins deep as I dropped stuff in (disable parts of plugins I wasn’t using) to do all the same things as this one plugin. Now, with the Omni-Channel, I only have one plugin. I don’t need that side-chained c6 to help dip the acoustic’s vocal range based on the lead vocalist because there is a built in side-chainable de-esser. I don’t need the Hcomp anymore because the built-in compressor has a mix knob which is why I use the hcomp on guitars in general. I can insert my harmonizer of choice (in the case of the acoustic I usually use parallel particles) right where I want it which is right after compression. There is even some great pre-amp modelling and EQ built-in that I’ve been able to incorporate. I love this plugin on acoustic sources like strings, pianos, acoustic guitars, etc because of the way it sounds when you use the modelling available. 

Another great feature of this plugin is the zero latency. Putting aside any latency added from the plugin you add into the plugin, the plugin is made to drop in on everything, shut off what you don’t need, and cruising right along. The plugin itself is incredibly resource light which allows for lots of instances and lots of power without lots of DSP. The low resource requirement and zero latency cost are what really set this plugin apart to me from something like the CLA mixhub. Now the workflow that the mixhub is based around is not possible with the omni-channel so if that’s important to you that you’ll only find that in the mixhub. What’s most important to me is ultimate flexibility and I don’t know of any other plugin of this magnitude that allows you to insert another plugin inside of its’ internal signal chain. 

Right along with that are the preset options. Once again, the presets aren’t perfect but when I got the plugin I was looking for some ideas on how I can better utilize it as a tool in my toolbox and the presets really helped me see and think about how this plugin can be used for good in my mix. I’d encourage you to really spend some time with an acoustic source, with no other plugins but the omni-channel, and start tweaking. While this plugin may not sound any better than your other chains, it sounds just as good at a fraction of the resource/latency cost because you are doing the work of many plugins all inside one plugin. 

I know the omni-channel may not be everyone’s second favorite plugin but the more I use it, the more I want to keep using it. It has also solved a lot of unique issues I’ve come across in terms of getting the desired routing. If you have any questions about how I use it, email me at daniel@studiostagelive.com and I’ll get back to you as soon as I can. Next week I’ll be wrapping up the series talking about my favorite and most used plugin. It may not be what you think so be sure to tune in and see. If you want to be reminded about the post, subscribe at this link, and you’ll get an email letting you know when the post is live. See you on the flipside and happy mixing!

Waves Soundgrid: Top 5 – Part 3

Here we are on week 3 of our Waves Top 5 series. These last two weeks have showcased some great plugins. As we get closer to my favorite plugin, the one I use the most, we are going to hear about some great stuff. Number 5, two weeks ago, showcased the CLA-76 compressor that I love because it is so fast and transparent. Last week, I talked about the Vitamin Sonic Enhancer and chose it over Scheps Parallel Particles because of its ability to get very granular with how it adds in harmonics. That leaves us today with talking about my number 3 favorite plugin, the C6 Multiband Compressor. There are a lot of options in the multiband compressor/EQ market these days. In fact many DAWs and consoles alike have one built-in. But for some reason, for me, the C6 has just risen to the top. 

Mechanically the UI for this plugin is quite refined. It hasn’t changed much from what I understand since it came out but the way it operates, what it shows you, makes life pretty easy. With the C6 you get 4 bands of tweaking to mess with and two floaters which can overlap with any other band and be anywhere you want them to be (this is one area where the F6 is different, with that all the bands are floating). You have all the typical compression options for each band, the ability to disable them if you want, and a favorite feature of mine is the ability to solo an individual band so you can really hear what you are doing in a specific frequency range. Be sure to watch the release settings on the left, if it isn’t on manual, your release settings won’t have any effect on the operation of the plugin. The orange line is what you’re doing to the sound. Obviously flat would be what comes in goes out but as you adjust gain and such you’ll see the line adjust a bit. One thing that this plugin does that you won’t see in many of these types of plugins (with the exception of the C4) is show  you the dynamic range with the purple shading. This is the biggest reason why I prefer this over the F6. Yes you can always just read the knobs but if I’m using waves as a tool, the way C6 displays is preferable. Lastly there is an input and output gain adjustment if needed. 

A great but not advertised feature of the C6 is the large preset library. It’s been around for so long that many well known artists have been able to get there presets installed in the plugin. While I don’t recommend setting it and forgetting it with presets they can often provide a great starting point or at least some inspiration for what you could do with the plugin itself. I will often find myself dropping in a C6 on just about anything to see if it can help. Occasionally I’ll experiment a bit, play with the preset options, and land on a great setup for that input on that day. 

My biggest use of this plugin is on vocals. I start with a template that I created that works well with my setup and PA tune and tweak from there. Often times we deal with vocalists who’s sound changes as their voice warms up or the note they are singing changes. That issue is easily fixed with the C6. In my room, vocals (spoken or singers) sound great while they talk with just a little EQ but when they sing need a bit more 600hz carved out dynamically or I’ll dynamically trim out the top end of a BGV so I can push them in the mix but they wont overtake the lead vocal. I can’t solve that problem with EQ or system tuning because it only happens when they are singing out or singing specific notes. Here comes the C6. I use it as well on bass guitars that often when playing open strings or lower notes hit the “hot” notes for the acoustical space of the room. It’s easy to grab one of the floating bands and reign in those troublesome frequencies and really start to normalize the bass guitar top to bottom. I know of and have personally used the C6 to do some dynamic mastering on the master buss of a recording. This is definitely a plugin I’d try anywhere!

So how do you use the C6? Have you found any of the presets particularly helpful? Find a unique use for this plugin? Let us know in the comments below! Next week we’ll move on to my second favorite plugin which might be a bit of a surprise to some as there are definitely more popular options out there. Make sure you don’t miss it (subscribe at this link)! As always if you have any questions, hit us up at engineers@studiostagelive.com. See you next week!

Waves Soundgrid: Top 5 – Part 2

Welcome back to week 2 of our Waves series talking about my top 5 plugins. As I mentioned last night, I see this question being asked all the time, sometimes of me, and so I thought I’d do a series talking about my top 5 plugins, how to operate them, and how I use them. Last week (here is a link in case you missed it) I talked about the CLA-76. While I use it a lot, I can often get pretty close with other options in the arsenal if I can’t use it. This week, I’m talking about harmonizers. It was really a toss up between two plugins with an ever-so-slight winner. This tie is made of Vitamin Sonic Enhancer and Scheps Parallel Particles. Both sound great, are easy to use, and are used frequently if I get the chance. Vitamin allows for granular control over what is added while Parallel Particles allows for a more cohesive experience because of it’s design. I give the edge here to Vitamin however. Because you can really tweak exactly what you want to add that, in my mind, gives it the edge because in theory you can create what you hear in Scheps with Vitamin. But, I use Scheps a lot where I used to use vitamin because I can get what I want quicker and easier while vitamin takes a bit to get really dialed. In many ways, Scheps is the one-knob plugin for harmonizers. However, for things like toms where I need to really control and tune what is happening Vitamin is the perfect fit and if I had to pick just one, I’d land with the Vitamin Sonic Enhancer.

Waves describes Vitamin like this, “Waves Vitamin is a multiband harmonic enhancer and tone-shaping plugin that can make any track sound powerful and full of spark by mixing an enriched version with the original signal.” Sort of like the C6 in operation, you set the frequency band in which each channel of the plugin works, set stereo width, and then attenuate the direct sound (what equates to a wet/dry knob) and that’s it. It also has a convenient punch setting that works a lot like the punch knob in Hcomp which can create some fun adjustments. Often times I’ll get the plugin reacting like I want it to with the 5 channels and then grab the master and adjust to taste. If you struggle to get moving or don’t know where to start the plugin is loaded with presets that can get you pretty far down the road. 

Probably a favorite and yet underused feature of this plugin is the solo option. When you click on it, you hear what is happening in the band only. This can really help you identify what needs to go up or down as you can solo one or a few of them to help identify where things are going wrong if you are having issues. Another great feature is the direct fader. Think of it like this, there are two paths for the audio through the plugin one is unprocessed, one is processed. You can’t attenuate the wet path but you can mix in or out, the direct path which can help you really get the exact amount of harmonics added. This feature differentiates this plugin from most other harmonics plugins because, much like old school FX units, you are basically getting what equates to a wet/dry setup. 

I could find myself using it on toms when I need a really big tom sound for big concerts or just a bigger/wider sound. I also use it regularly on electric guitar inputs to accentuate their role in the song (for lead guitars I use it to enhance the presence and top end, for rhythm guitars vitamin helps me get a big deep phat sound). My acoustic guitar chain usually has a parallel particles inserted in the middle of the omni-channel but I occasionally need to swap out for vitamin if I’m having a tough time locking it in. I love to use it on synths and electric pianos as well to help things just pop. 
So that’s number 4, the Vitamin Sonic Enhancer. Do you guys use it alot? If so, what do you use it with? Any tricks I didn’t mention? Let me know in the comments below! Next we are on to dig into my top 3 plugins starting with a plugin that probably everyone knows about. If you don’t want to miss out be sure to subscribe at this link. Lastly, if you have any questions, email us at engineers@studiostagelive.com and we’ll get back to you as soon as we can. See you all on the flipside!