Welcome to week 4 of our “Making a Broadcast Mix” series. If you’ve missed the first 3 weeks you can find them at these links (Week 1 – Recording, Week 2 – Ingest, Week 3 – Processing). This week we are going to be work on developing that first initial mix. The starting point you’ll use for each song in the set. We will also be touching on automation within your DAW. This is also when those navigation markers really start to come in handy as well. But before we dig in, during the Ingest week, 2 weeks ago, I talked about two schools of thought about the dead space in the recordings. Some prefer to chop the audio clips up while others (like me) prefer to automate a bit more to really clean up the noise floor. Either way, I like to have whichever method I do done before I start mixing so that I don’t have to stop and get those more mundane tasks out of the way.
At this point, you’ve gotten all your clips locked in, you have the video file imported so you can keep an eye on what’s going on organically in the room, you’ve dialed in the dynamics and FX that you’re going to use and it’s finally time to get down to the brass tax. Typically I have a bit of a mix going as I dial in the dynamics of everything but this is where I really turn my ears on and listen through each song and really dial things in. If possible, I love to do this right after a significant break so that ear fatigue isn’t playing a role. The biggest thing you can do here is to use your ears. That sounds superficial but it’s really key. You are literally staring at a computer screen. It’s really easy to fall into the meter watching trap and not really listen and critique your mix. I love to just shut my eyes and sit back in my chair and start seeing what of the inputs I know are there I can hear and how they are sitting. Whatever you need to do, really do it. Take your time. It’s easy to rush through this phase so buck the trend and slow down.
This is also a great time to talk about mix relationships. There are just some things that need to fall in place together. For instance, the kick and snare need to both blend together and have an equal attack. The bass guitar needs to either be ducked for the kick hits or leave room down in that frequency range so that both can be heard clearly. I love dialing in the guitars as well. Electric guitars, especially if there is more than one, need to both be clear and understood but not stomp on vocals. Same for acoustic guitars as well as their relationship to the piano. Pianos become the glue to your mix. They don’t need to be super present but if they aren’t there, something feels missing (that’s a great tip to remember: if something feels missing in your mix, bring up the piano and see if that solves it). The blend in the vocals is also something that is incredibly important because if it’s off, it’s really noticeable. The philosophy for how they should be mixed is often a mixed bag so make a judgement call but the key here is to make sure that if you can see it on the broadcast video, you need to hear it. That is why it is so important to mix along with the video that you’re working with.
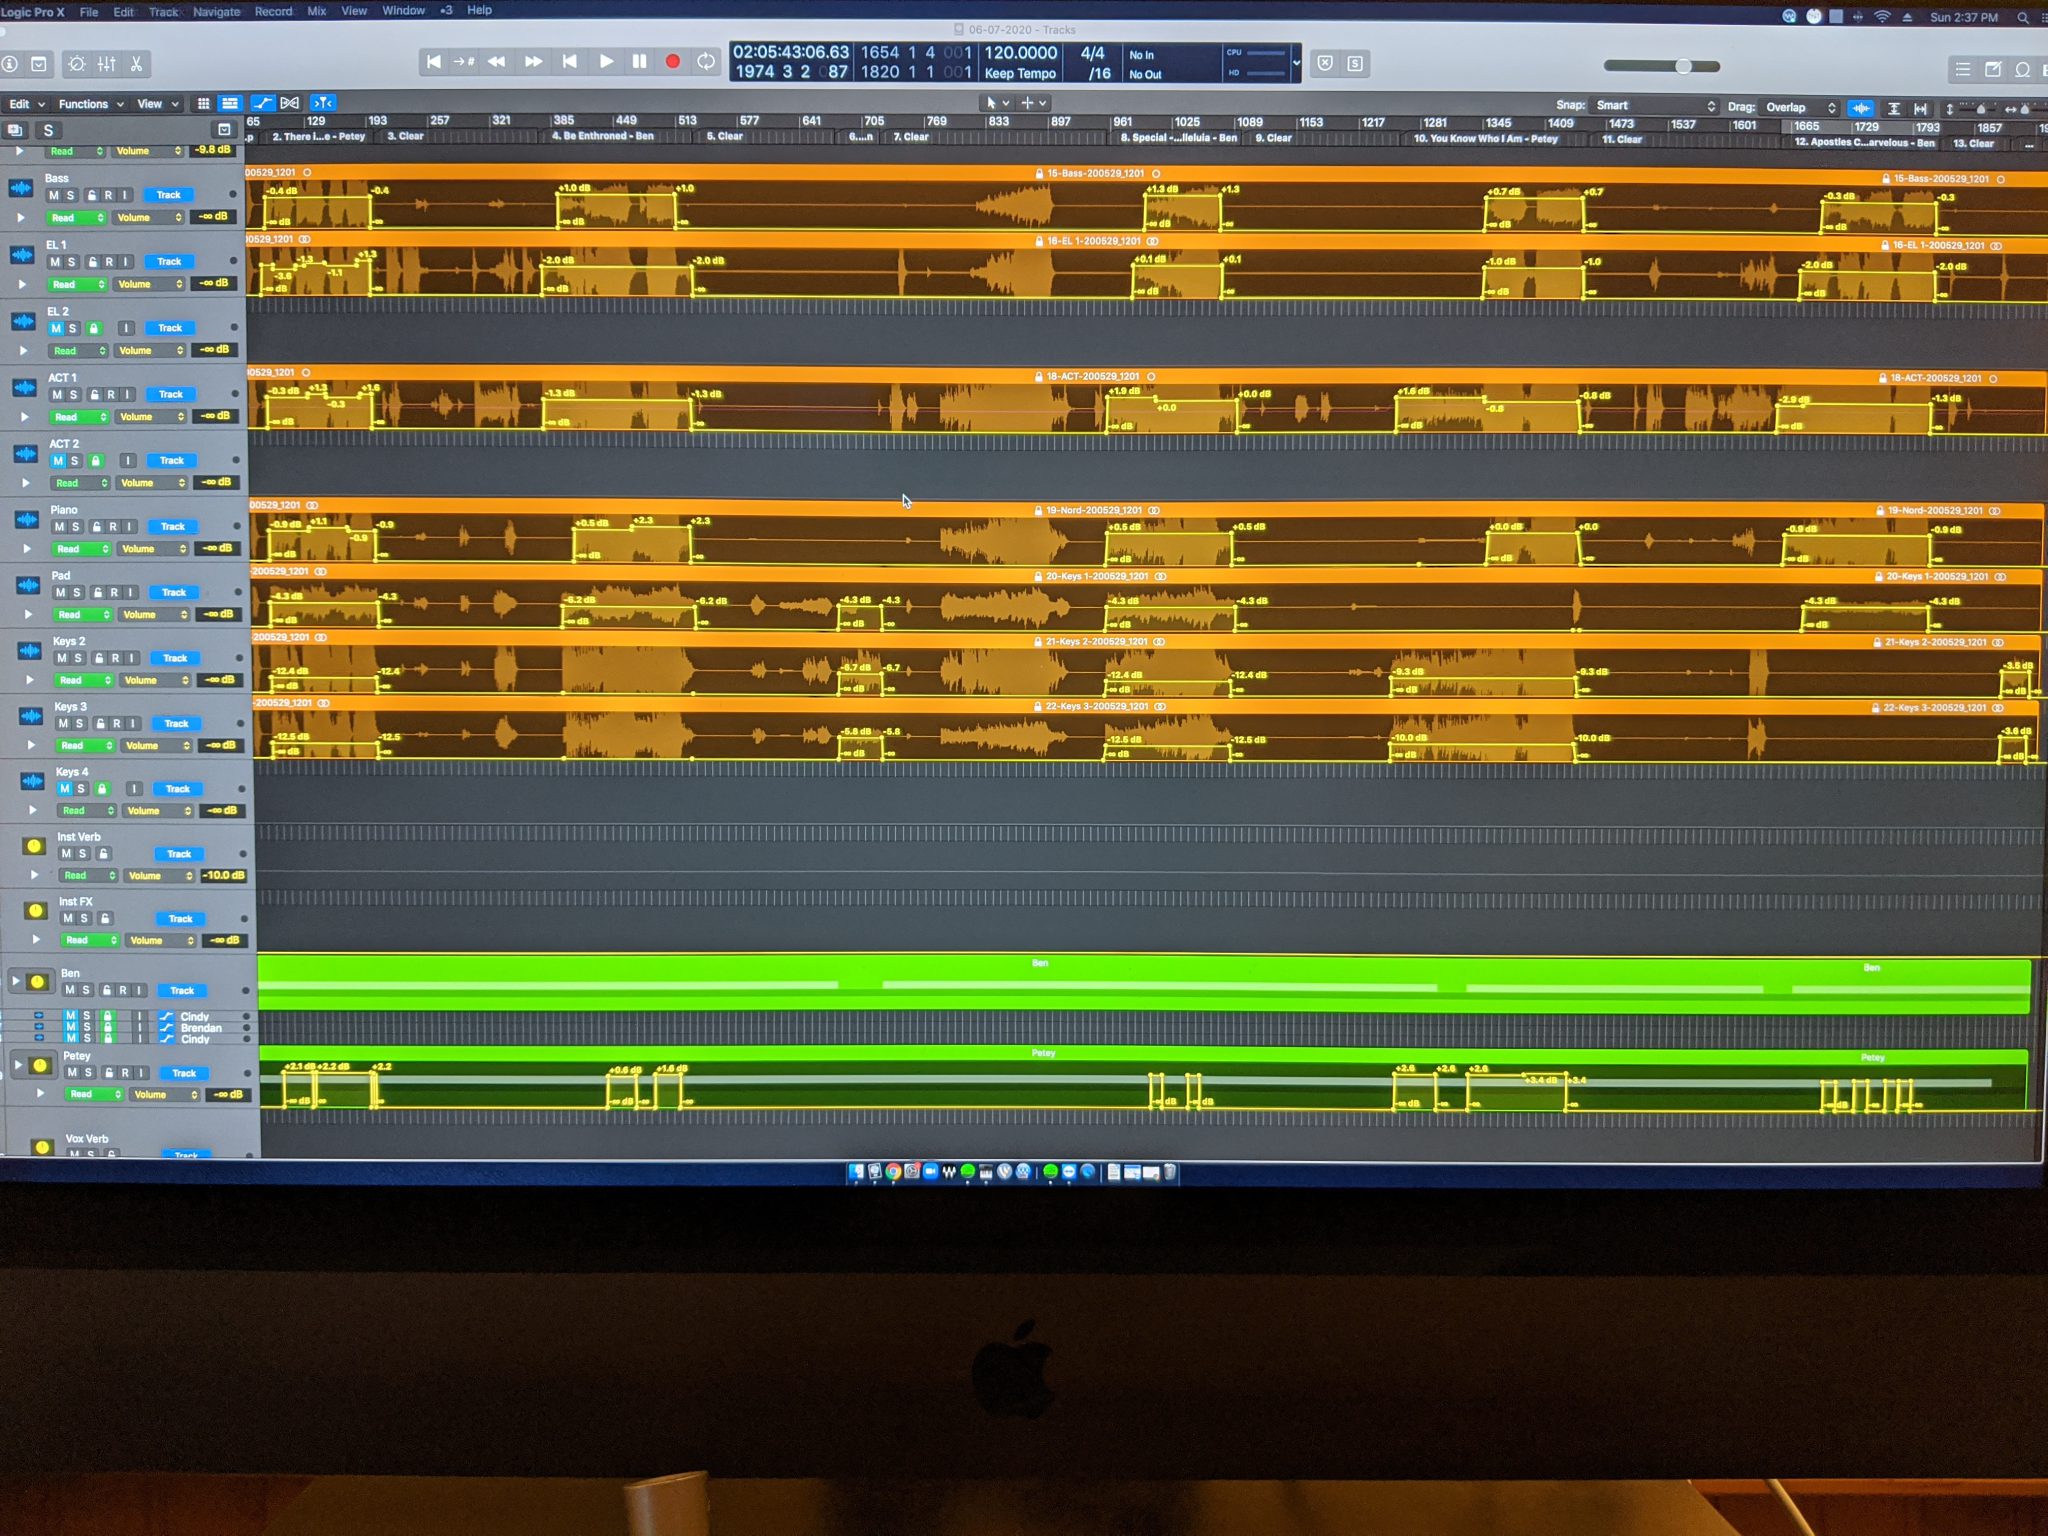
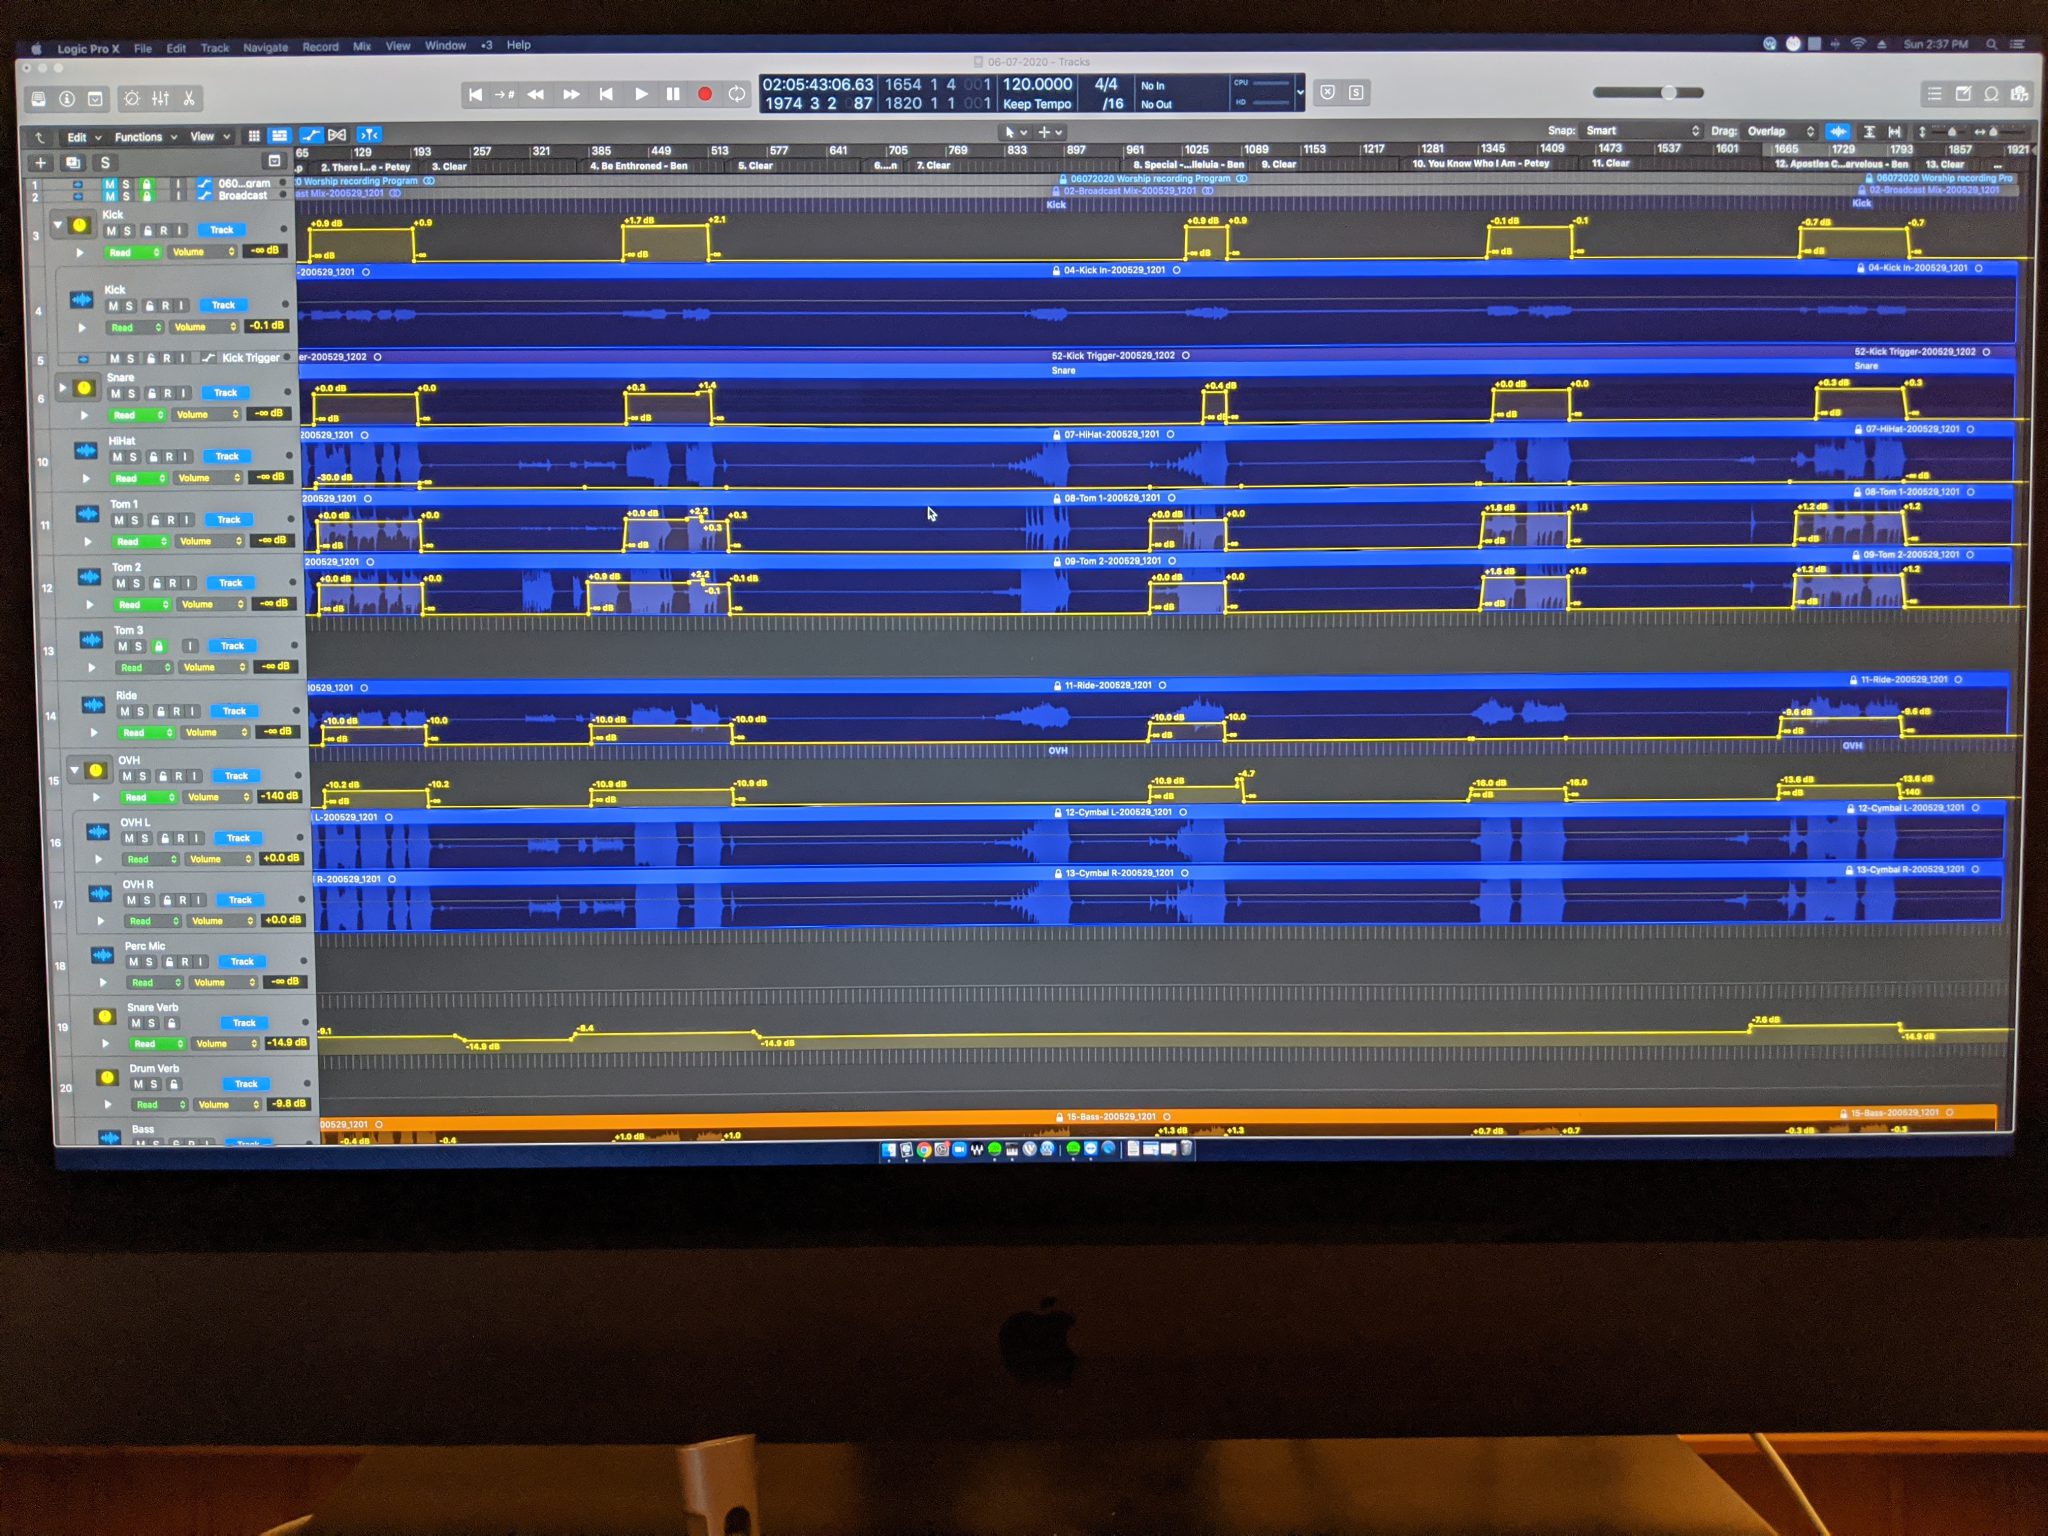
After you’ve got that basic mix, this is where you dig into the weeds and start automating. Up until now I usually use my control surface and faders to mix so that I can respond a bit more organically but after I’ve got that initial mix and I’ve drawn in some simple automation I usually switch to the mouse and keyboard that I can easily make broader changes that may not be in real time with the mix I’m listening to. How much you automate your mix is completely up to you but just like at FOH for a live production, the more active you are, the more you respond to what the music is doing, the better things will sound (generally). I’ve included a couple pictures of the automation page from a recent mix so you can get an idea of what I do generally. You’ll see that instead of cutting the clips up I just automate faders. This helps eliminate the noise floor of unused channels but also allows for easy sync of additional tracks if they need to be dropped in. Please, don’t be afraid to reach out to me either in the comments below or on Facebook with any questions you have. I’d love to follow up with you and hopefully learn something from how you do things. If you’re looking for things to pay attention to, listen for the instrumental solos or when those guitars are playing that songs lick, ride those verb returns (especially at the beginning and ends of songs), really listen in on the BGVs, I find that I’m riding them a lot more than I am the lead singers for that song so they can be heard but not overtake the leader. Lastly check in on those mix relationships that apply to your mix during each song/element. Don’t be afraid to get started on this step and take a break for awhile or overnight if you feel like you’re stuck or things just aren’t locking in like they usually do.
That wraps it up for this week. Next week I’ll be digging into my abbreviated mastering process and standards and the format that I export with that meshes with our video team effectively. There has been a fair amount of learning while doing that has happened but I’ve landed on a consistent process. If you have any questions about this week’s or any previous post, just drop those below or on Facebook. Make sure you subscribe so you don’t miss out on any posts (to subscribe, follow this link). I hope you are all finding your stride and keeping busy as we are continuing through this crazy time in history. See you all on the flipside!
Man
Great Article!
Love to get your feed back on what I do because I know you listen.
http://www.willingdon.org
Thanks man!